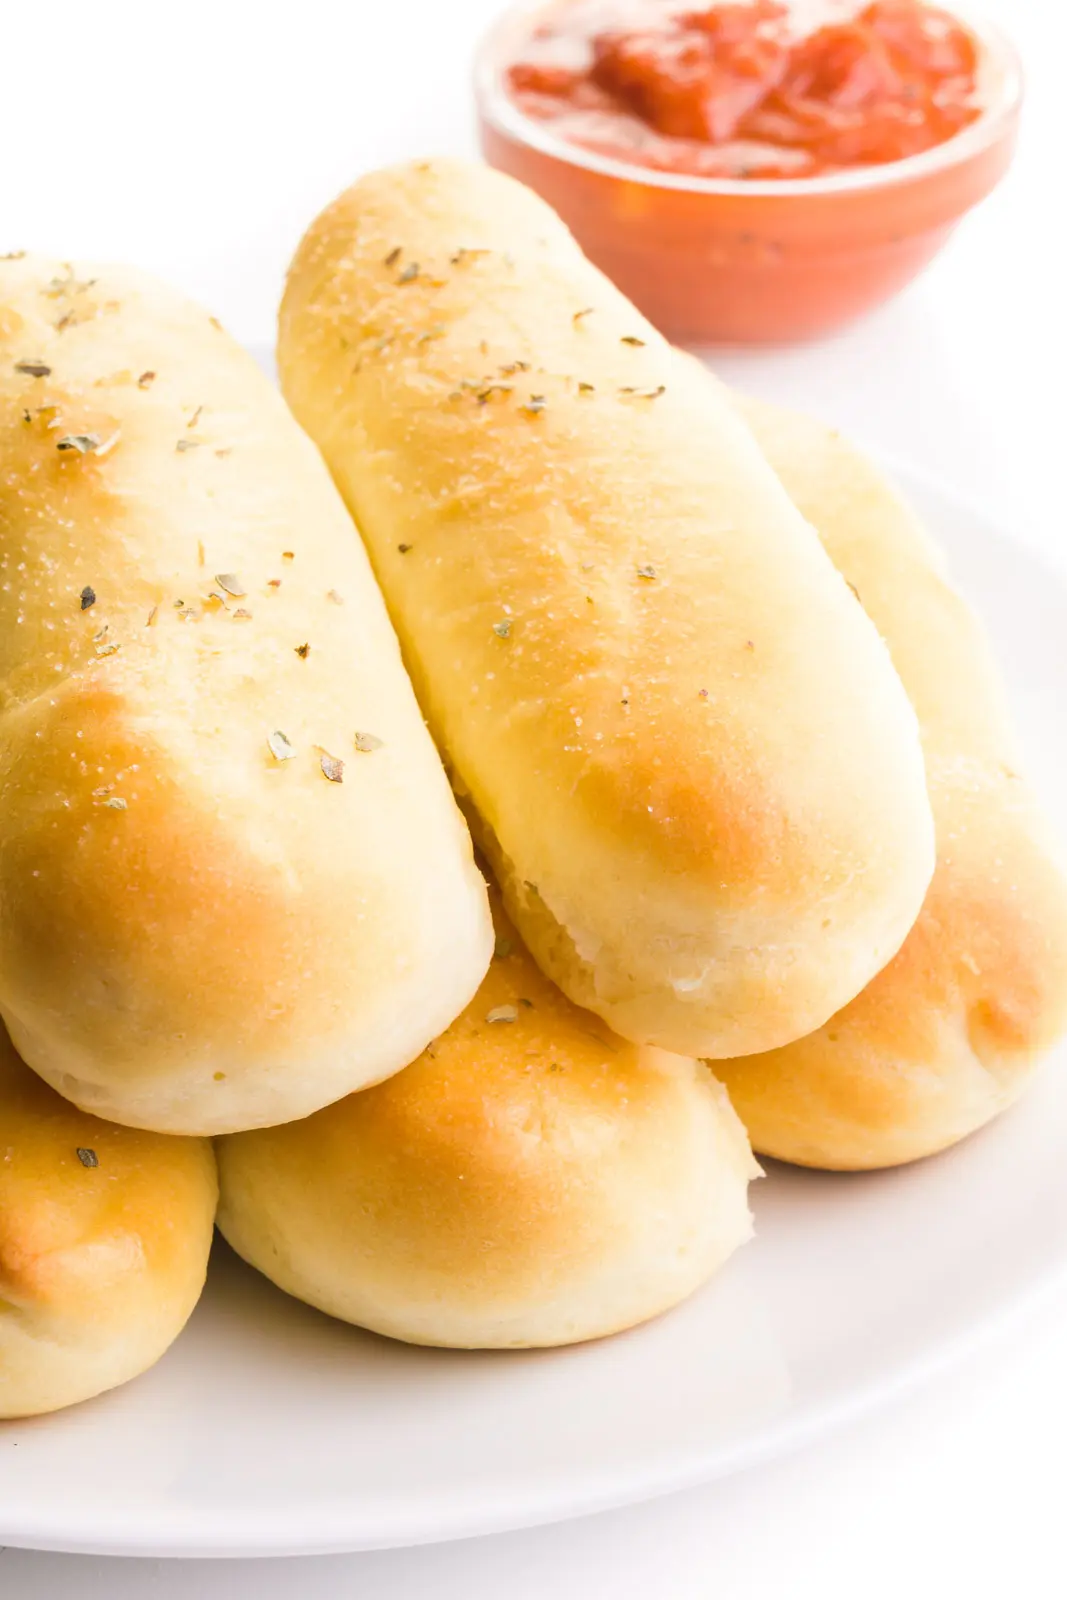
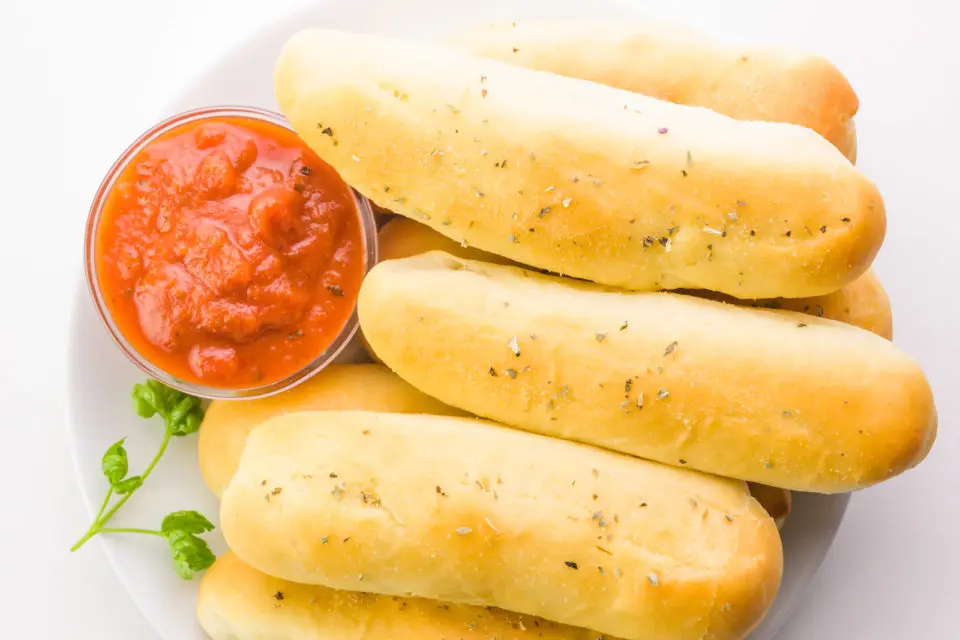
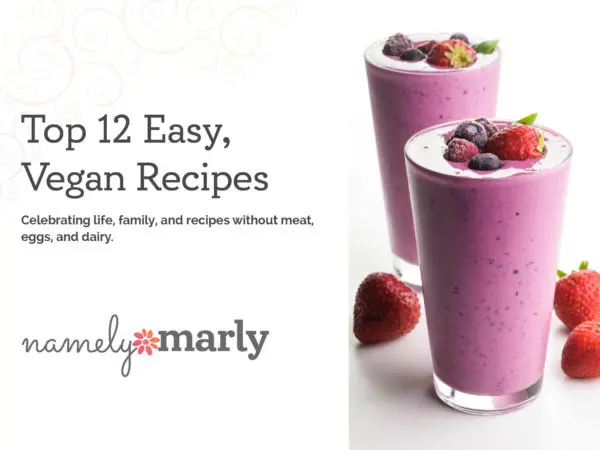
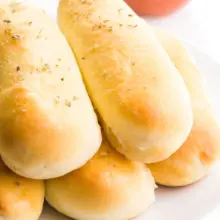
Vegan Breadsticks
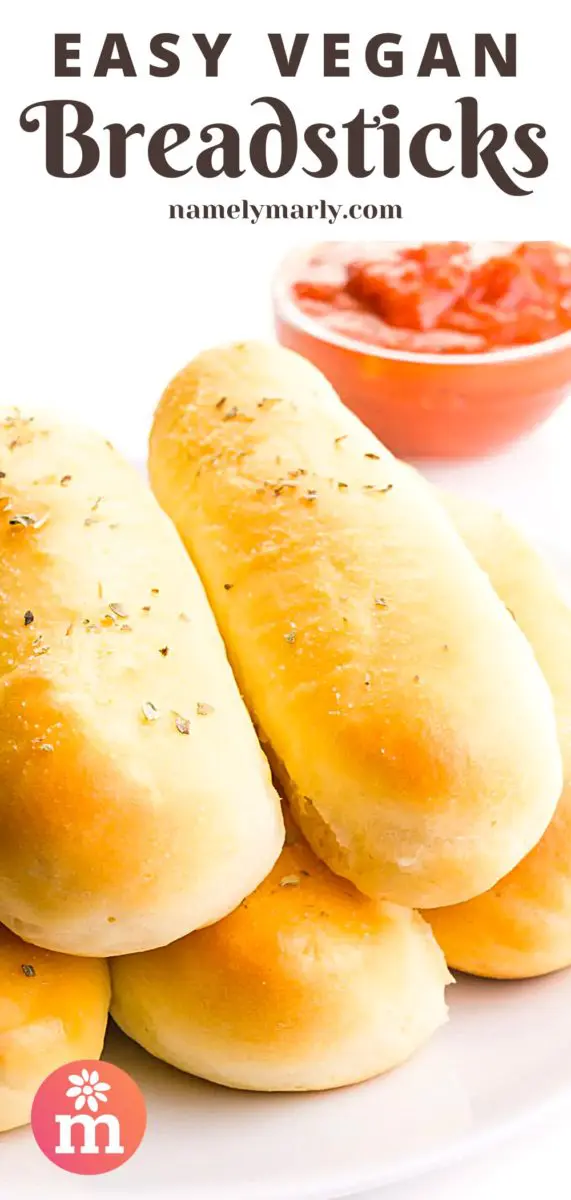

Better than Olive Garden! For the best Vegan Breadsticks experience, make this recipe to serve alongside your favorite plant-based dinners, such as Vegan Baked Ziti. It’s so easy because this breadsticks recipe is made with only 5 ingredients, plus water. But don’t skimp on the toppings, that’s what makes these garlic breadsticks beyond fantastic!
If you’re in a hurry and want to serve an Italian dish like baked vegan spaghetti pie with a side of bread, then go with this vegan garlic bread because it’s fast, easy, and fantastic.
But If you’ve got a little more time, what I love about these vegan breadsticks is just how soft and tender they are. Besides, you can freeze them and have them on reserve for those moments when you need the best bread ever!
There’s nothing like having vegan frozen breadsticks ready to be reheated and served!
What Makes This Recipe Shine?
- Bread flour has a higher protein content, resulting in more tender breadsticks
- Adding melted butter to the dough is another trick for creating pillowy soft bread
- Coating freshly-baked breadsticks with a mixture of melted butter and seasoning makes them irresistibly delicious!
Key Ingredients
You can find the full printable recipe, including ingredient quantities, below. But first, here are some explanations of ingredients and steps to help you make this recipe perfect every time.
Here are the ingredients you’ll need for this recipe, including substitution ideas:
- Yeast — You’ll need one packet of either instant or active dry yeast.
- Sugar — A little bit of granulated sugar is all you’ll need.
- Flour — I recommend using bread flour, but you can substitute all-purpose flour.
- Salt
- Vegan Butter — We’ll be adding some vegan dairy-free butter or you can substitute olive oil.
- Garlic powder
- Oregano — You can use either fresh or dried oregano.
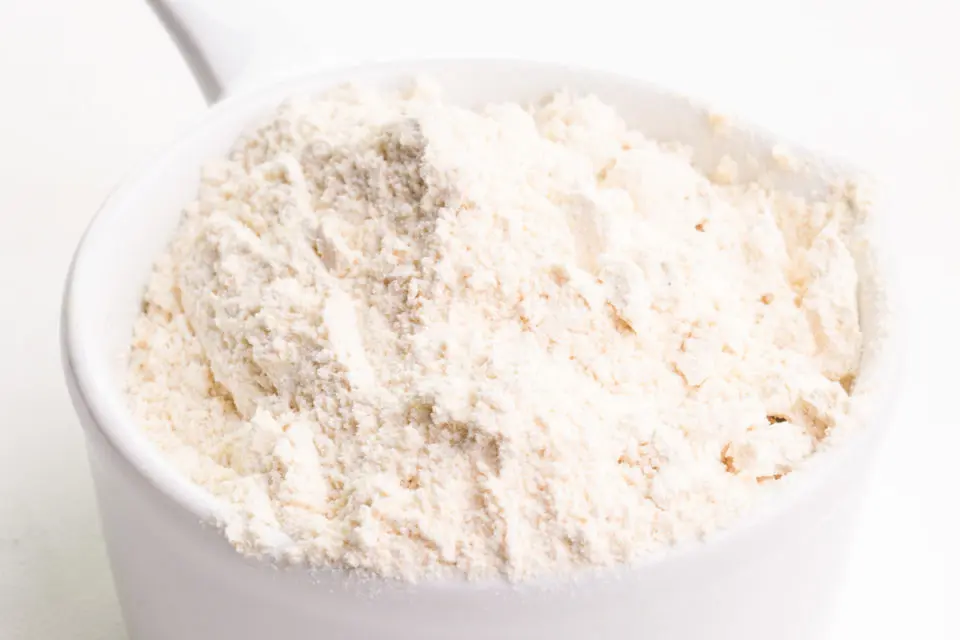
What is Bread Flour?
Bread flour is similar to all-purpose flour, but it is milled from a different type of wheat. The hard spring wheat berries has a higher protein content, which makes the dough stronger. This yields a higher rise in the dough, producing softer buns and breads. You can usually find bread flour in the baking section next to other flours. You can substitute all-purpose flour. If you have some vital wheat gluten, adding 2 teaspoons of vital wheat gluten to all-purpose flour will increase the protein content.
How To Make Vegan Breadsticks
- Stir the yeast, warm water, sugar, butter, and salt in a mixing bowl.
- Stir in 2 cups flour and mix until combined.
- Add the remaining flour and knead with a dough hook for up to 5 to 7 minutes, until smooth and elastic.
- Set aside to rise until doubled in size, roughly an hour.
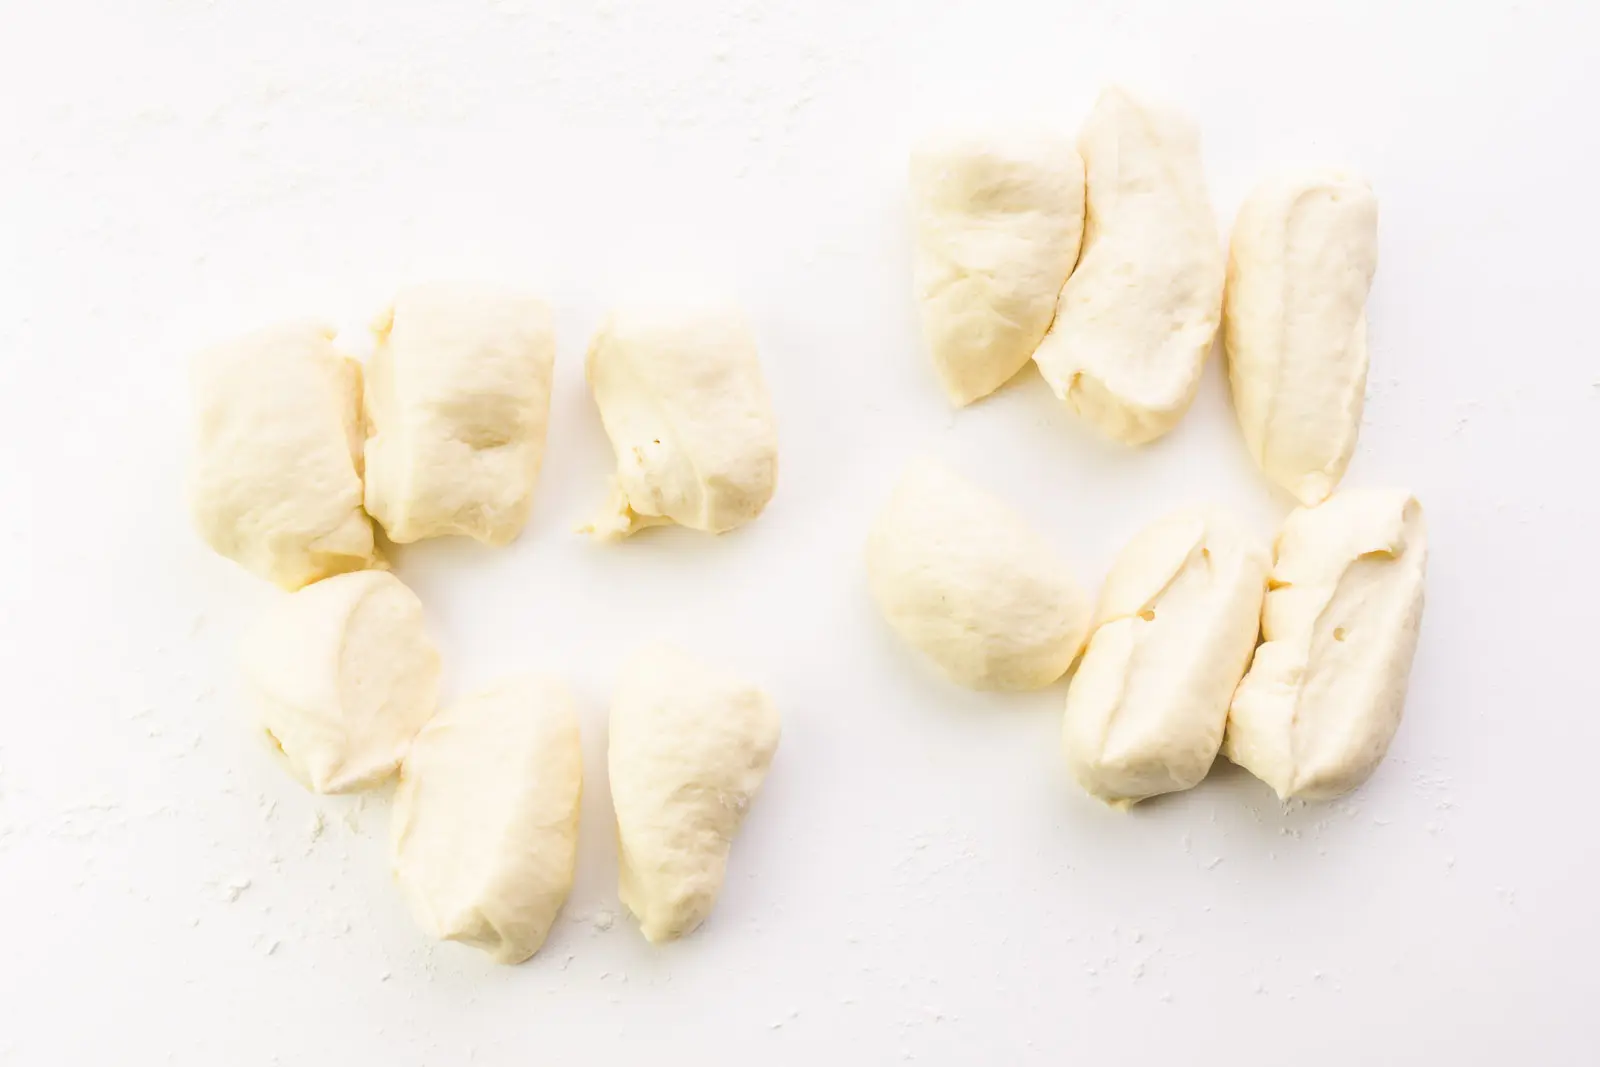
- Cut the dough into 12 equally-sized pieces.
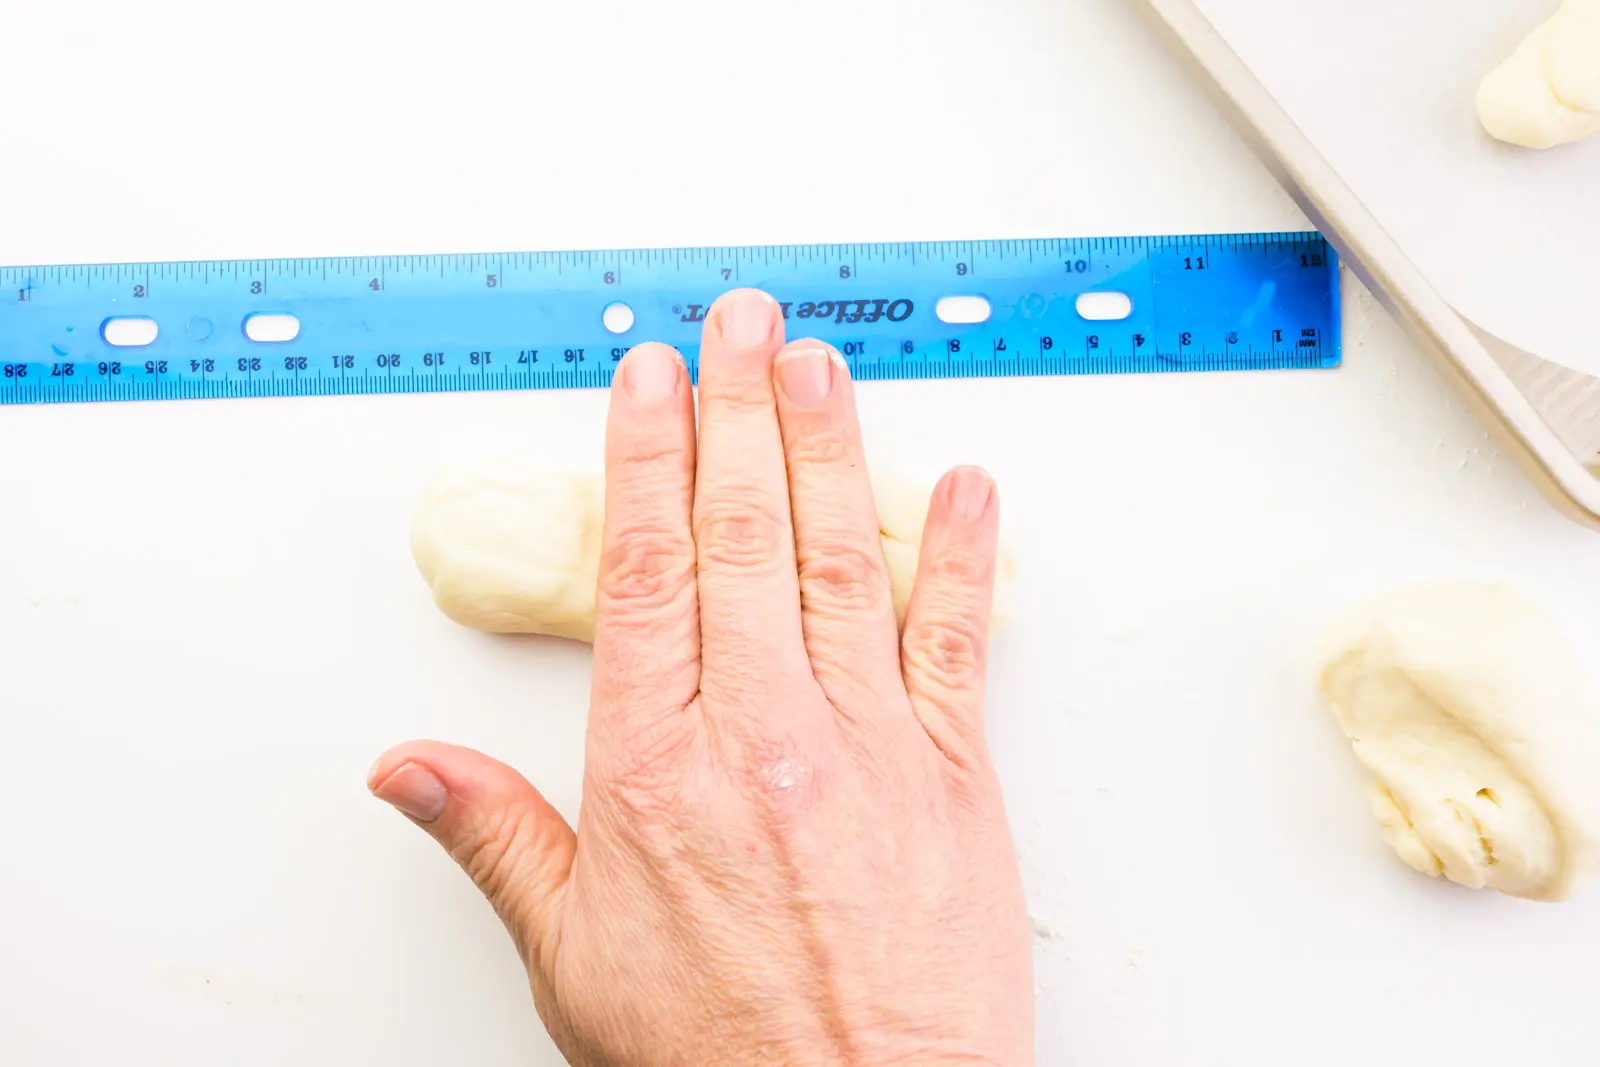
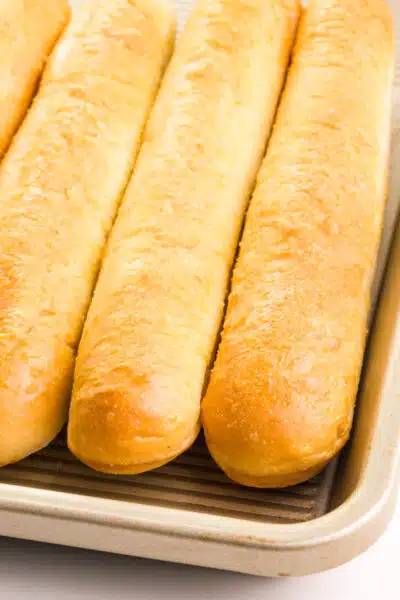
- Roll each piece into a 7-inch long log and place on a prepared baking sheet
- Cover the pan and set aside to rise for about 30 to 45 minutes.
- Bake breadsticks on the center rack for 12 to 14 minutes.
- Move the pan to the top rack to give the breadsticks a golden crust on top.
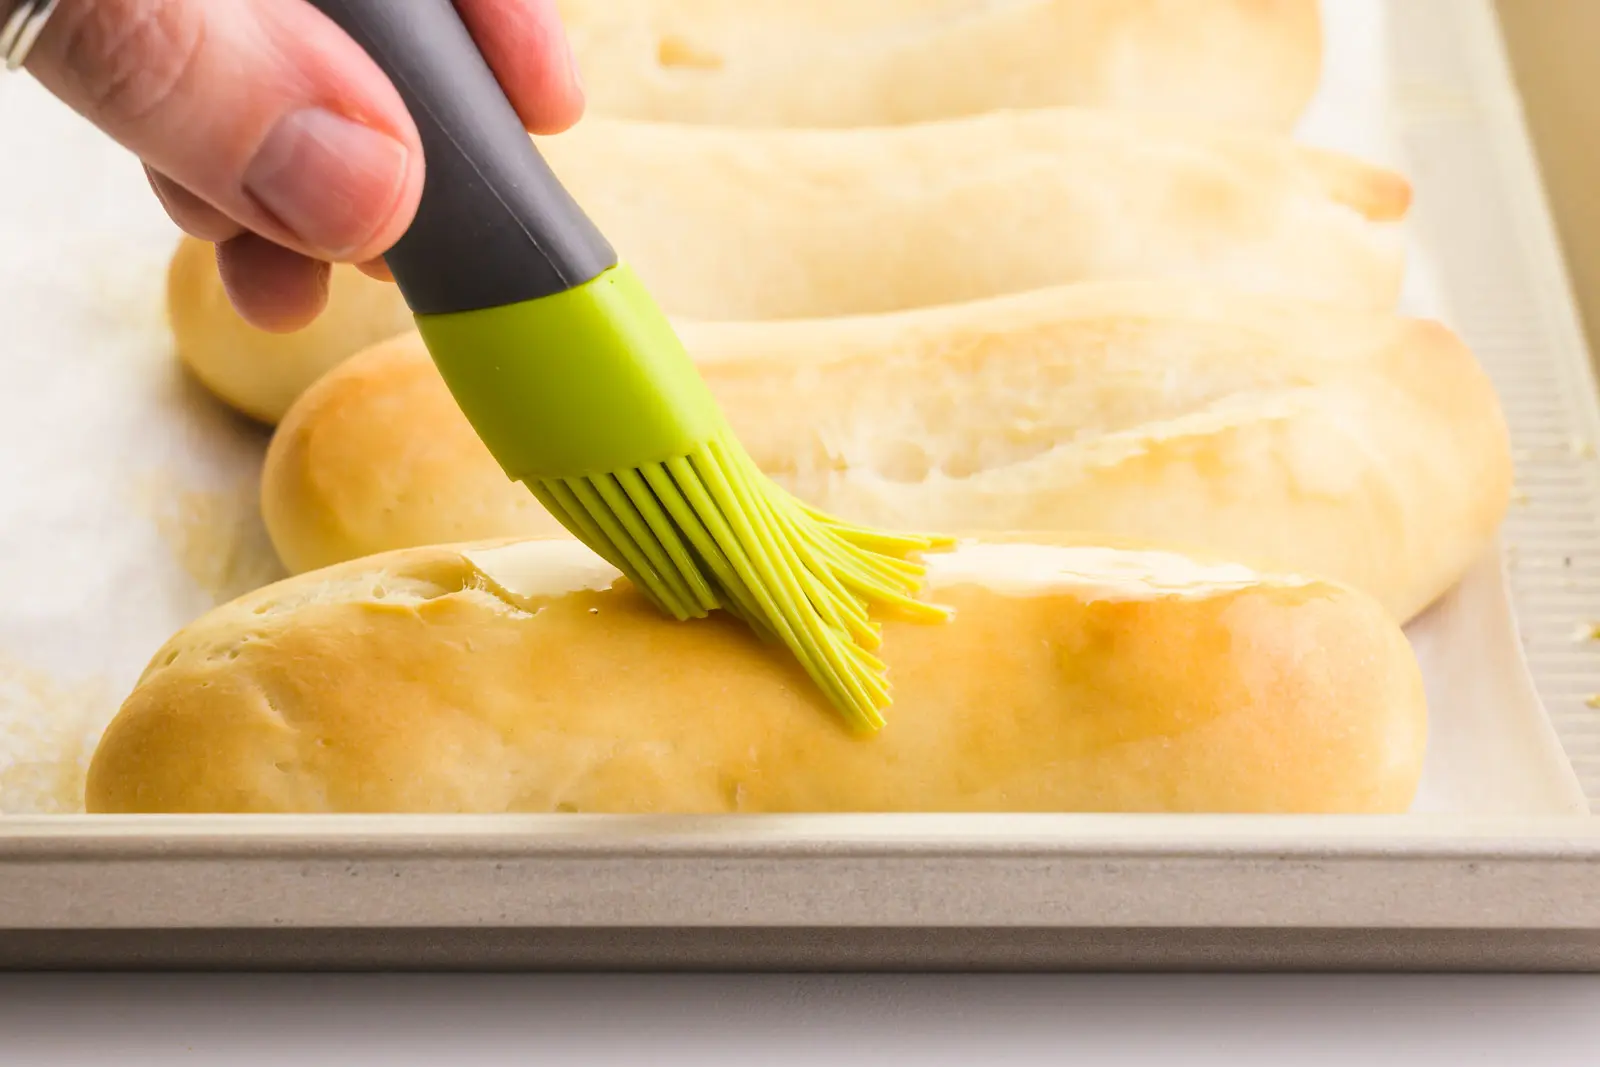
- Brush freshly-baked breadsticks with melted butter and sprinkle with the garlic salt.
Here are more detailed step-by-step instructions.
Step One: Proof the Yeast
- Place the water in a microwave-safe bowl and heat for 11 seconds. Insert your finger in the water, which should be about the same temperature as your finger.
- Add yeast and warm water to a mixing bowl (for a hand-held or stand mixer). Stir in the sugar, butter, and salt.
- Stir in 2 cups flour. Fit the mixer with the paddle attachment and blend until well combined.
Step Two: Make the Dough
- Change out the paddle attachment for the dough hook. Pour in the remaining flour and knead the dough for up to 5 to 7 minutes. The dough should become smooth and elastic, while still slightly sticky.
- Transfer the dough ball to an oiled bowl, cover with a damp kitchen towel, and set aside to rise until doubled in size, roughly an hour. See my tips below for recommendations on the best places to rise dough.
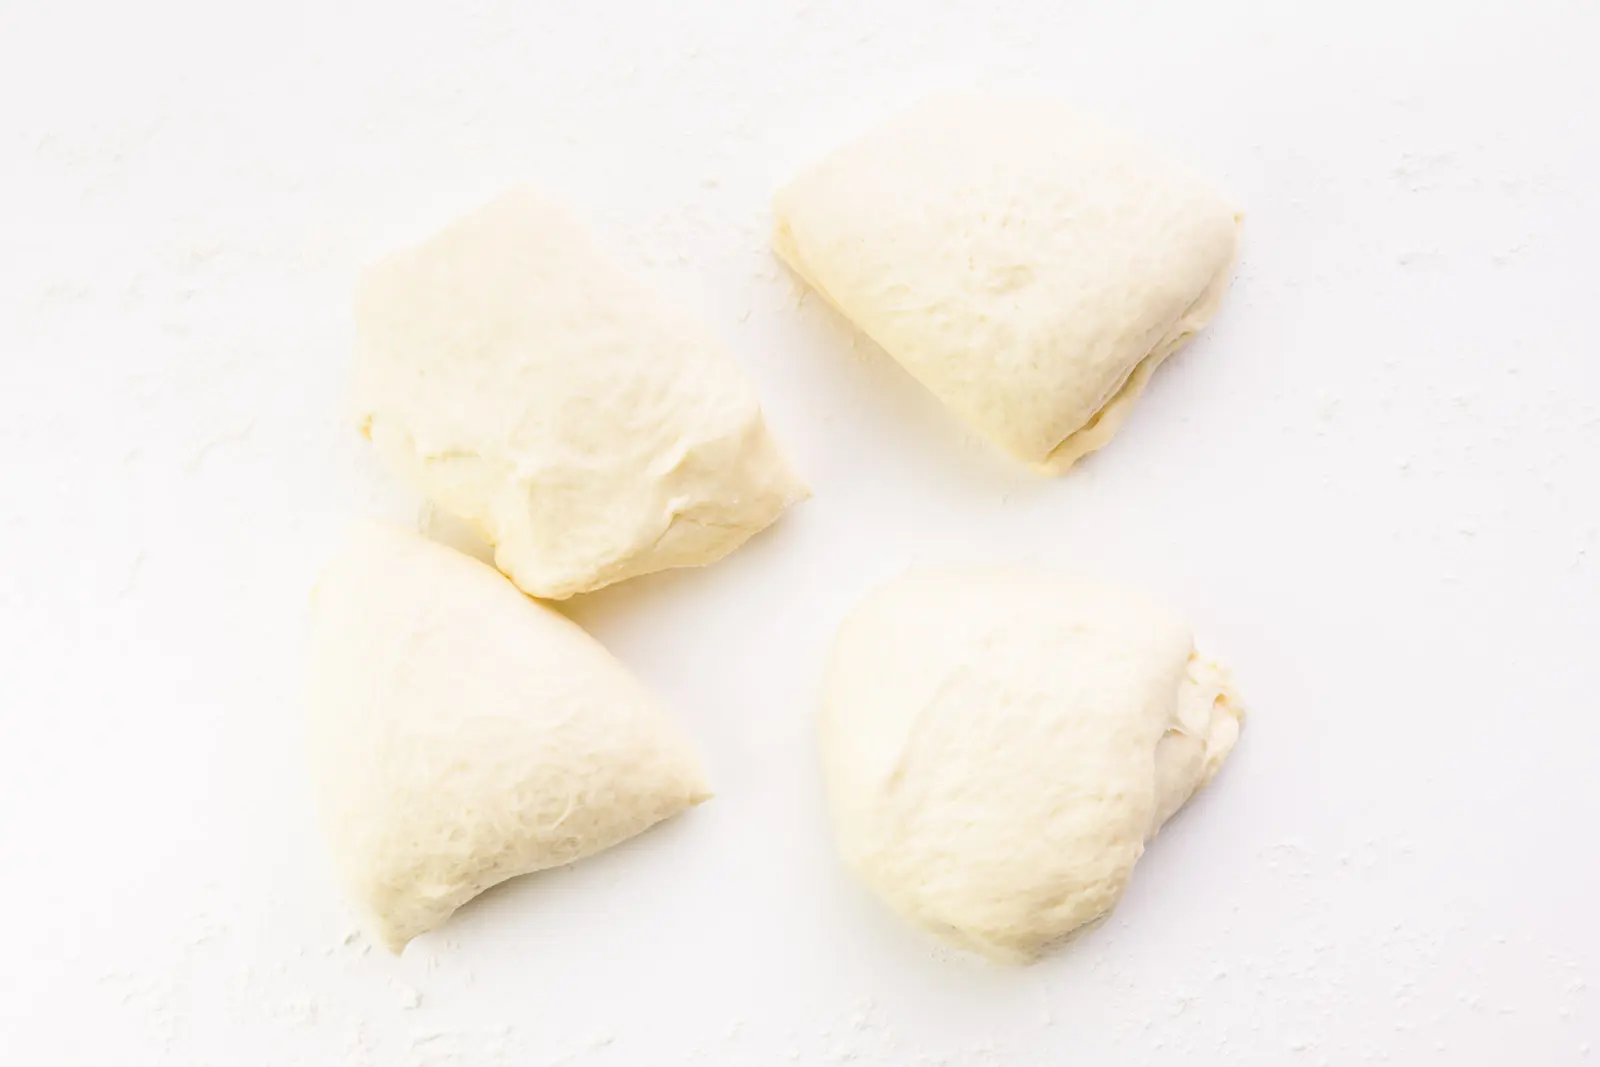
- Punch down the dough and transfer to a lightly floured cutting board.
- Cut the dough ball in half, then cut each half in half. You’re left with 4 pieces of dough.

- Cut these into thirds to make 12 equally-sized pieces of dough.
- Roll each piece into a 7-inch long log.
- Place these on the prepared baking sheets, leaving space between each of them.
- Cover the pan with a dampened kitchen towel or plastic wrap and set it aside to rise for about 30 to 45 minutes.
Step Three: Bake the Breadsticks
- Bake breadsticks on the center rack for 12 to 14 minutes.
- Move the pan to the top rack for the last few minutes of baking to give the breadsticks a golden crust on top.
- Stir together the salt, garlic powder, and oregano.
- When breadsticks are done, remove them from the oven and use a pastry brush to coat each of the hot breadsticks with melted butter.
- Sprinkle with the garlic salt. Serve warm.
- Store leftovers in an airtight container in the fridge for up to 7 days.
Storage Tips
Store leftovers in an airtight container in the fridge for up to 7 days. They can be frozen in freezer bags for up to 2 months. Reheat in the microwave or toaster oven.
Best Places to Rise Dough
For a warm place to let your dough rise:
- Oven Method — Turn the oven on its lowest temperature for about 5 minutes, then turn the oven off. Place the covered bowl of dough in the oven along with a pan of warm water.
- Microwave Method — Place a pyrex glass measuring cup full of 1 to 2 cups of water. Heat it on high for 2 minutes. This will create a warm, moist environment. Add the covered bowl of dough to the microwave, close the door, and let it sit for the allotted time.
Serving Suggestions
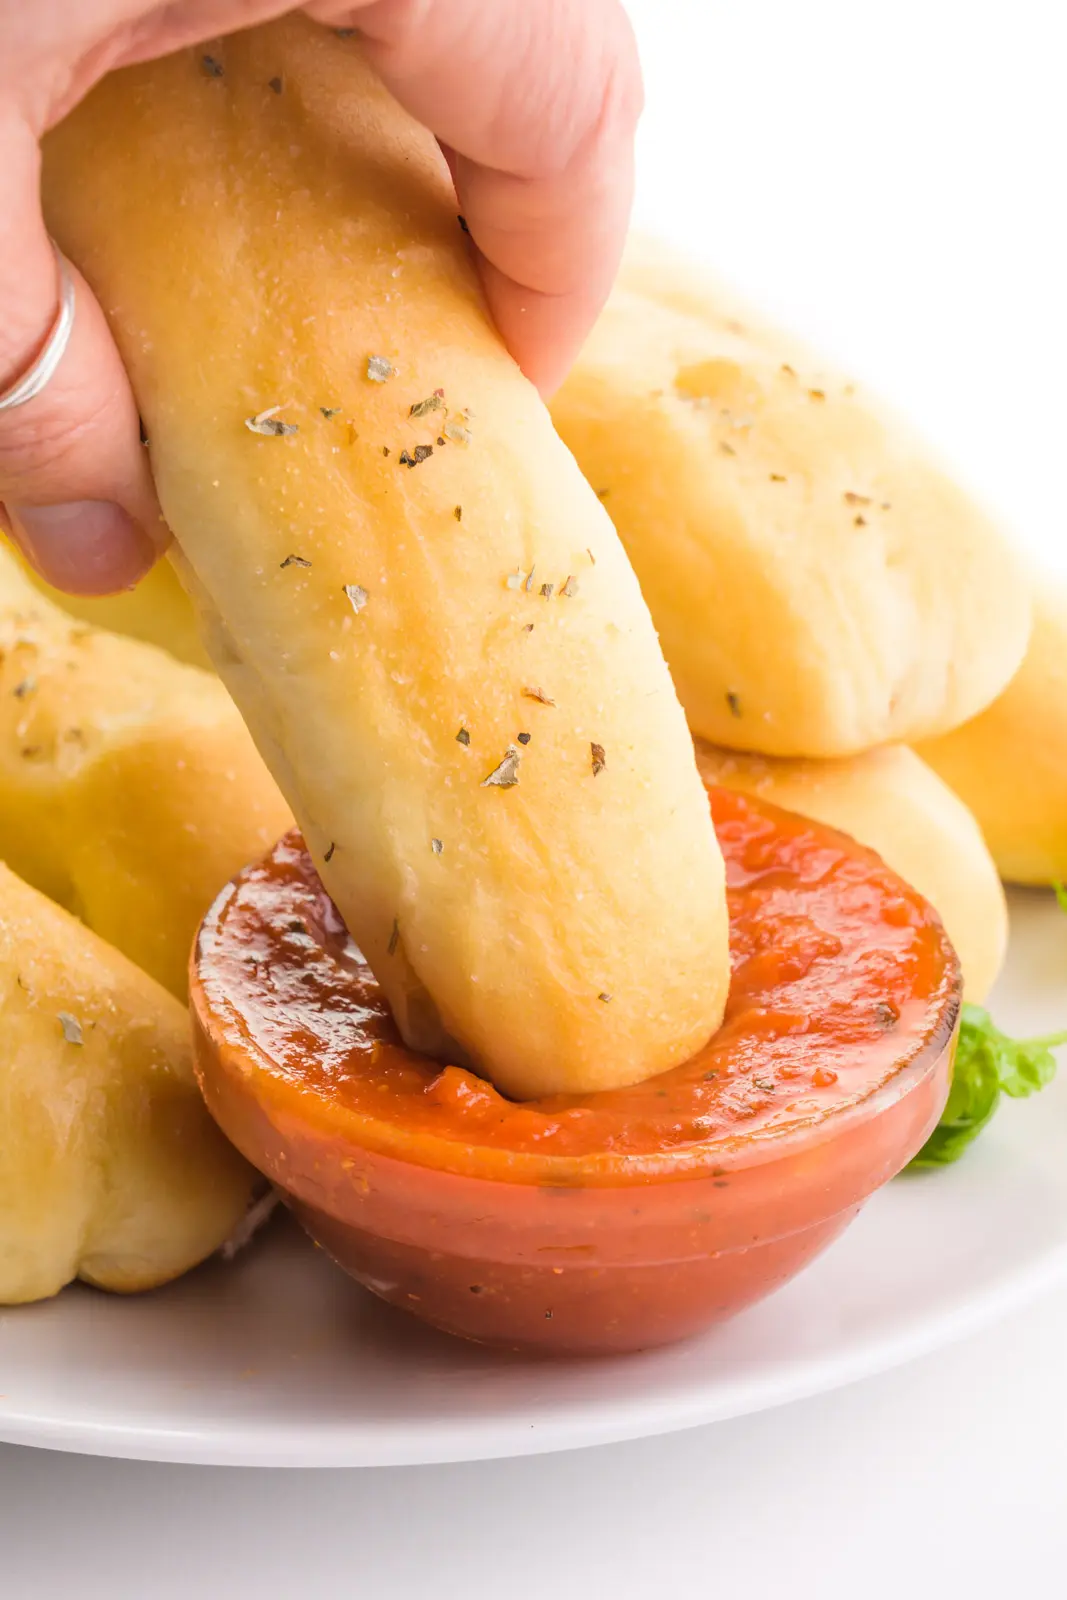
Serve vegan garlic breadsticks with any of the following:
- Marinara sauce — These are great appetizers when served with the right sauces.
- Vegan Alfredo sauce — This takes me back to my Olive Garden days and my favorite “entree” was the salad and breadsticks with some Alfredo sauce. Now we can do that again, except vegan.
- Vegan Lasagna — There’s nothing better than a breadstick to serve with some vegan lasagna, or any plant-based Italian dish for that matter.
- Walnut Pesto — This pesto is fresh and green and perfect for serving with bread of any kind.
Vegan Cheese Breadsticks
If you’ve ordered from any popular pizza place lately, you may have noticed they love serving cheesy bread. You can recreate that experience by melting some vegan mozzarella shreds on top of these dairy-free breadsticks.
Simply sprinkle a half cup (or more) of vegan mozzarella shreds (Follow Your Heart or Daiya are our favorites) and move that pan to the top rack and bake until the cheese melts. It’s absolutely delicious!
Frequently Asked Questions
Are Olive Garden breadsticks vegan?
Good news — Olive Garden breadsticks are vegan! However, you may not have an Olive Garden in your neighborhood. No worries, you don’t have to go to the restaurant to enjoy quality vegan breadsticks, because you can make them at home, too.
Are breadsticks vegan at Pizza Hut?
Pizza Hut breadsticks are not vegan, but only because the seasoning mix has dairy products. You can order the breadsticks without seasoning to enjoy a dairy-free and vegan experience.
More Vegan Bread
If you love these vegan breadsticks, be sure to try even more vegan bread recipes:

Subscribe and get a free Easy Vegan Recipes eBook
Plus our latest vegan recipes, delivered right to your inbox!
Vegan Breadsticks
Ingredients
- 1 cup water
- 2¼ teaspoons active dry yeast (1 package)
- 3 tablespoons vegan butter, melted (substitute olive oil)
- 1 ½ teaspoons salt
- 1 tablespoon granulated sugar
- 3 cups bread flour
Garlic Topping
- ½ teaspoon garlic powder
- ½ teaspoon sea salt
- 1 teaspoon dried oregano
- 2 tablespoons vegan butter
Instructions
For the Breadsticks:
- Prepare two baking pans by lining with parchment paper.
- Place the water in a microwave-safe bowl and heat for 11 seconds. Insert your finger in the water, which should be about the same temperature as your finger. Or use a thermometer to achieve between 105°F/41°C and 109°F/43°C.
- Add yeast with warm water to a mixing bowl (for a hand-held or stand mixer). Stir in the sugar, butter, and salt.
- Stir in 2 cups flour. Fit the mixer with the paddle attachment and blend until well combined.
- Change out the paddle attachment for the dough hook. Pour in the remaining flour and knead the dough for up to 5 to 7 minutes. The dough should become smooth and elastic, while still slightly sticky.
- Transfer the dough ball to an oiled bowl, cover with a damp kitchen towel, and set aside to rise until doubled in size, roughly an hour. See post tips for recommendations on the best places to rise dough.
- Punch down the dough and transfer to a lightly floured cutting board. Cut the dough ball in half, then cut each half in half. You're left with 4 pieces of dough. Cut these into thirds to make 12 equally-sized pieces of dough. Roll each piece into a 7-inch long log. Place these on the prepared baking sheets, leaving space between each of them. Cover with dampened kitchen towels or plastic wrap and set aside to rise for about 30 to 45 minutes.
- Preheat oven to 400°F/200°C.
- Bake breadsticks on the center rack for 12 to 14 minutes. Move the pan to the top rack for the last few minutes of baking to give the breadsticks a golden crust on top.
For The Garlic Topping:
- Stir together the salt, garlic powder, and oregano.
- When breadsticks are done, remove them from the oven and use a pastry brush to coat each of the hot breadsticks with melted butter. Sprinkle with the garlic salt. Serve warm.
- Store leftovers in an airtight container in the fridge for up to 7 days.
Recommended Equipment

(The products above contain sponsored links to products we use and recommend)
Notes
The nutrition information shown is an estimate provided by an online nutrition calculator and should not be considered a substitute for a professional nutritionist’s advice.
This post was originally published in 2014 and was updated to include new photos, new text, and an updated recipe in 2021.
Can these be hand-kneaded? I would LOVE to make them, but do not have a stand mixer.
Hi Dawn! Yes, you can make these breadsticks without a stand mixer. Simply use a stiff spatula or wooden spoon to stir the dough in the bowl. Once you notice the dough starts to stick to the edges of the bowl (and no noticeable flour in the bowl), cover and set it aside in a warm, dry place to proof. It typically will need a longer proof time (up to overnight) to rise. But once it has doubled (or nearly doubled) in size, you can follow the rest of the recipe. I hope this helps!
This recipe was SPOT ON!! I used a low protein bread flour, and they were soft and pillowy, with a perfect yeasty flavor. I made 6 breadsticks and used the remaining dough for something else. As soon as i tasted them, i regretted my decision to not make 12! Hahahah!
Hi Jody! So glad you liked these breadsticks. I’m SO with you. ALL the breadsticks ALL the time!
Please give me servings for 2. Its so vegan and my teen son asked for it last night thank you. Garlic breadsticks
Hi Maria! How about this. Why not make the whole batch and then freeze the ones you don’t eat! And then you can pop the frozen breadsticks in the oven for a few minutes before dinnertime. You’ll have “fresh baked” breadsticks ready for every meal! At least until they run out. 🙂
OMG these look amazing! I am trying this recipe out TODAY! I cannot wait to eat these…all of them! LOL:)
Thanks, Julia! I made a double batch and froze half of them so we always have fresh breadsticks on hand!
Breadsticks are my weakness. Okay homemade bread in general but yeah garlic breadsticks, swoon.
I’m so with you on this Paula!
Marly,
When did you freeze them, before or after baking? And the follow up, what steps to take after freezing? (thawing or simply baking, etc)
Thanks, Carla
Hi Carla! I froze these after I baked them because I wanted them in “ready-to-serve” condition. That way we just pop them in the toaster oven and toast for 3-4 minutes and the outside is nice and crispy. Depending on the strength of your toaster oven and how many breadsticks you’re toasting, you may want to increase the amount of time you’re toasting them to make sure they’re warmed through. Let me know how it goes!
Hey it’s takes some skills to bowl, and you can still proudly say you were a college athlete! So kudos to you! Me? I’ll take the bumpers thank you very much. I will however take some of these.
Hey, bumpers look like a lot of fun too. I’d like to see how many times I could bump the ball back and forth between the bumpers, down the alley, and still get a strike!! Wouldn’t that be fun!
I love breadsticks! I’m going to print this off and try them ASAP. Thanks for posting! (The buttery spread is a handy recipe to have, too. Have you tried it in larger amounts as a dressing for pasta?)
I have never tried it as a dressing for pasta, but what a great idea! I used to go to a restaurant that served a Hot & Naked Pasta which was basically olive oil and garlic. It was yummy!
Yes please I’ll take them all! I love garlic bread!
So glad you like them!
YUM, I love breadsticks! 🙂
Yep! They are the best!