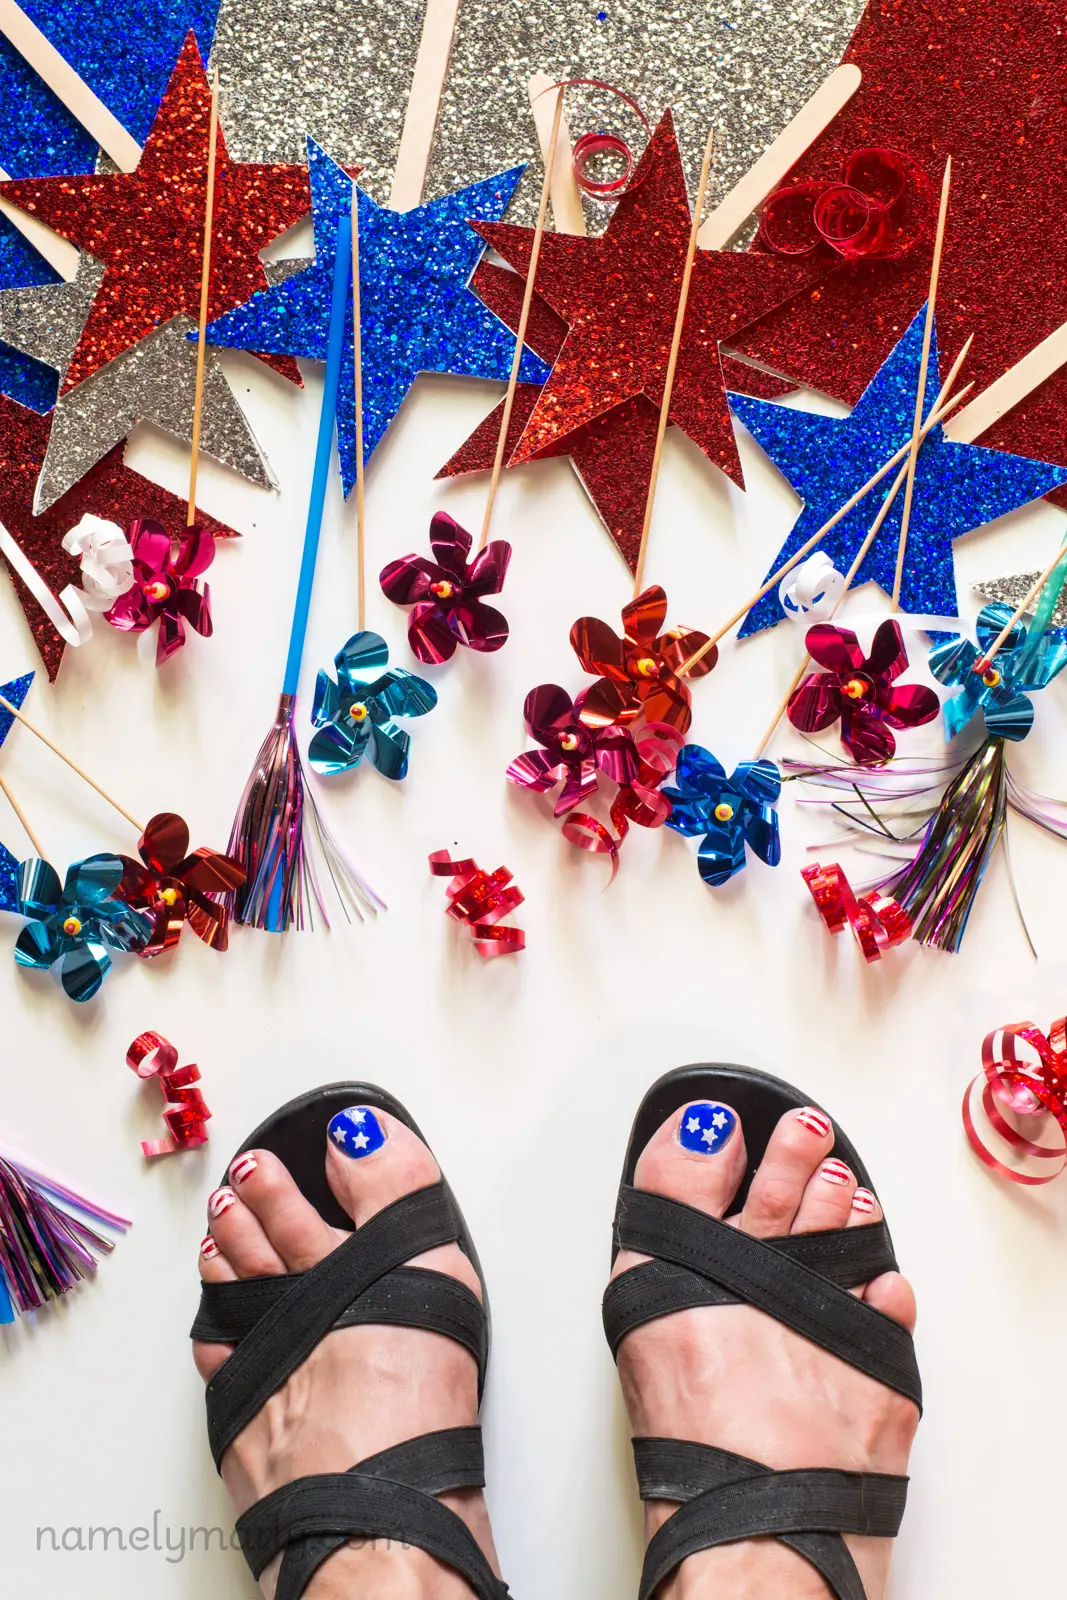
Stars and Stripes Nail Art
Today’s post is so fun, I seriously can’t wait to share it with you. I came up with a new and super-easy way to decorate nails and just in time for the Fourth of July holiday, here’s my first design: Stars and Stripes Nail Art. It’s such a fun time of year to celebrate!
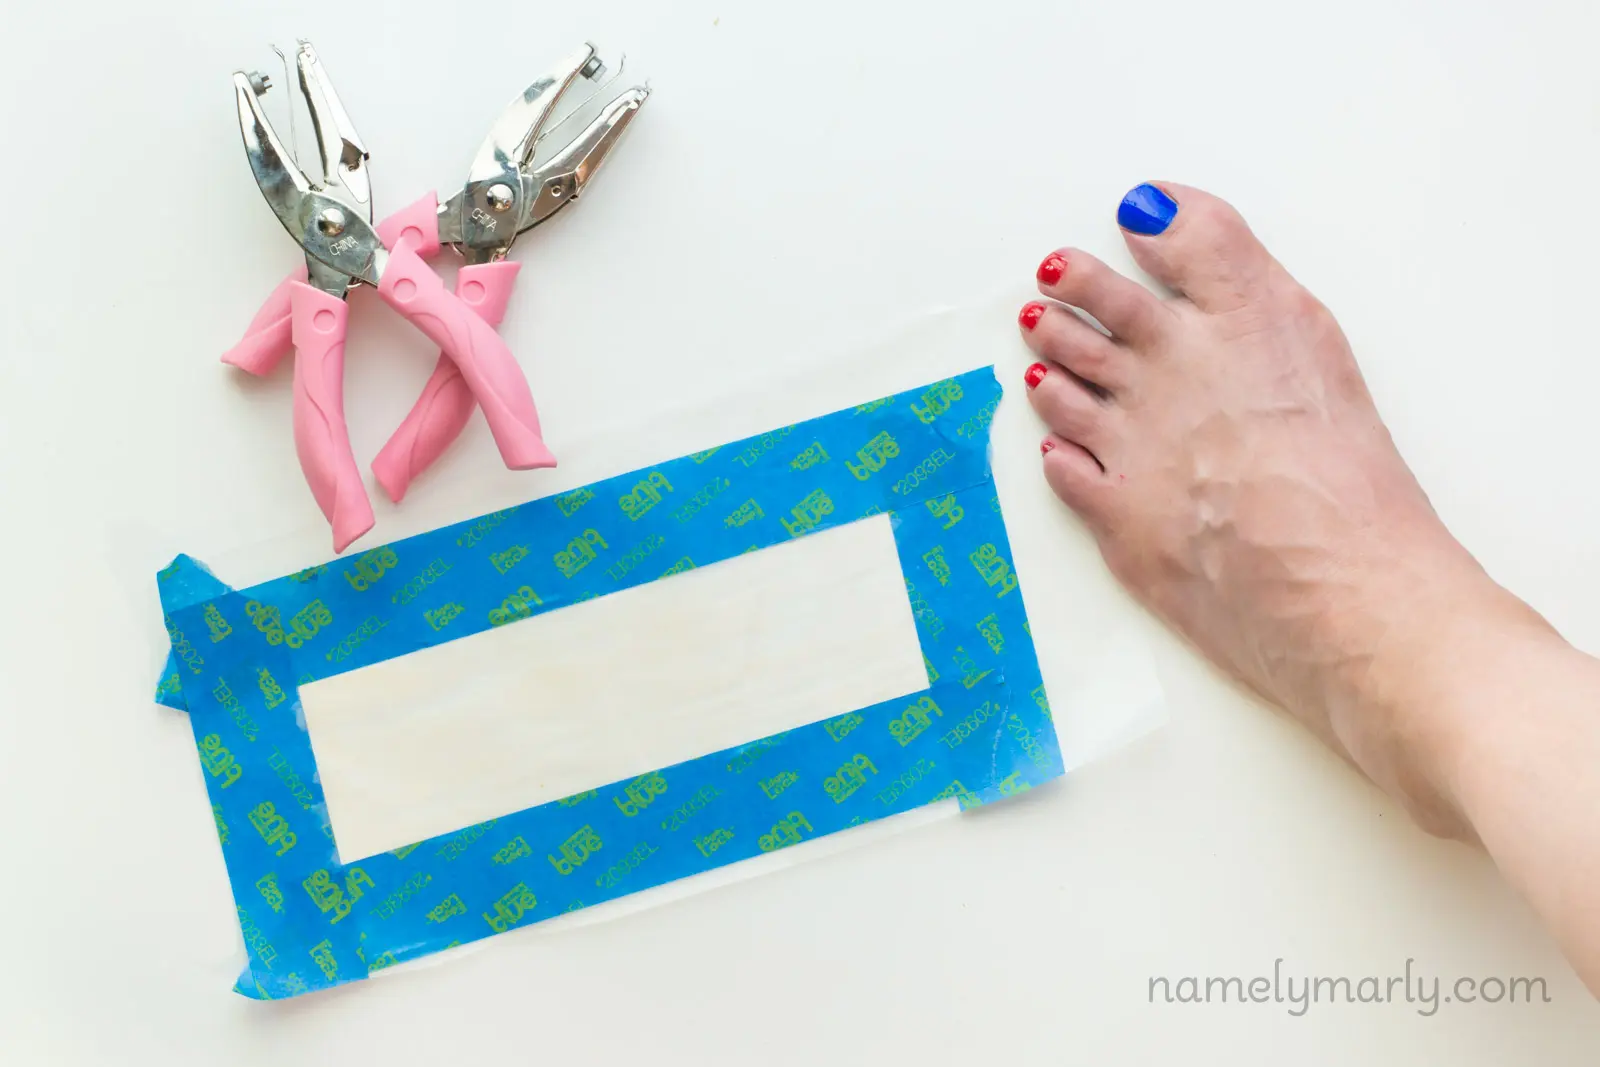
I don’t know how I came up with the idea for this, but the next thing you know, I was painting nail polish on a piece of waxed paper. After a couple of coats and with some masking tape on 3 sides, the polish dried and created a sheet. Then I used a decorative hole punch tool to create designs.
So simple. So fun!
I love being creative and artistic and why not share your artistic side with these DIY Stars and Stripes Nail Art toenails!
I have painted my toes before, but have seldom received comments about them. But with my Stars and Stripes Nail Art toes, people were raving about them. Even my sisters!
You know sisters!
How to Make Stars and Stripes Nail Art
Begin by using masking tape on waxed paper to create a section. Fill it in with white nail polish. You’ll need about 3 coats of white nail polish, allowing time for each coat to dry in between.
Also, you’ll want 4 colors of nail polish – Red, White, and Blue, of course, and a Clear Top Coat.
Finally, you’ll need: waxed paper, masking tape, scissors, and a star-shaped decorative whole punch. I found one in the craft section at Michael’s.
Note: I know the photo below shows a rectangle, and that definitely works, but watch the video below for the best way to create a 3-sided area with masking tape that saves on nail polish!

While you’re waiting for your white nail polish strip to dry, paint your big toes with the blue and your remaining toes with red nail polish.
You might want to give it a couple of coats. Be sure to allow plenty of time for drying before moving on to the next step.
Once your toes and the white nail polish are dry, get out your star hole punch. This is where the fun begins!
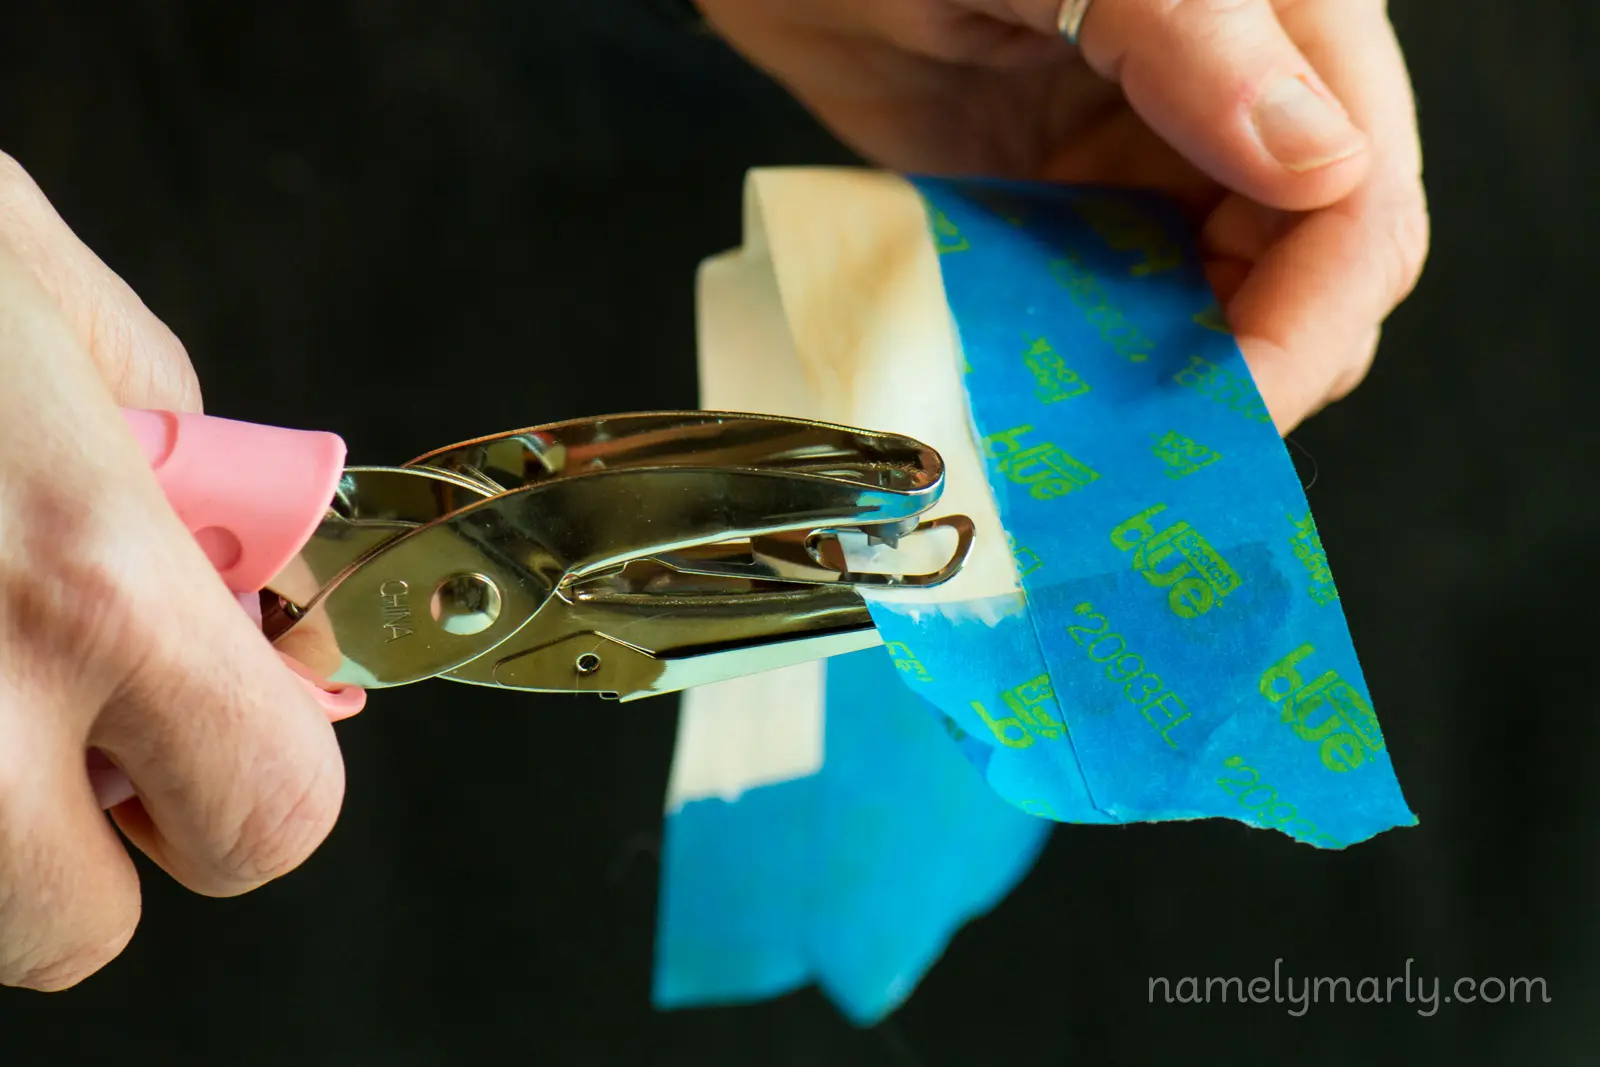
Pull the waxed paper off the back of the nail polish. It should pull away with minimal resistance. If it starts to tear apart, that’s a sign you don’t have enough coats or it’s not dry enough yet.
Once you’re able to pull off the waxed paper, you’re left with a sheet of nail polish between your tape, then punch off 6 stars (or more if you’d like more stars on each toe). I put about 3 stars on each big toe.
So, next coat your right big toe with clear top coat nail polish. You can grab one of the stars by getting one of your fingertips damp, then lightly tap one of the stars. It should stick to your finger. Then lightly tap that star where you want it to be on your big toe. While the clear coat is still wet you can move the star around a little, but don’t do too much, because it will start to dissolve or the blue will blur into the white.
Next, grab another star and place it on your toenail. Repeat until you have the right amount of stars for each big toe.
Watch this Stars and Stripes Nail Art video for the quick guide on how I did this fun and easy DIY nail design!
For the stripes, use scissors to cut thin strips in the white, dried polish strip. Using one toe at a time, coat with the clear coat polish, grab one of the cut strips and place it on your toe. Dab it in the middle but leave both edges of the strip out so you can use your scissors to trim off the edges to fit your toe.
Then press those edges into the clear coat. I have enough toenail space for 2 stripes per toe. If your toenails are smaller, you may only be able to get one, or you may want to create thinner strips.
My pinky toenails are pretty small, so I left them red with no stripe.
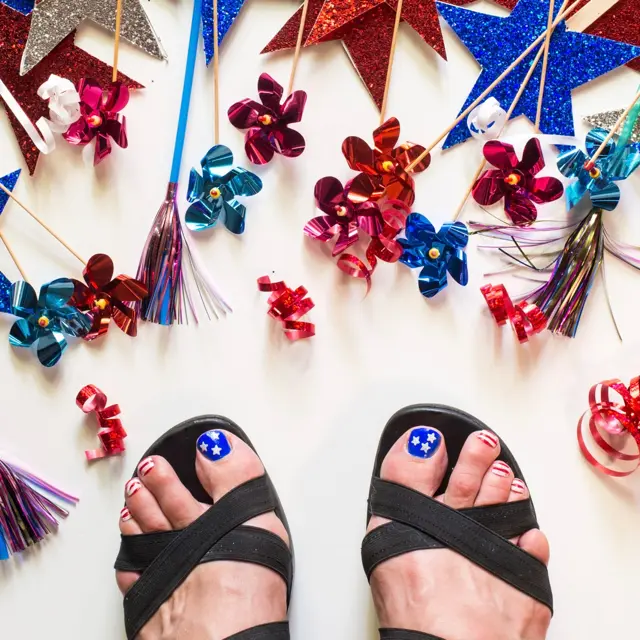
After your nails have dried, add a clear topcoat to each toe to seal the deal.
Wait for the oohs and ahs from your friends when they see your adorable toes!
Below are some printable instructions for your use.
If you decide to make this DIY Stars and Stripes Nail Art, take a photo and share it with me using #namelymarly on Instagram. We love seeing your photos!
DIY Stars and Stripes Nail Art
Let the summer begin with this fun DIY Stars and Stripes Nail Art. I created a little trick to make decorative Fourth of July theme nail art! You can do it too!
Prep Time: 30 minutes
Materials:
- White nail polish
- Blue nail polish
- Red nail polish
- Topcoat (clear) nail polish
- Waxed paper
- Masking or painter’s tape
- Star craft hole punch
- Scissors
Instructions:
- I strongly recommend watching the quick video to show how I made these stars and stripes nail art design.
- Tear off a piece of waxed paper. Use the tape to section off a long stripe going parallel with the edge of the waxed paper. Use two pieces of tape to section off both ends, creating a rectangle with the open end of the waxed paper being the edge.
- Cut the back of the waxed paper, behind the tape and then place that below the edge of the waxed paper. That way when you paint it with nail polish, you won’t have to worry about the nail polish getting on your table.
- Apply a coat of white nail polish to the sectioned off area on your waxed paper. Allow that to dry and repeat with two more coats.
- In the meantime, paint your big toes with blue nail polish and your other toes with red nail polish. Use 1 to 2 coats, depending on your preference.
- As soon as the white nail polish has dried completely (you can use a fan to speed that process up), peel the waxed paper off the back. You’re left with a “sheet” of white nail polish. Use the star hole punch to punch out about 6 stars (I used 3 stars on each large toenail). Then use the scissors to cut several thin strips.
- Beginning with your big toe, apply a coat of clear topcoat over your dry blue toenail. Pick up one of the white stars (it helps if you wet your fingertip) and then tap it on your toe (on the wet topcoat). Repeat until you have 3 white stars on your big toe.
- Then apply a coat of clear topcoat to your second toe (painted in red). Grab one of the white strips and apply it to the top of your second toe. Trim off the edges, being careful not to get the scissors close to your actual toe. Place 2 stripes on each toe.
- Repeat steps #7 – 8 with your other foot.
- Apply a topcoat layer to seal in your decorated toes.
- Wear sandals and flip flops to show off your adorable toes!
That’s it!
I’m having so much fun with this new trick. Who knows, maybe we’ll have more Nail Art Designs to come!
I like post about nail art design tutorial with detailed step by step process and with videos. It really helps beginners to learn and understand it better. great job.
Thanks, Lynda!
LOVE! This is so adorable and helpful!