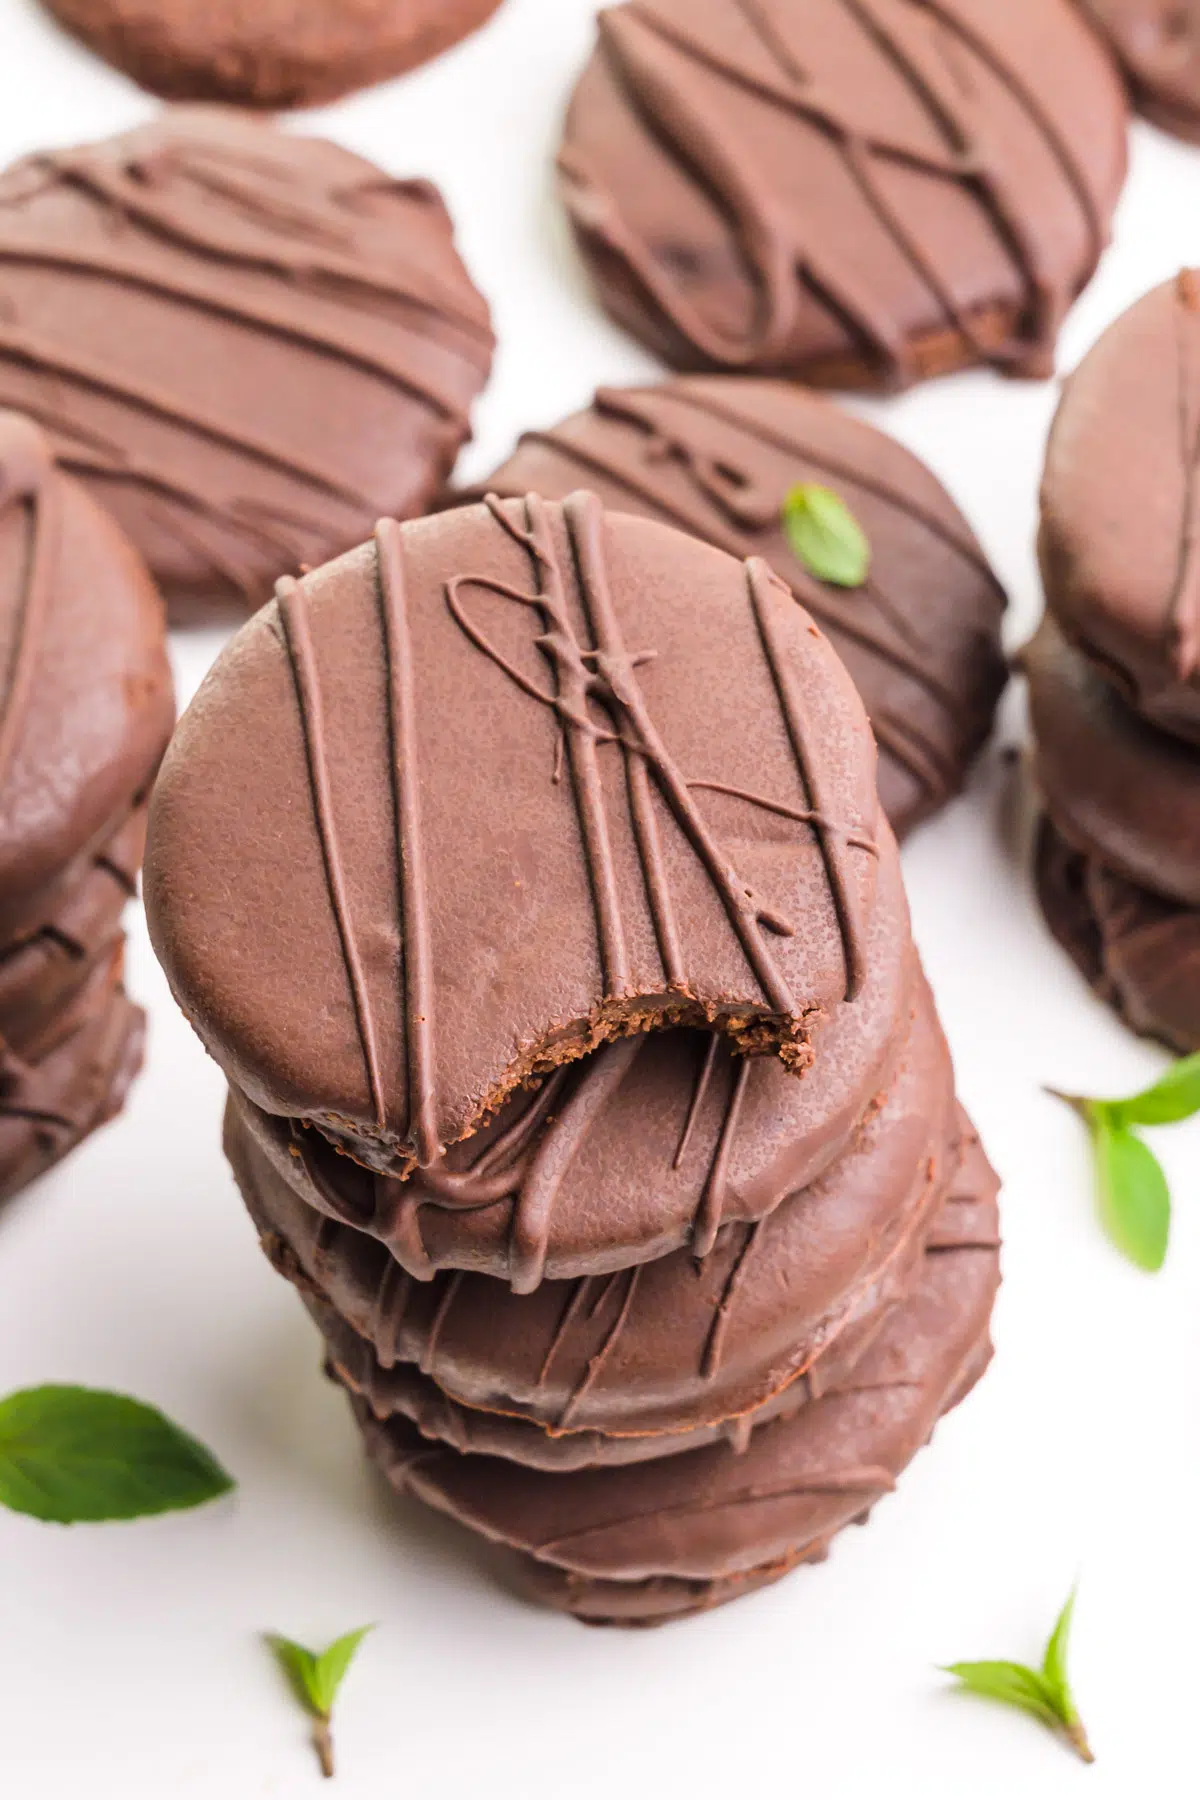
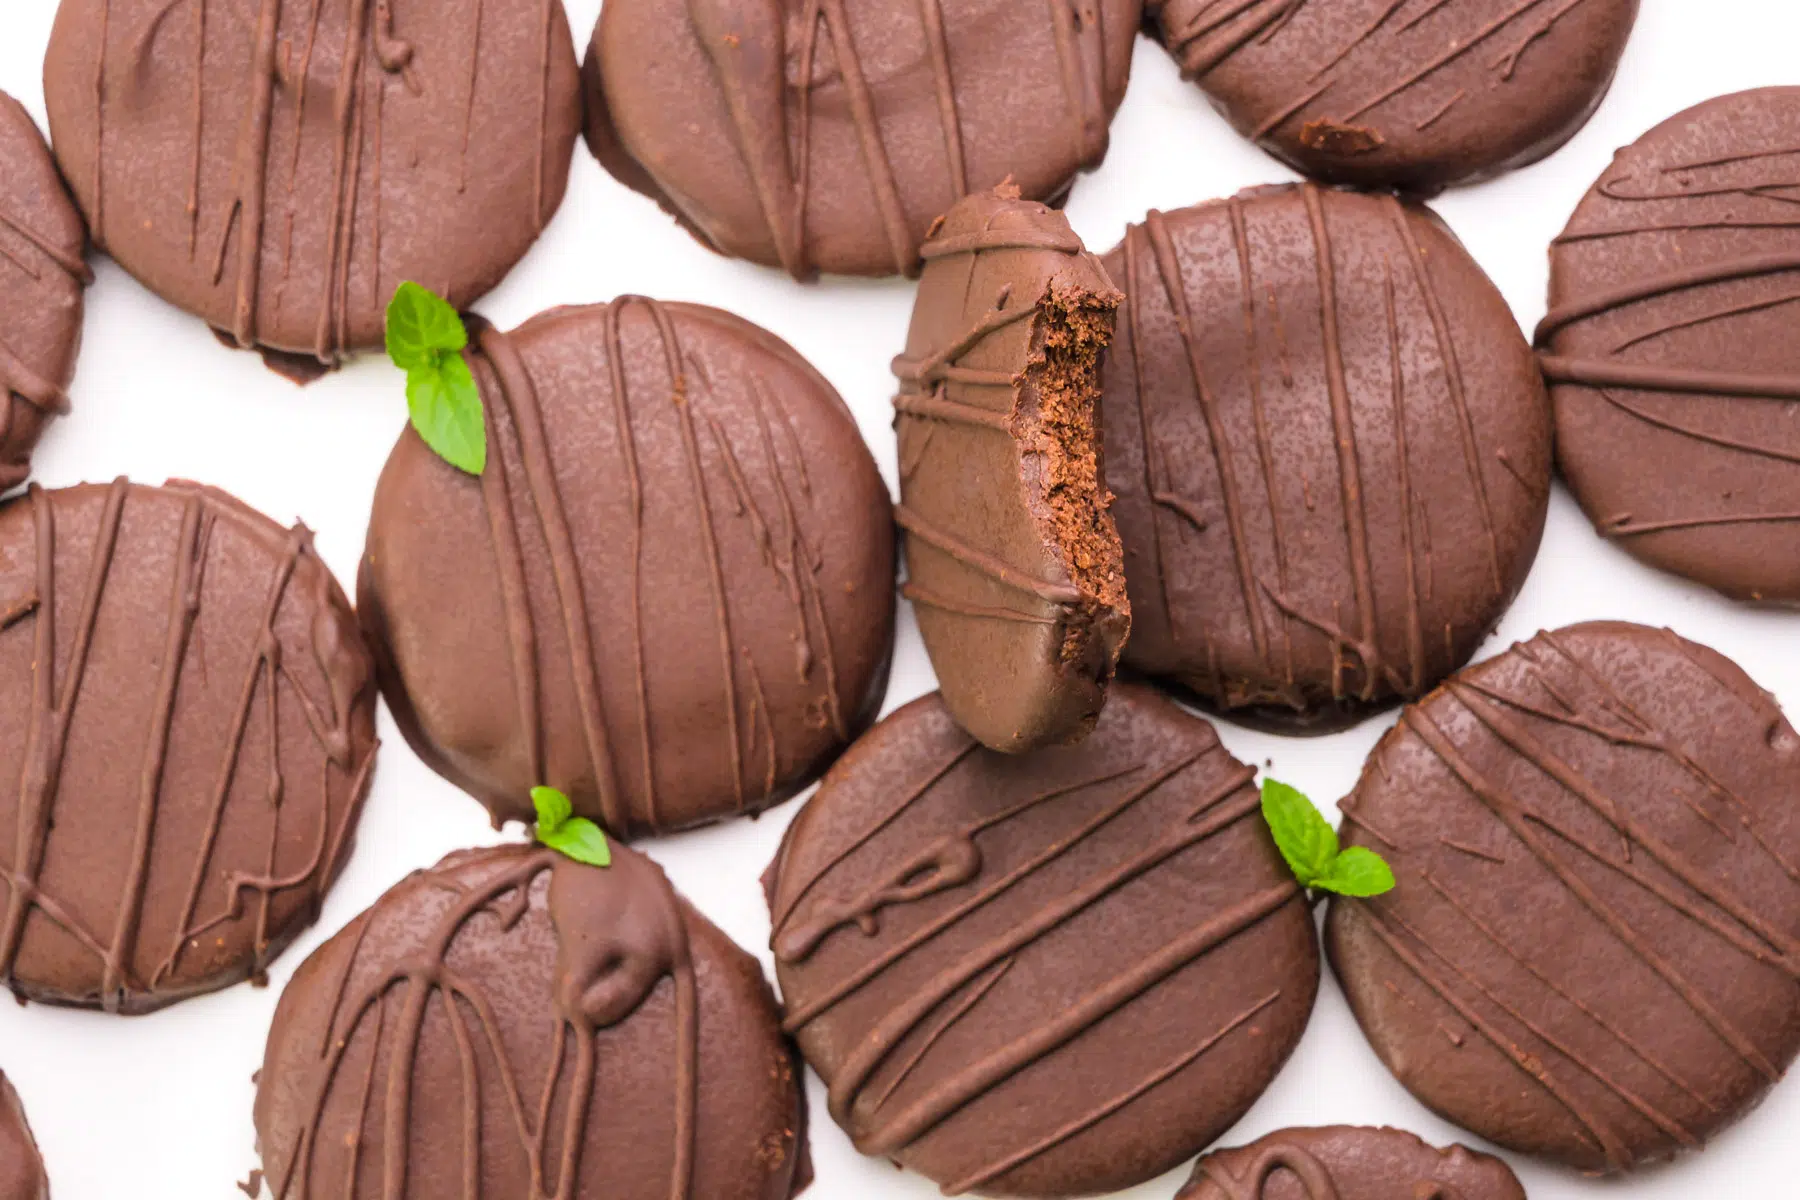
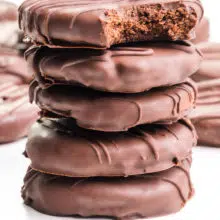
Vegan Thin Mint Cookies
This homemade Thin Mint Cookies recipe delivers a crispy chocolate cookie with mint chocolate topping in every bite. In fact, these thin mints cookies are unique because this recipe is made vegan (dairy-free and egg-free) but tastes just as good as the original thin mint recipe.
Let me begin by saying I have nothing against the Girl Scouts. They seem like a fine organization.
Yes, it’s true I was a Campfire Girl. The two organizations are like opposing universities. They have similar goals, but people are usually loyal to one or the other.
You see, I liked being a bluebird. It was fun being a bluebird.
Won’t you be a bluebird with me?
Sorry, only Campfire Girls will get that, but I had to say it anyway. Or sing it. I think I remember nearly every single song we sang – both the sanctioned and the “around the campfire” songs. You don’t even want to get me started!
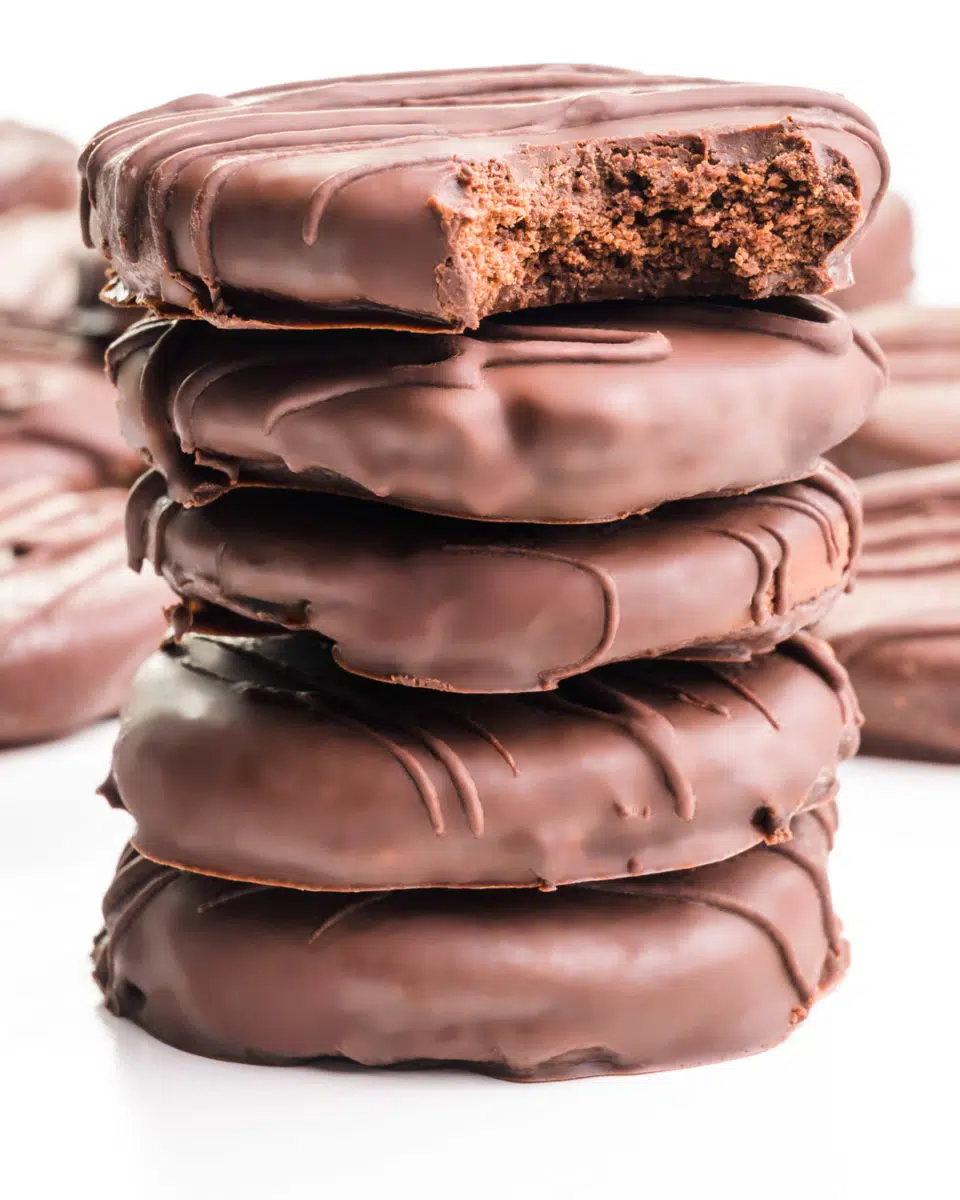
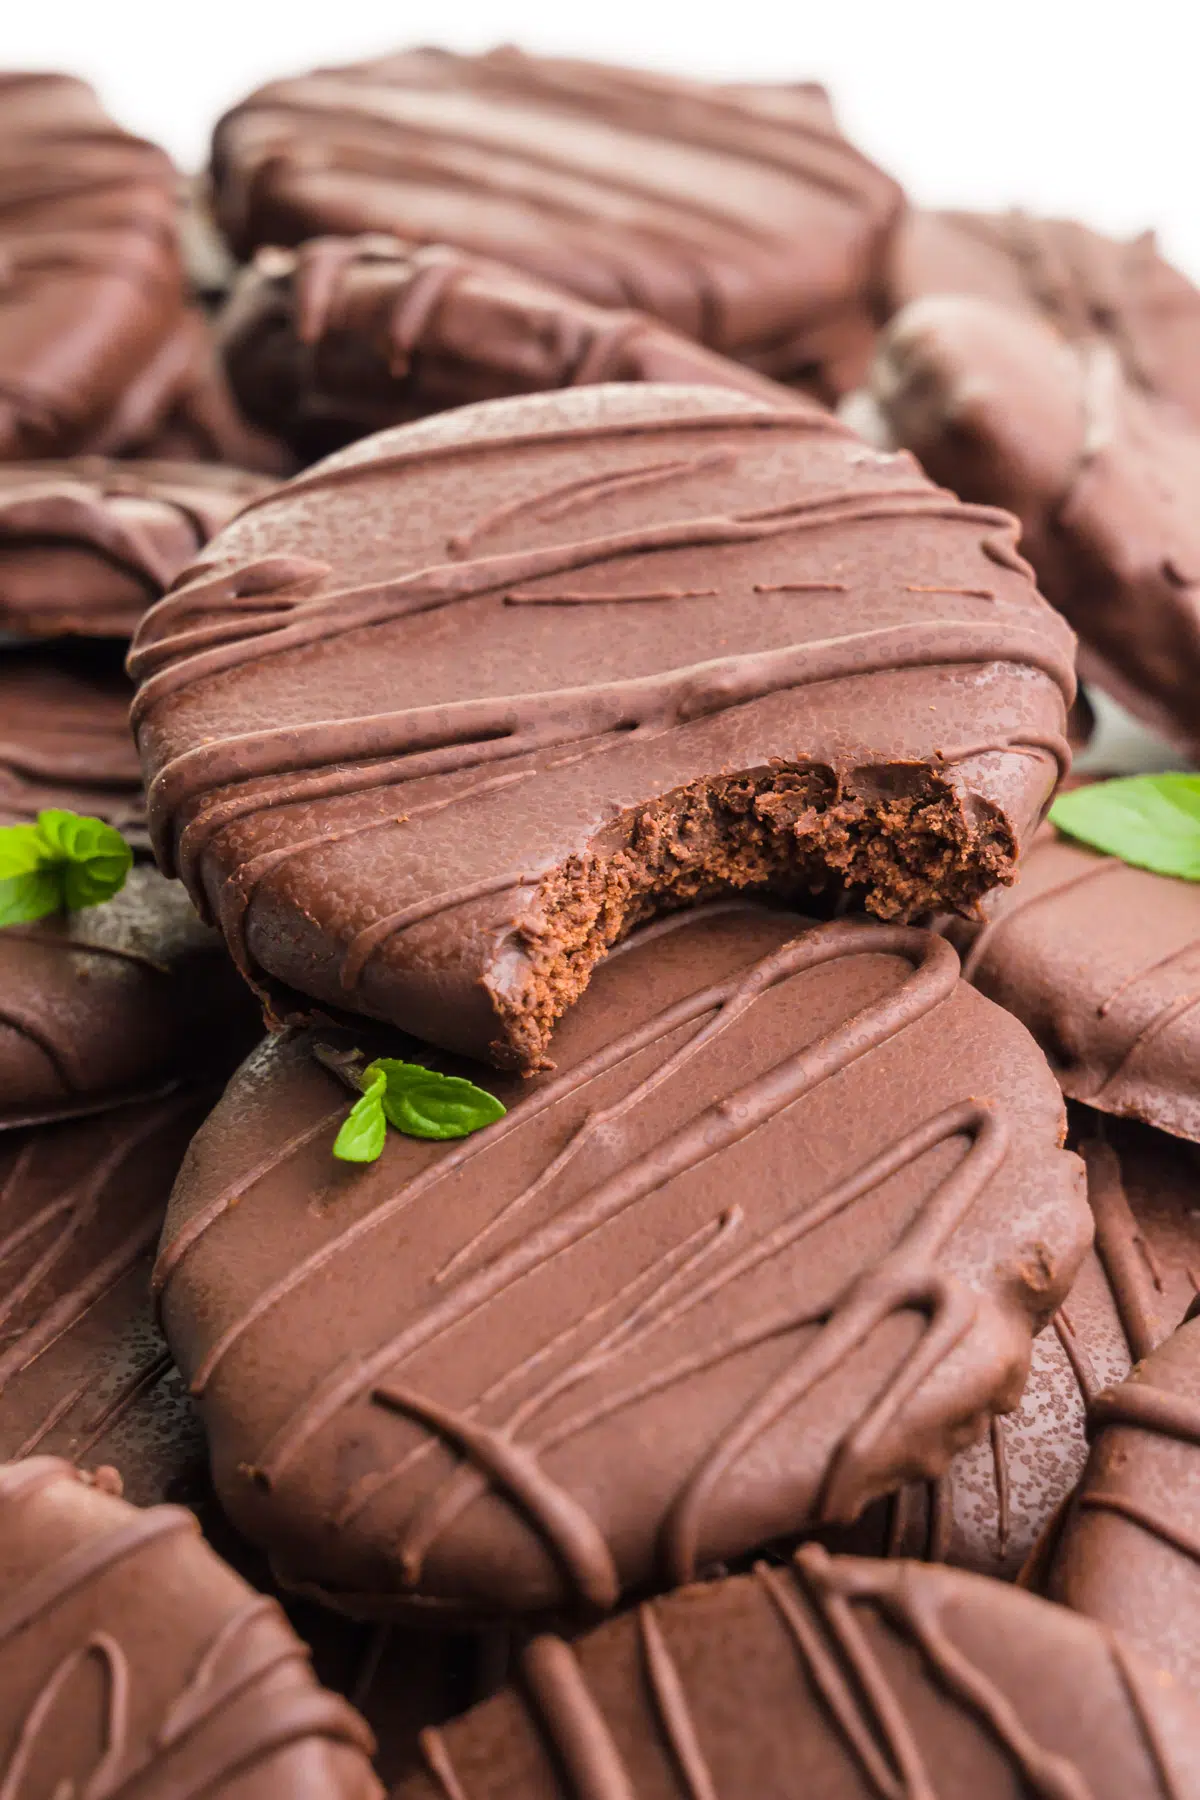
We sold candy door-to-door, not cookies. I don’t know if anyone sells anything door-to-door anymore. Anyway, there’s no denying that the thin mint Girl Scout cookies are the best with their crispy chocolate cookie coated in melted chocolate. This recipe delivers that cookie at home!
What Makes This Recipe Shine?
- Chilling the dough makes it easier to roll these cookies besides creating a nice make-ahead step in the process.
- The dark chocolate coating adds delicious texture to the cookies, adding tenderness to every bite.
- Mint extract is added to the cookie and the combination of mint and chocolate is undeniably irresistible!
I expected this thin mint cookie recipe would be a chore to make, but I found the process to be enjoyable.
Maybe it was the smell of mint in the air.
Or maybe it was the anticipation of having one of these delicious Girl Scout mint cookies. All I know is that I don’t have anything against Girl Scouts. Especially now that I get to enjoy my own version of their delicious cookies!
Key Ingredients
You can find the full printable recipe, including ingredient quantities, below. But first, here are some explanations of ingredients and steps to help you make this recipe perfect every time.
Here are the ingredients you’ll need for this recipe, including substitution ideas:
- Vegan butter — I recommend using Earth Balaance vegan buttery sticks, Miyokos, or homemade vegan butter.
- Peppermint extract — A little bit goes a long ways, but it adds the distinctive flavor we’re looking for.
- Cocoa powder — You can use either natural or Dutch-process cocoa powder.
- Chocolate chips — Consider all your dairy-free chocolate chip options.
- Coconut oil — I recommend refined coconut oil for a more neutral flavor.
Curious about how to make thin mints? The good news is it’s relatively easy to make these chocolate-covered cookies! Let’s get started.
- Cream the butter and sugar until light and fluffy. Stir in the remaining wet ingredients.
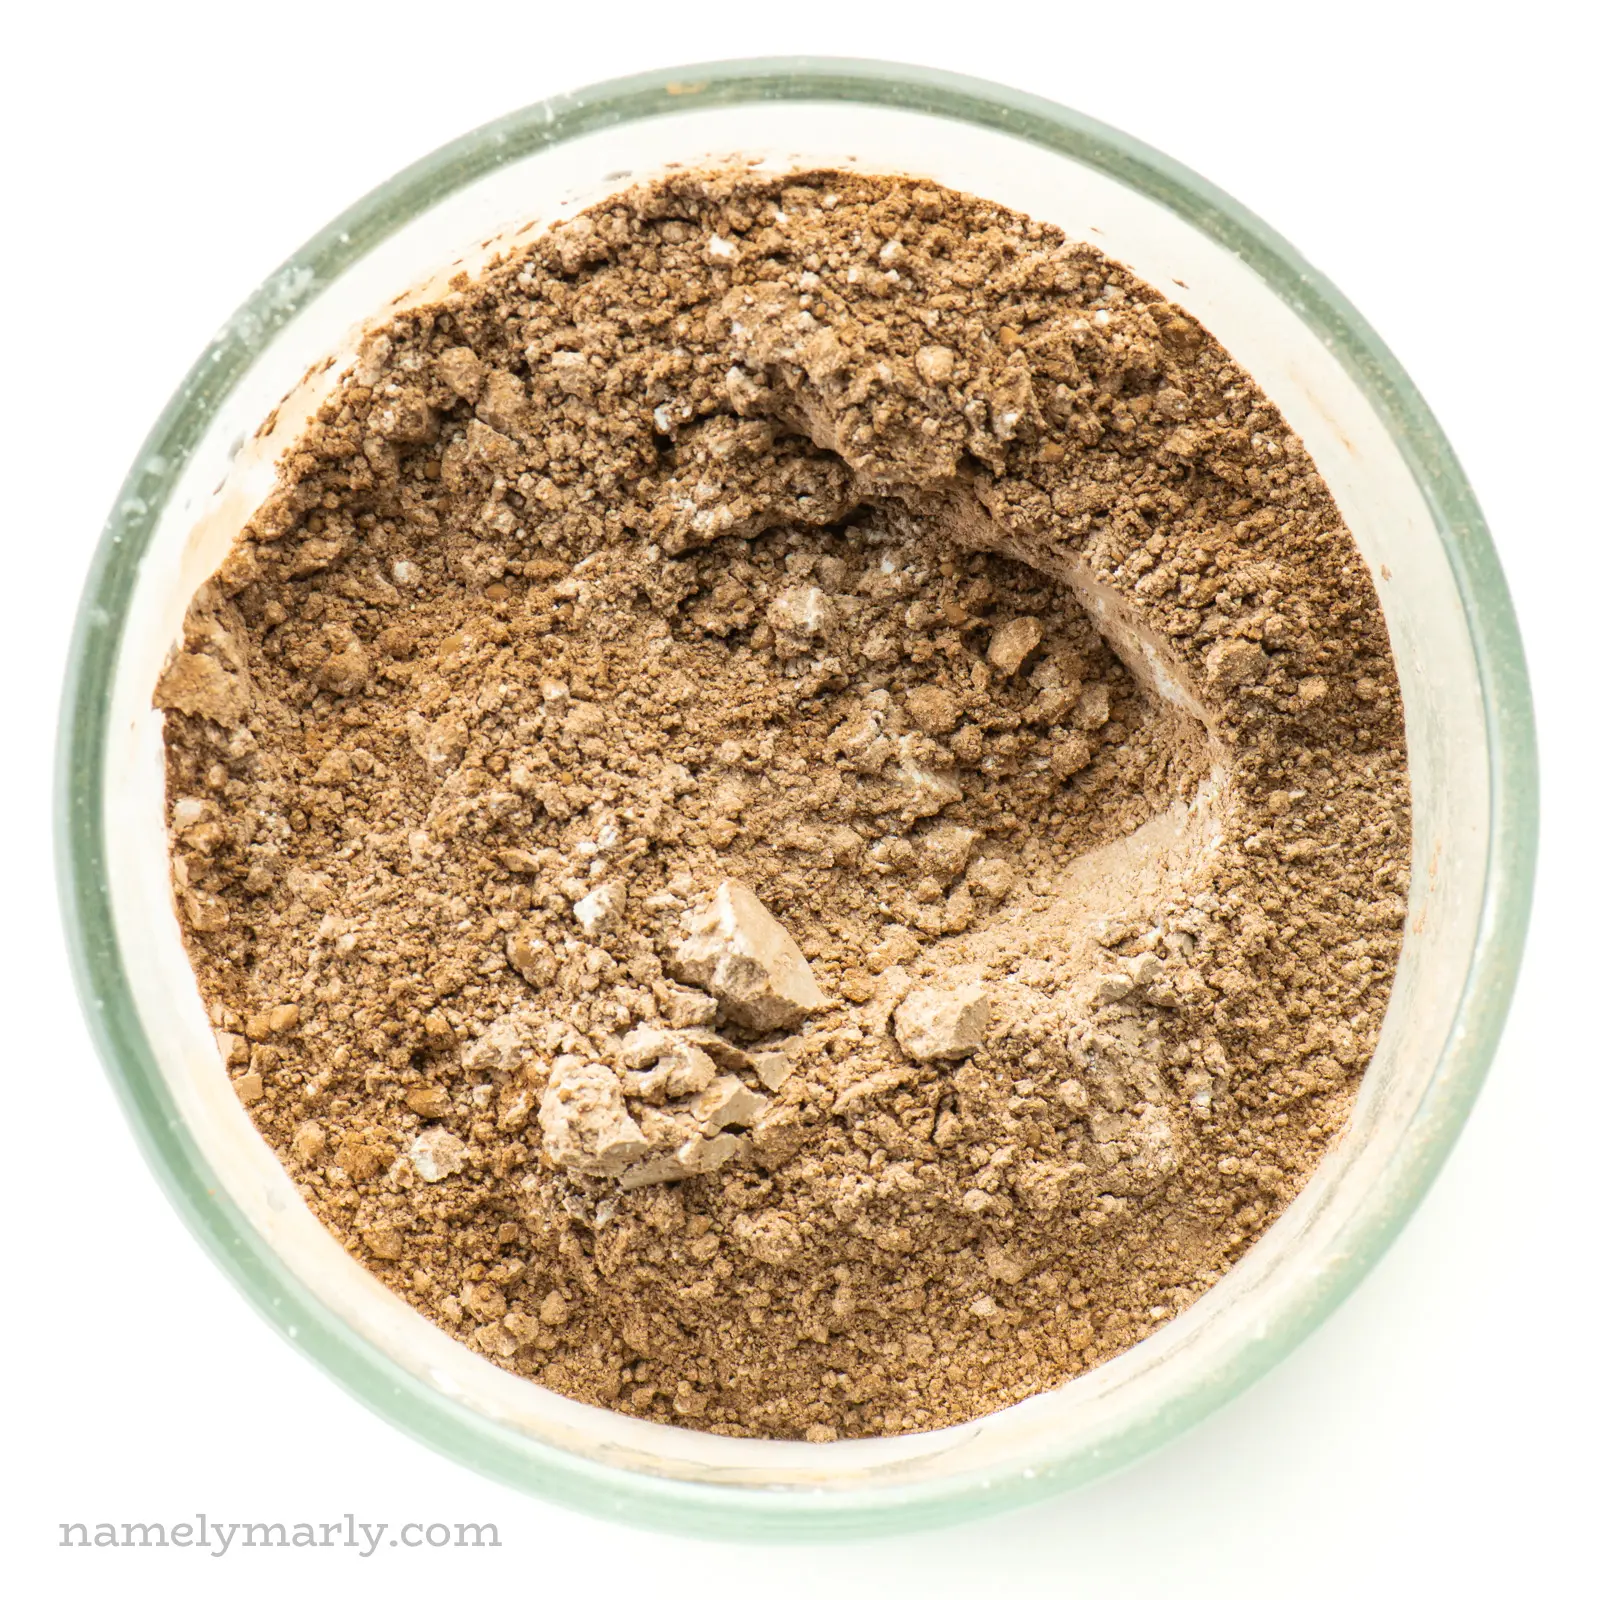
- Whisk together the dry ingredients.
- Add the flour mixture to the wet ingredients and stir until combined.
- Divide the dough into two balls, wrap them in plastic, and refrigerate for an hour.
- Roll the chilled dough until it’s about 1/8 to 1/4 inch thickness.
- Use a round cookie cutter to cut cookies. Place cut dough cookies close on a baking tray.
- Bake cookies and then transfer to wire racks to cool completely.
- Dip cooled cookies in melted chocolate and chill until the chocolate sets.
Step-by-Step Instructions
Here are step-by-step instructions with images.
Step One: Cream Butter and Sugar
In a large bowl, use a mixer to cream the butter and sugar until light and fluffy.
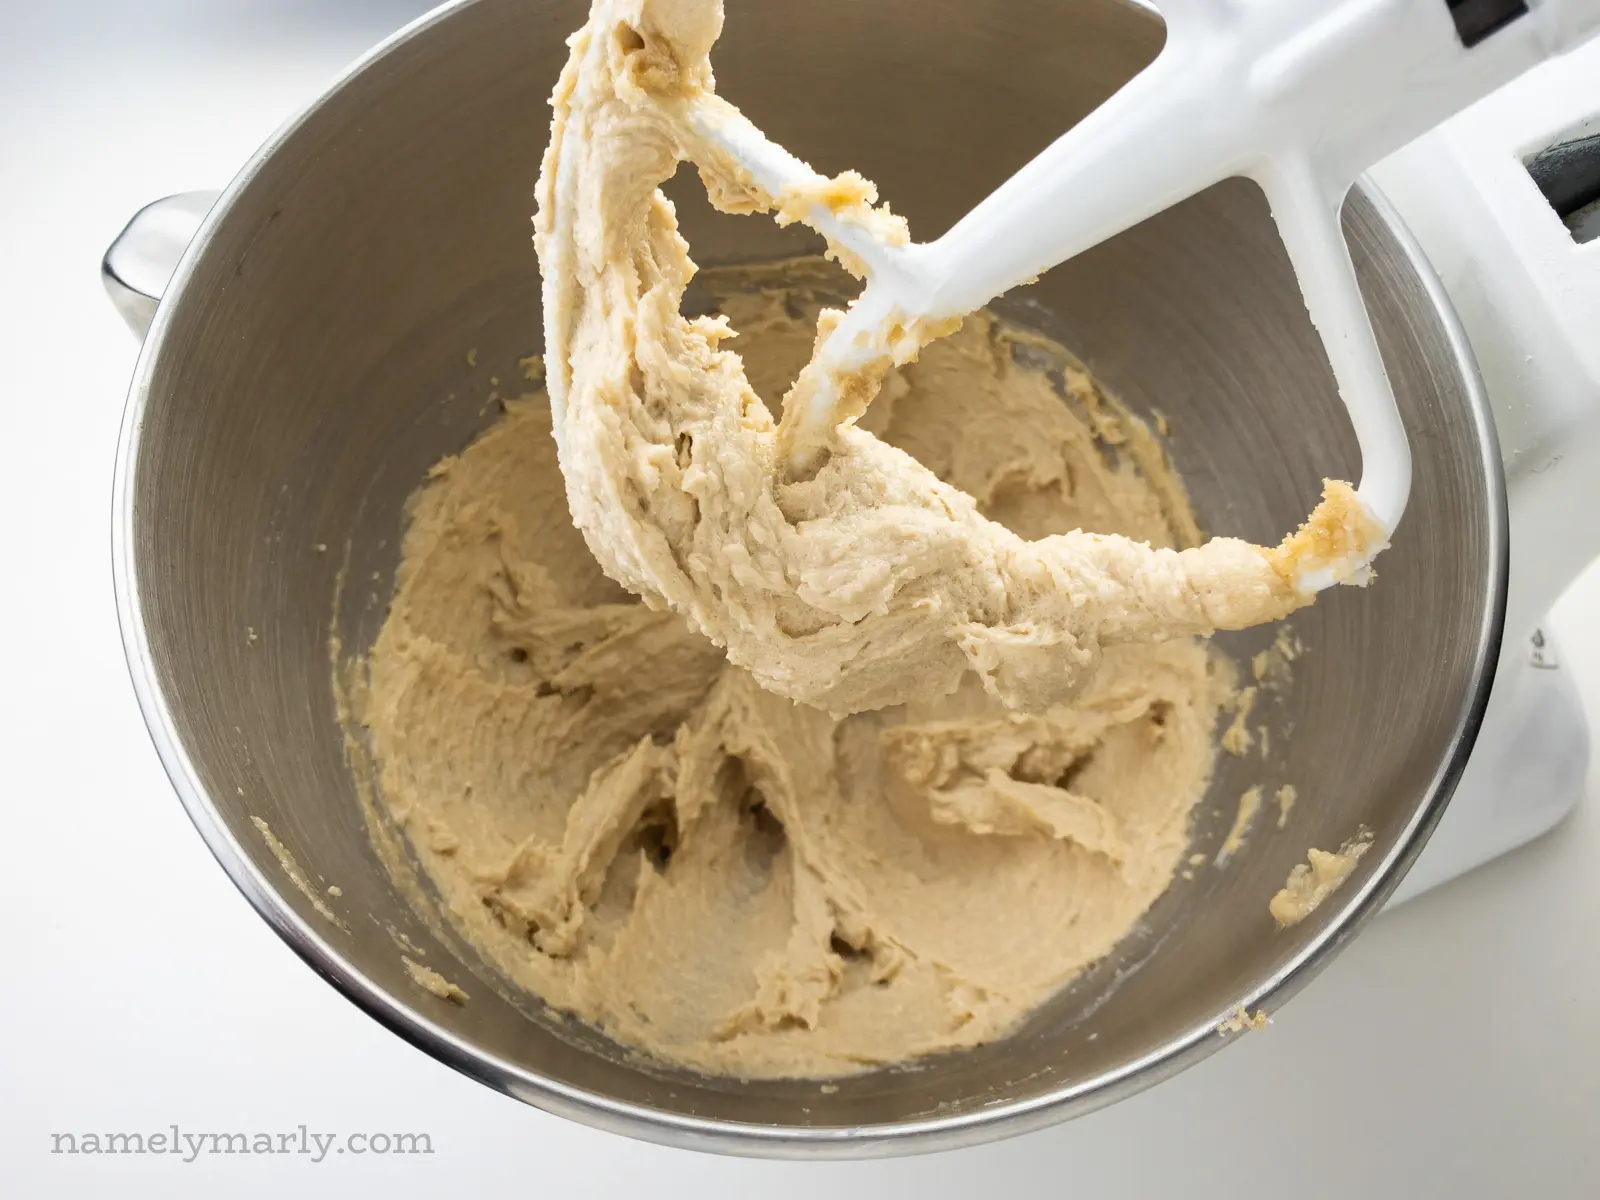
Add the remaining wet ingredients and beat until combined.
Step Two: Combine Dry Ingredients
In a medium bowl, mix together the flour, cornstarch, cocoa, and salt. Stir until well combined.
Step Three: Combine Wet and Dry + Chill
Add the flour mixture to the wet ingredients and give everything a stir.
Make two big balls with the cookie dough and chill for an hour.
Step Four: Cut and Bake
- When you’re ready to make the cookies, begin by heating your oven to 350 F.
- Roll the dough until it’s about 1/8 to 1/4 inch thickness.
- Use a cookie cutter to cut the dough into small rounds.
- Place cut cookies on a prepared cookie sheet.
- Bake the cookies for 5 to 6 minutes (or longer if you want a crispier cookie). Work through all the cookie dough baking the cut cookies in batches.
Step Five: Dip in Melted Chocolate
Once you’ve baked all the cookies and they’ve cooled completely, it’s time to dip them in chocolate.
- Place chocolate and coconut oil in a microwave-safe bowl or saucepan.
- Heat in the microwave in 20-second increments, stirring in between, until the chocolate melts.
- Stir in the peppermint extract.
- Dip each cookie in melted chocolate, gently tapping to remove any excess chocolate.
- Place the dipped cookies on a pan covered in waxed or parchment paper.
- Once the pan is filled, transfer it to the fridge so the chocolate will set.
- Optional: Add additional drizzles of chocolate after the first coat of chocolate has set.
Marly’s Tips
- Be sure to use refined coconut oil if you don’t want a strong coconut flavor
- Use either a small round cookie cutter
- Be sure to leave the vegan butter on the counter for about 30 minutes to soften it.
Storage Tips
Once the chocolate has completely set, store finished cookies in an airtight container in the fridge for up to 7 days or in the freezer for up to 2 months. These cookies are pretty tasty when frozen.

If you love these DIY thin mints, you can take your mint game to another level with these Vegan Junior Mint Candies.
But if it’s chocolate you crave, you’ll want to see even more cookie recipes! Be prepared to fall head over heels for these:


Subscribe and get a free Easy Vegan Recipes eBook
Plus our latest vegan recipes, delivered right to your inbox!
Ingredients
Chocolate Shortbread Cookies
- ¾ cup vegan butter, softened
- 1 cup granulated sugar
- 3 tablespoons water
- 1 tablespoon cornstarch
- 1 tablespoon ground flaxseed
- ¼ teaspoon peppermint extract
- 2 cups all-purpose flour (see notes for measuring flour)
- ¾ cup cocoa powder (natural or dutch-process)
- 1 teaspoon baking powder
- ¼ teaspoon salt
Chocolate Topping
- 1 ½ cup dairy-free chocolate chips
- 2 teaspoons coconut oil
- ¼ teaspoon peppermint extract
Instructions
For the Chocolate Shortbread Cookies:
- In a large bowl, use a mixer to cream the butter and sugar until light and fluffy. Add the ground flax, cornstarch, and water. Beat again to combine. Set aside.
- In a medium bowl, mix together the flour, cocoa powder, baking powder, and salt. Stir until well combined. Add the flour mixture to the wet ingredients and stir until combined.
- Assess your batter. If it's dry, stir in a tablespoon of water. If it's too wet, stir in a tablespoon of flour.
- Create two large cookie dough balls and wrap each dough ball in plastic wrap. Refrigerate for at least an hour.
- When you’re ready to make the cookies, begin by preheating your oven to 350°F/175°C. Line cookie sheets with parchment and/or silpat.
- Grab one of the dough balls and roll it out until it’s about ⅛ to ¼ inch thickness. Do this on a lightly floured surface or roll the dough between two sheets of plastic wrap (for less mess).
- Use a small round cookie cutter (or anything with a roughly 2-inch shape) and cut the rolled dough. Place cut dough cookies on the baking tray. These cookies don't spread much so you can place them fairly close together.
- Bake cookies for 5 to 6 minutes. You can bake them longer if you want a crispier cookie. Once cookies are done, transfer to wire racks to cool completely.
For the Chocolate Topping:
- Place chocolate and coconut oil in a microwave-safe bowl or saucepan. Heat in the microwave in 20-second increments, stirring in between, until the chocolate melts. Then stir in the peppermint extract.
- Dip each cookie in melted chocolate and use a fork to remove them, gently tapping to remove any excess chocolate. Place it on a pan covered in waxed or parchment paper. Once the pan is filled, transfer it to the fridge so the chocolate will set. Optional: Add additional drizzles of chocolate after the first coat of chocolate has set.
- Once the chocolate has completely set, store finished cookies in an airtight container in the fridge for up to 7 days or in the freezer for up to 2 months.
Recommended Equipment

(The products above contain sponsored links to products we use and recommend)
Notes
The nutrition information shown is an estimate provided by an online nutrition calculator and should not be considered a substitute for a professional nutritionist’s advice.
Enjoy!
This post was originally published in 2019 and was updated to include new photos, new text, and an updated recipe in 2021.
I adore Thin Mint cookies. Chocolate and mint are one of those perfect taste combos, IMHO. I was the leader of my GS group (within the troop we had groups) and we were called The Green Panthers. Hey, it was 1973.! Sing, in a round: “Make new friends, but keep the old one is silver and the other’s gold.” ;-).
Will these be okay without vodka? I don’t drink.
Absolutely! (Please pardon the vodka pun!)
I think the vodka adds a bit of crispiness to the cookies, but they’ll be fine without it. Let me know how it goes!
These will be made! They look and sound delicious.
Whoa! I need to whip some of these up over the weekend for sure.
I have long been searching for a recipe such as this. I am happy I have found this. Thanks for posting…
So amazing!
Looks fabulous!
Mmm, we LOVE Thin Mints — definitely want to try these!