Vegan Ice Cream Sandwich
Make delicious vegan ice cream sandwiches with only 8 ingredients. Vegan ice cream and chocolate cookie sandwiches for your sweet cravings!

This post may contain affiliate links. Disclosure Policy
You'll also get even more vegan recipes delivered to your inbox every week!


This is the ultimate Vegan Chocolate Ice Cream Sandwich! Whether you’re a seasoned vegan or just dipping your toes into the delectable world of plant-based delights, this is a treat you won’t want to miss.
As a food blogger, one of my main missions is to show you that vegan recipes are not only easy but outrageously delicious.
Picture this: luscious vegan vanilla ice cream sandwiched between two heavenly, chewy, and oh-so-chocolaty vegan chocolate cookies. If that doesn’t get your mouth watering, I don’t know what will!
In this Post
Ingredients & Substitutions
You can find the full printable recipe, including ingredient quantities, below. But first, here are some explanations of ingredients and steps to help you make this recipe perfect every time.
- Ice Cream — I used my dairy-free vanilla ice cream (it’s so easy to make!), but you can also change up the flavors. Try using this creamy vegan chocolate ice cream. Or how about this dairy-free banana nice cream? Go with your gut for the flavors that work for you.
- Butter — To make the cookie base, we’ll begin with some softened vegan butter. You can substitute coconut oil.
- Sugar — I prefer to use granulated sugar, but you can also use brown sugar.
- Vanilla — We’ll add some vanilla extract for the best cookie flavor.
- Flour — I use all-purpose flour, but I oftentimes will substitute whole wheat flour. You can also use gluten-free flour formulated for baking.
- Cocoa powder — I prefer to use Dutch-processed baking powder to create that dark cookie sandwich. However, you can substitute natural cocoa powder.
- Baking powder — We’ll add a bit of baking powder to make the cookies soft.
- Salt — A little bit of salt enhances the sweetness of the cookie batter.
- Milk — We’ll add nearly a cup of plant-based milk to the cookie dough. I used soy milk, but just about any dairy-free milk will work.

How to Make Vegan Ice Cream Sandwiches
- Spread softened ice cream in a container roughly half the size of your baking pan and then freeze.
- Make the cookie dough.
- Spread the batter in the prepared pan.
- Bake and then cool completely on a wire rack.
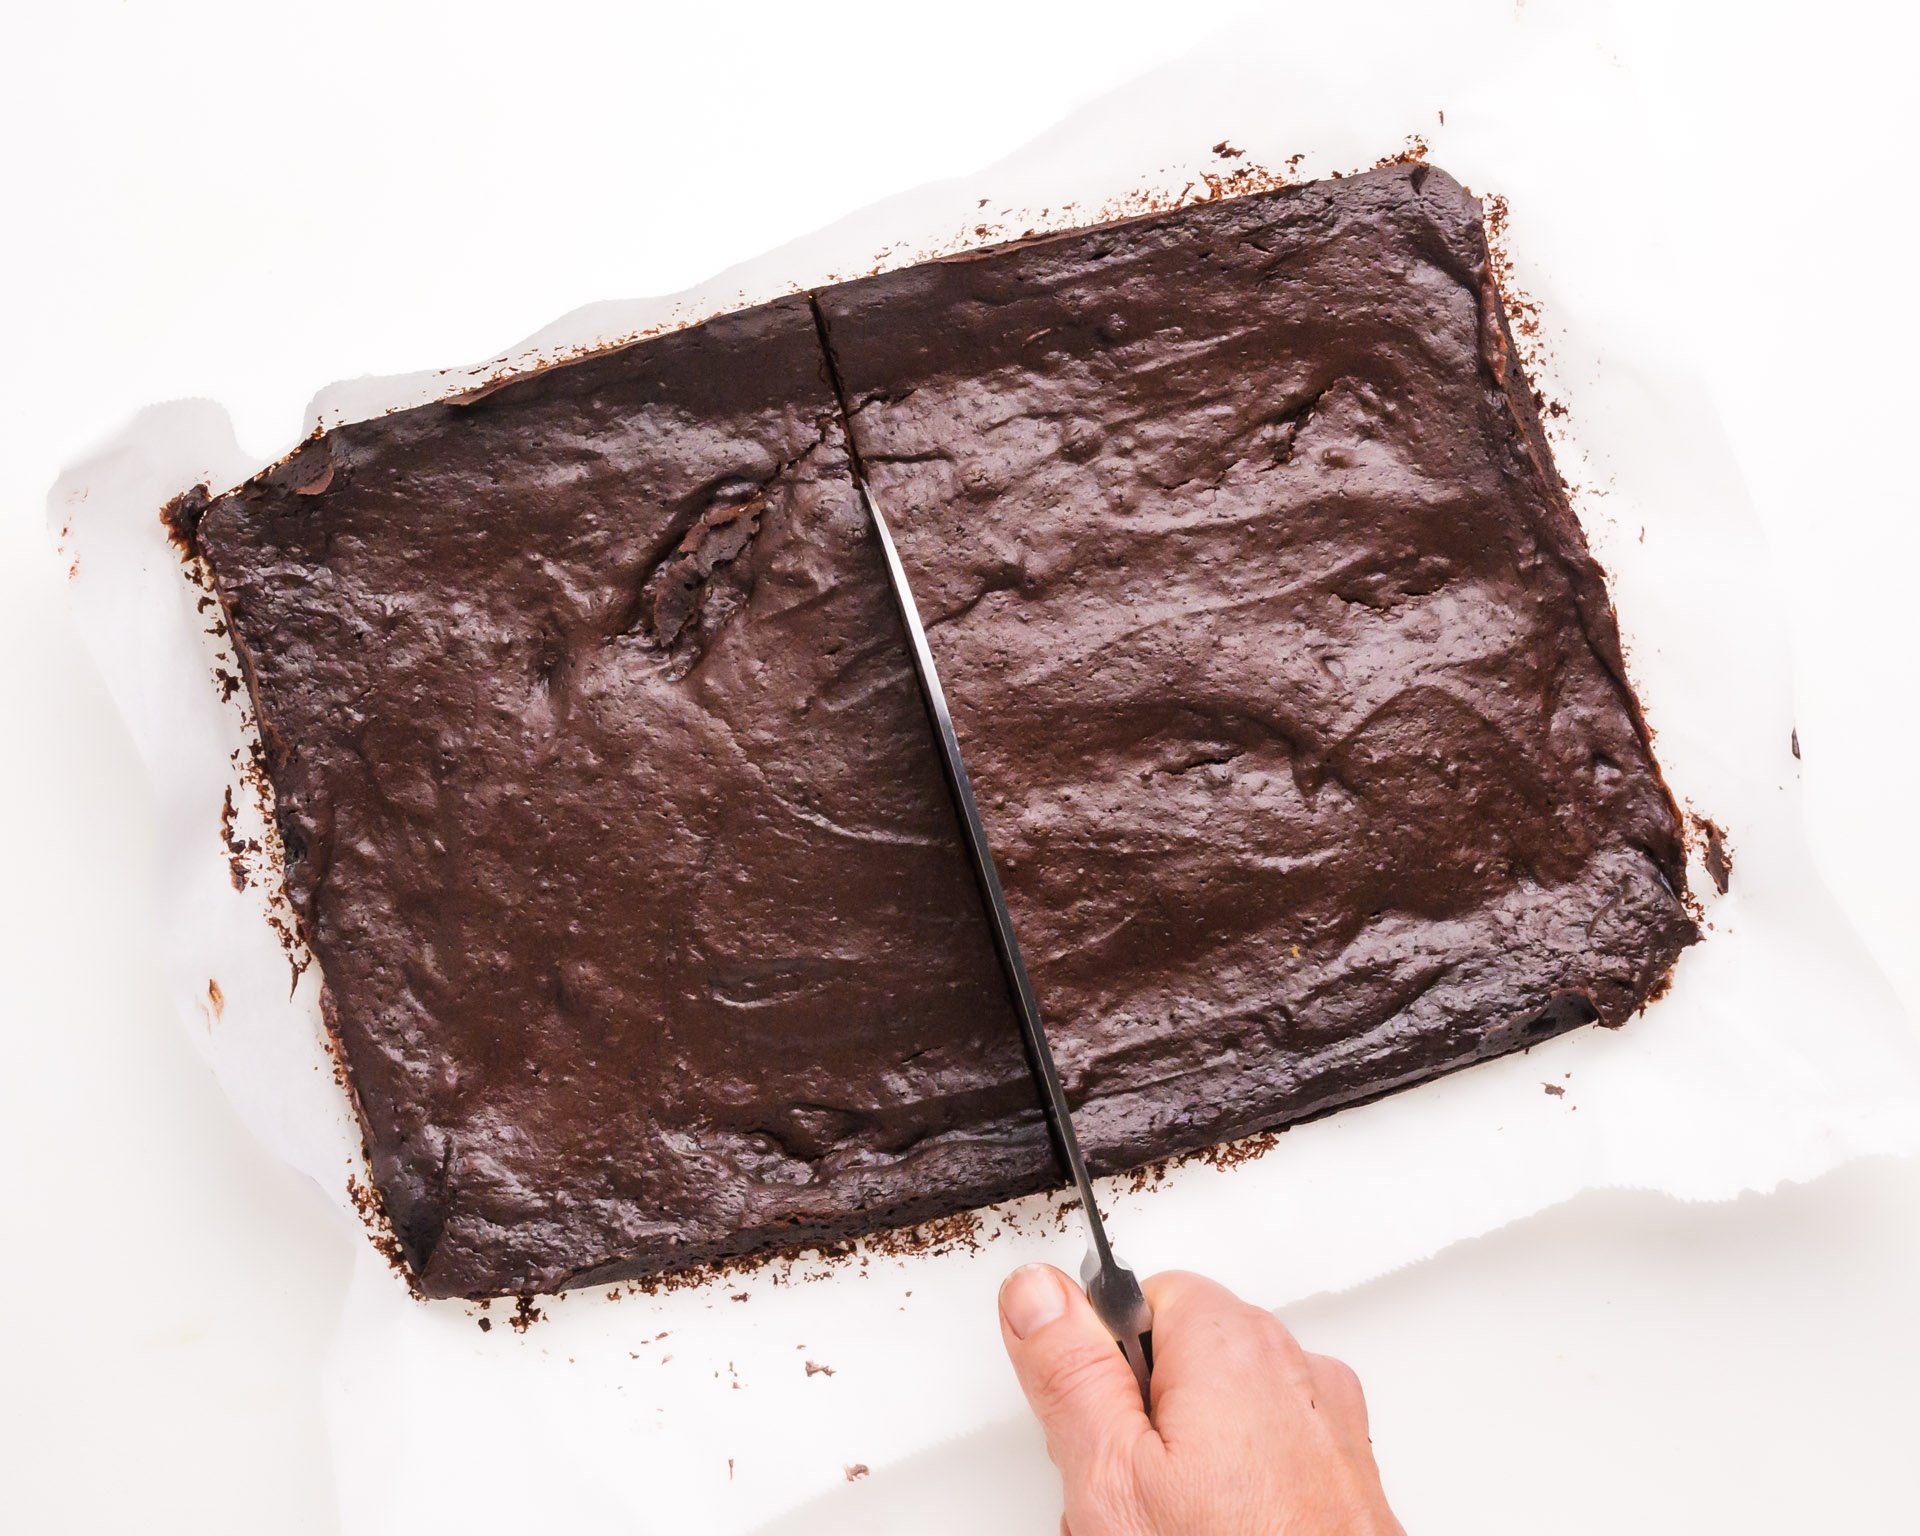
- Transfer the cooled cookie base to a cutting board and cut it in half.
- Add the ice cream on top of one of the pieces and top with the second cake.
- Trim any excess ice cream from around the edges.
- Gently press the top layer down into the ice cream to create a seal.
- Cover with plastic wrap and freeze for 2 to 3 hours (or up to overnight).
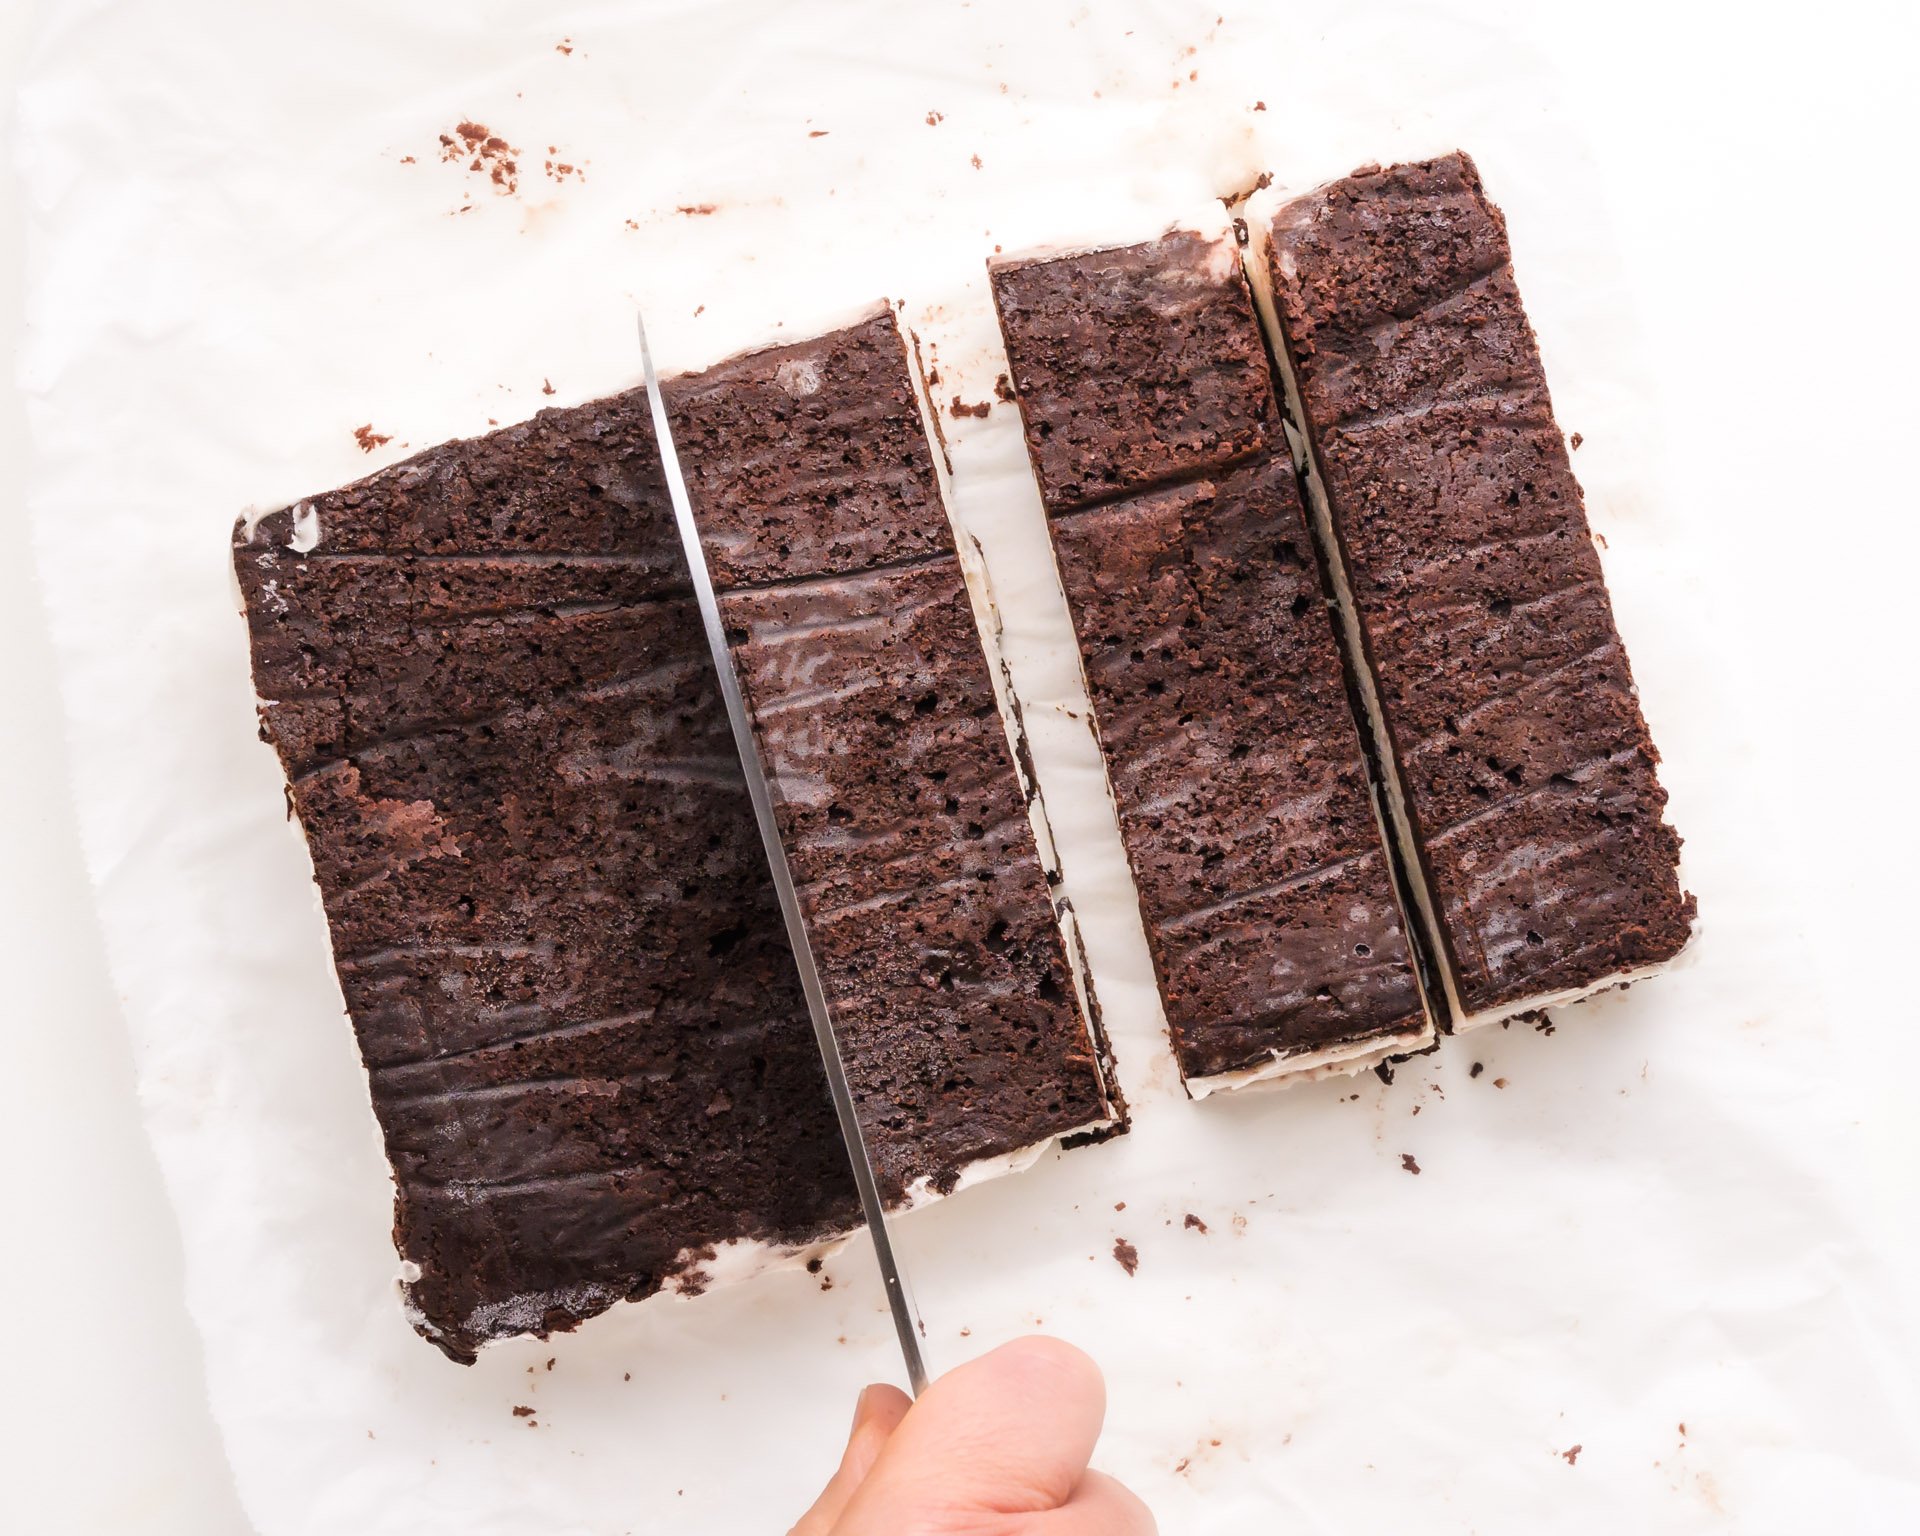
- Once frozen, cut the treats into sandwiches.
What Makes This Recipe Shine?
- HOMEMADE — Making ice cream sandwiches yourself means you get to customize the flavors, from the cookie base to the ice cream, and even the toppings!
- EASY — This recipe is made with only eight ingredients, keeping it simple and fun to make!
- FAVORITE — Everyone loves these frozen treats, from kids to kids at heart!
Frequently-Asked Questions
Are there gluten-free options for the cookie part of the ice cream sandwich?
Absolutely! You can easily make gluten-free vegan ice cream sandwiches by using a gluten-free flour blend in place of regular all-purpose flour.
How do I store these vegan ice cream sandwiches to keep them from becoming too hard in the freezer?
Keep your ice cream sandwiches from firming up too much in the freezer by wrapping them in parchment or wax paper before placing them in a freezer-safe bag or container. This extra layer insulates the treats. Let it sit at room temperature for a few minutes to soften slightly before indulging.
Serving Suggestions
While a vegan ice cream sandwich is a treat in itself, these delightful serving suggestions can make your experience even better:
- Drizzle with Chocolate Sauce: Warm up some vegan chocolate sauce and drizzle it over your ice cream sandwich for an extra layer of rich, gooey goodness.
- Chocolate Shell — Dip your sandwiches in dairy-free chocolate magic shell mixture. Crunchy, sweet chocolate makes every frozen dessert better!
- Crushed Oreo Crumbs: Roll the sides of your ice cream sandwich in crushed Oreo crumbs to add a delightful crunch and extra flavor.
- Chopped Nuts: Crushed peanuts or pecans provide a nutty texture and flavor to contrast the creamy ice cream.
- Caramel Drizzle: A generous drizzle of dairy-free caramel sauce makes for a perfect balance of sweet and salty.
- Sprinkles on Top: Roll the sides of the ice cream sandwich in any number of toppings, such as ground cinnamon, cocoa powder, mini chocolate chips, or even sprinkles.
Mix and match these ideas to create your own ice cream sandwich masterpiece.
Storage Tips
Store sandwiches in freezer bags where they will keep in the freezer for up to 2 months. Individually wrapping sandwiches in parchment paper can help ensure better texture while frozen.
Subscribe and Get a Free Easy Vegan Recipes eBook

Plus our latest vegan recipes, delivered right to your inbox!
We won’t send you spam. Unsubscribe at any time.

Vegan ice Cream Sandwich
You’ll also get even more vegan recipes delivered to your inbox every week!
Ingredients
- 3 – 4 cups vegan vanilla ice cream
Cookie Base
- ½ cup vegan butter, softened
- ¾ cup sugar
- 1 teaspoon vanilla extract
- 1 cup all-purpose flour
- ¾ cup unsweetened cocoa powder
- ½ teaspoon baking powder
- ½ teaspoon salt
- ¾ cup plant-based milk
Instructions
- Remove the ice cream from the freezer to soften (around 30 minutes). Line a rectangle container roughly half the size of a 9×13 baking pan (I used a rectangle storage container) with parchment paper and spread the soft ice cream in the pan. Use a spatula to create an even layer of ice cream. Place this in the freezer.


For the Cookie Base:
- Preheat oven to 350°F/175°C. Line a 9×13 inch baking pan with parchment paper, leaving some paper hanging over both sides.
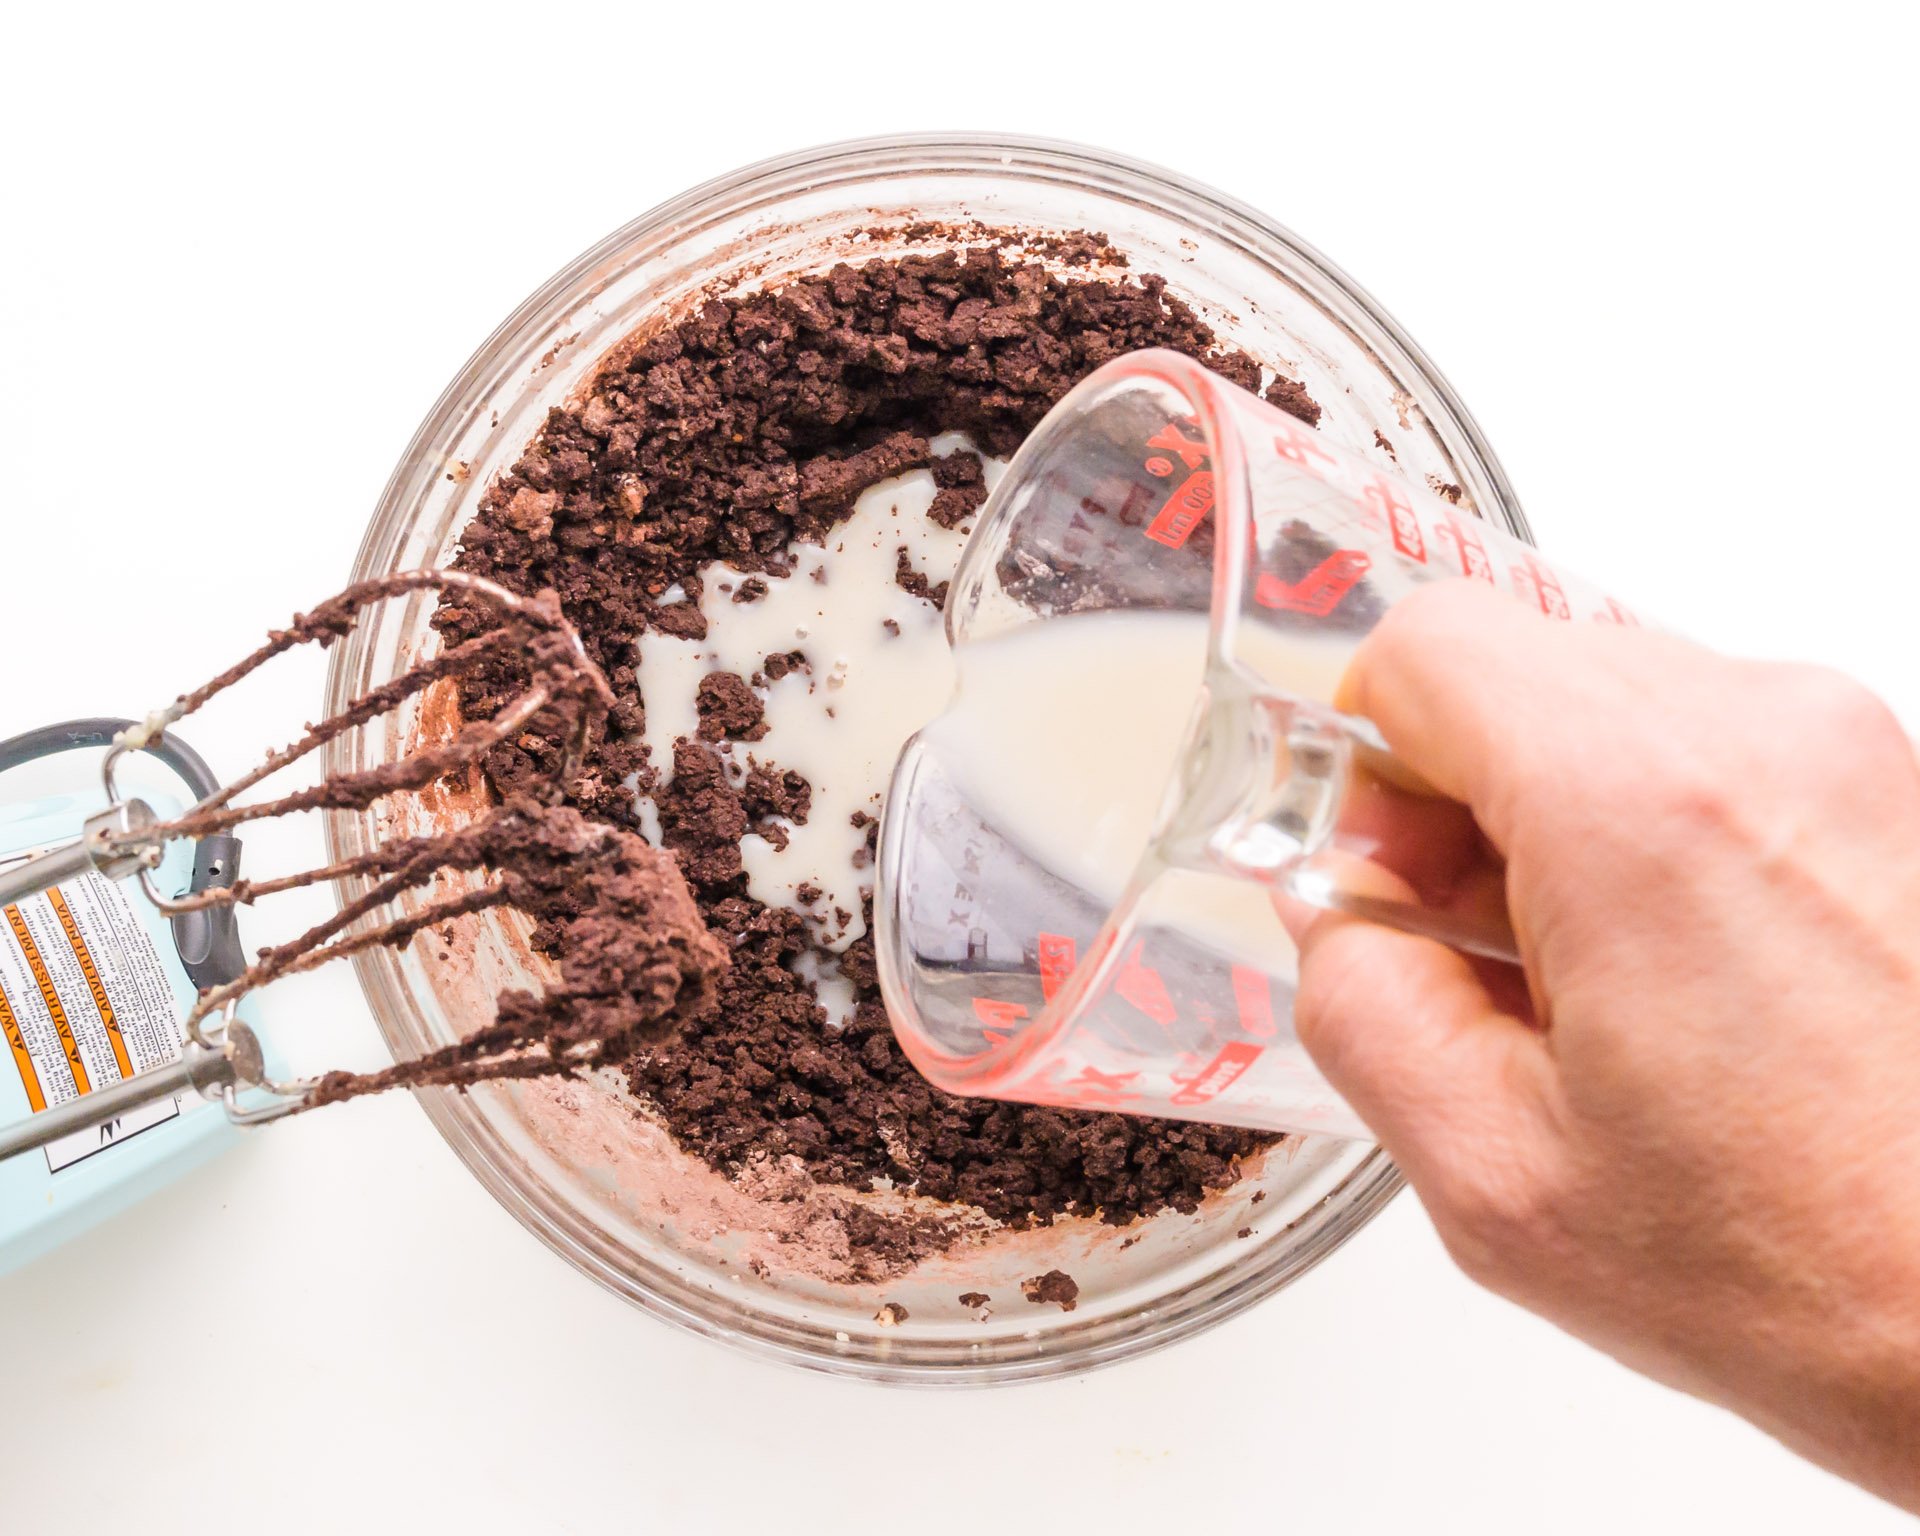
- Mix vegan butter, sugar, and vanilla with an electric mixer until light and fluffy.
- Stir together dry ingredients, from the flour to the salt.
- Add dry ingredients to the mixer and mix on medium speed until combined. This will be crumbly.

- Gradually mix in the plant-based milk. Continue mixing until combined.

- Use a spatula to spread the batter in the prepared pan. Bake for 10 to 15 minutes. Leave this in the pan and allow it to cool for several minutes. Use the parchment paper to lift it from the pan and cool completely on a wire rack.


Assembling the Sandwiches:
- Transfer the cooled cookie base to a cutting board and cut it in half to create two 9×6 1/2" cakes. Add the ice cream on top of one of the pieces and top with the second cake. Trim any excess ice cream from around the edges.

- Gently press the top layer down into the ice cream to create a seal. Cover with plastic wrap and freeze for 2 to 3 hours (or up to overnight).
- Once frozen, cut the treats into 10 sandwiches using a knife dipped in warm water (for cleaner slices).

- Store sandwiches in freezer bags where they will keep in the freezer for up to 2 months.
(The products above contain sponsored links to products we use and recommend)
Notes
Nutrition
The nutrition information shown is an estimate provided by an online nutrition calculator and should not be considered a substitute for a professional nutritionist’s advice.
More Vegan Ice Cream Recipes
If you love this recipe for vegan ice cream sandwiches, here are more vegan frozen favorites to try:


These vegan ice cream sandwiches are a perfect summer dessert. Feel free to unleash your inner creative and customize them with your favorite vegan ice cream flavors and toppings!
About the Author
Hi! I’m Marly McMillen. I’m the founding editor, author, recipe developer, vegan home chef, and food stylist behind Namely Marly. I’m so grateful to you and every member of my audience for your support and dedication. More about Namely Marly ›

Delicious treat for a summer day!