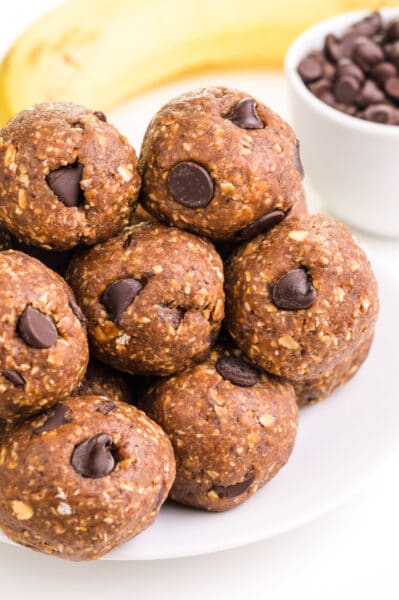
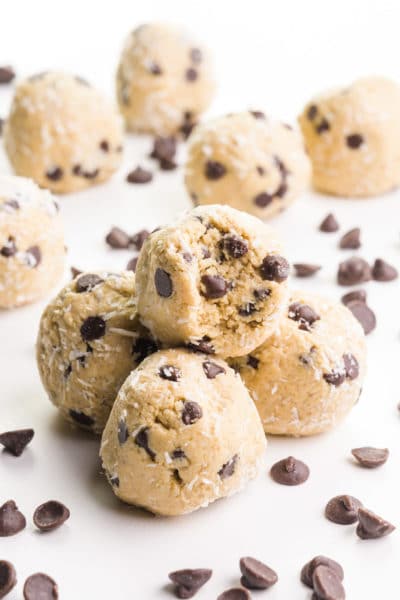
Birthday Cake Protein Balls
![]() by Marly McMillen
by Marly McMillen
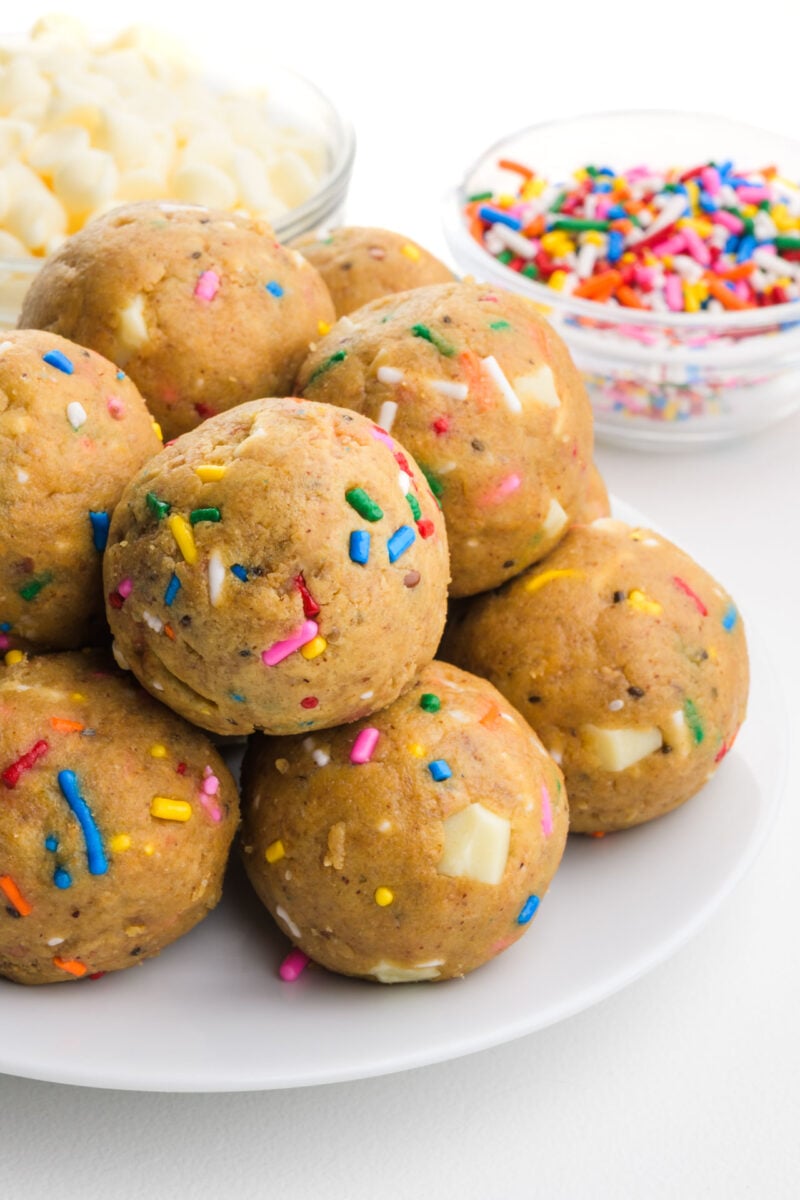
Satisfy your sweet tooth with these 10-minute Birthday Cake Protein Balls. A healthy, sprinkle-filled treat that tastes just like edible cake batter. Gluten-free, dairy-free, and meal-prep friendly!
This post may contain affiliate links. Disclosure Policy
You'll also get even more vegan recipes delivered to your inbox every week!
Let’s be honest: most protein snacks taste like flavored cardboard, and finding a “healthy” treat that actually satisfies a cake craving feels impossible. This Birthday Cake Protein Balls recipe changes that. You’re going to get a soft, fudge-like bite that tastes like birthday cake batter but with zero refined sugar and a hefty dose of plant-based protein.
And there’s more!
I’m sharing my “Silk-Fold Secret” technique and a quick troubleshooting guide from my test kitchen to ensure your protein balls are never dry or crumbly.

My Favorite Cake Loophole
Is there anything more nostalgic than the smell of vanilla cake batter? To be honest, I’ve always been the person who thinks the unbaked dough is the best part of making a cake.
But since we can’t exactly walk around snacking on raw flour all day, I’ve found the ultimate loophole: Birthday Cake Protein Balls.
These little bites are a total lifesaver when that 3:00 PM sweet tooth hits. They taste like a festive, sprinkle-filled celebration, but they’re packed with plant-based protein to actually keep you fueled.
Whether you’re meal-prepping for a busy week or just need a ‘just because’ treat, these are about to become your new favorite no-bake obsession!
In this Post
What are Cake Balls?
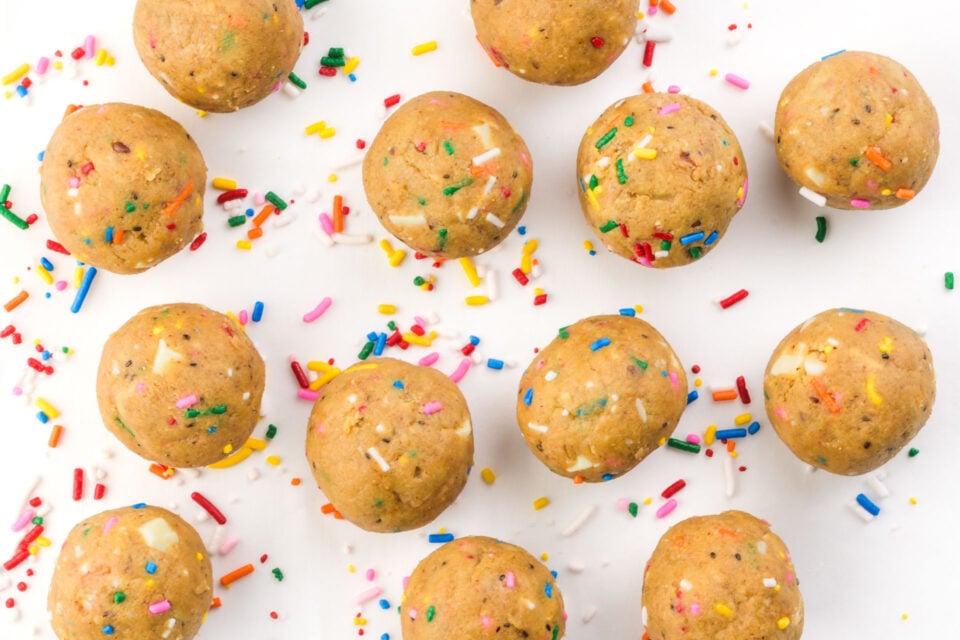
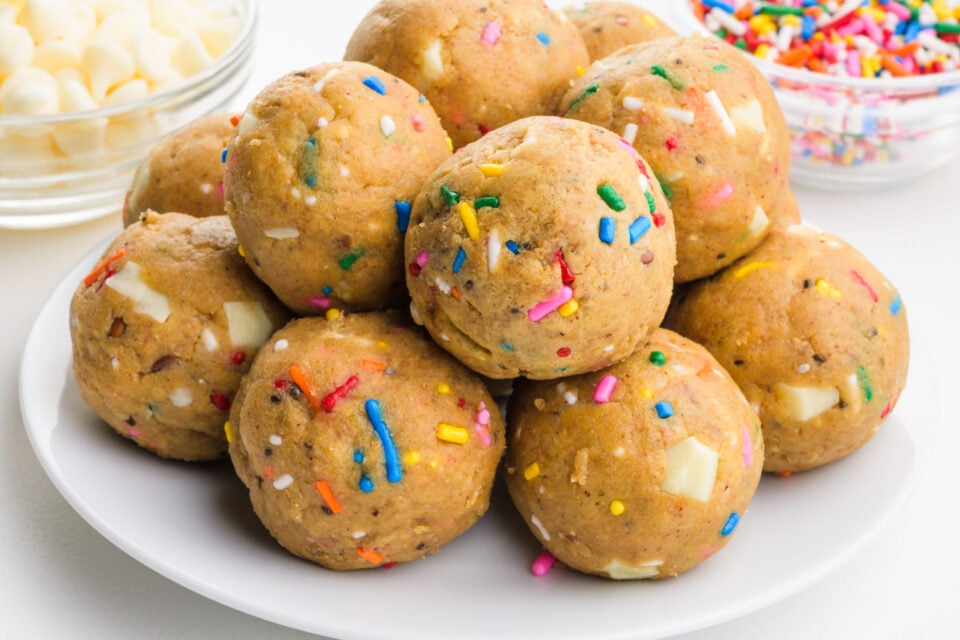
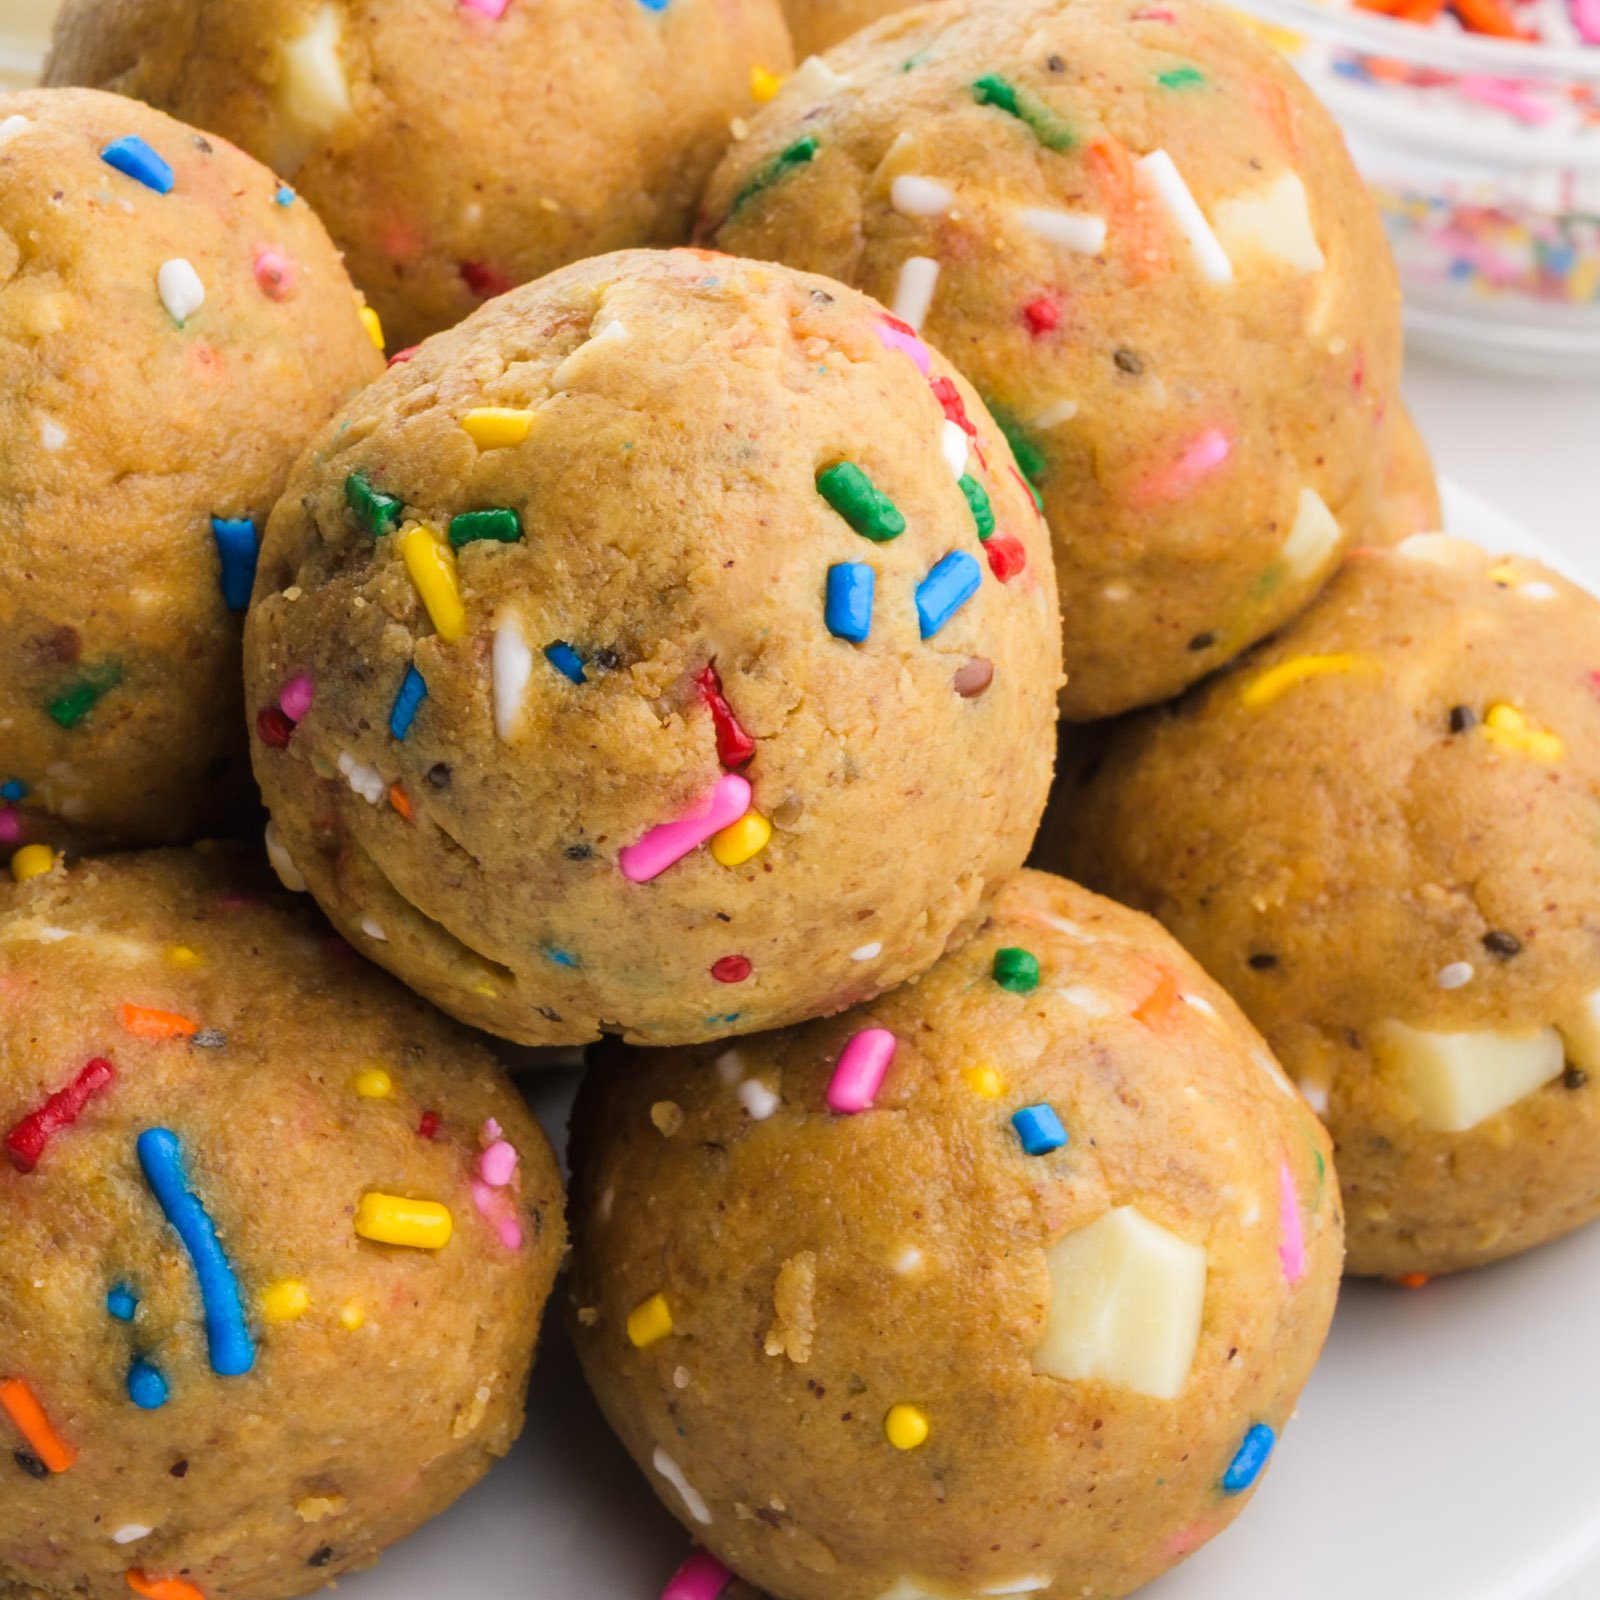
Birthday Cake Protein Balls are a no-bake, plant-based snack made with almond flour, vanilla protein powder, cashew butter, and maple syrup. To make them, simply whisk the dry ingredients, stir in the wet ingredients until a dough forms, fold in sprinkles, and roll into balls. They are gluten-free, dairy-free, and meal-prep friendly.
Ingredients & Substitutions
You can find the full printable recipe, including ingredient quantities, below. But first, here are some explanations of ingredients and steps to help you make this recipe perfect every time.
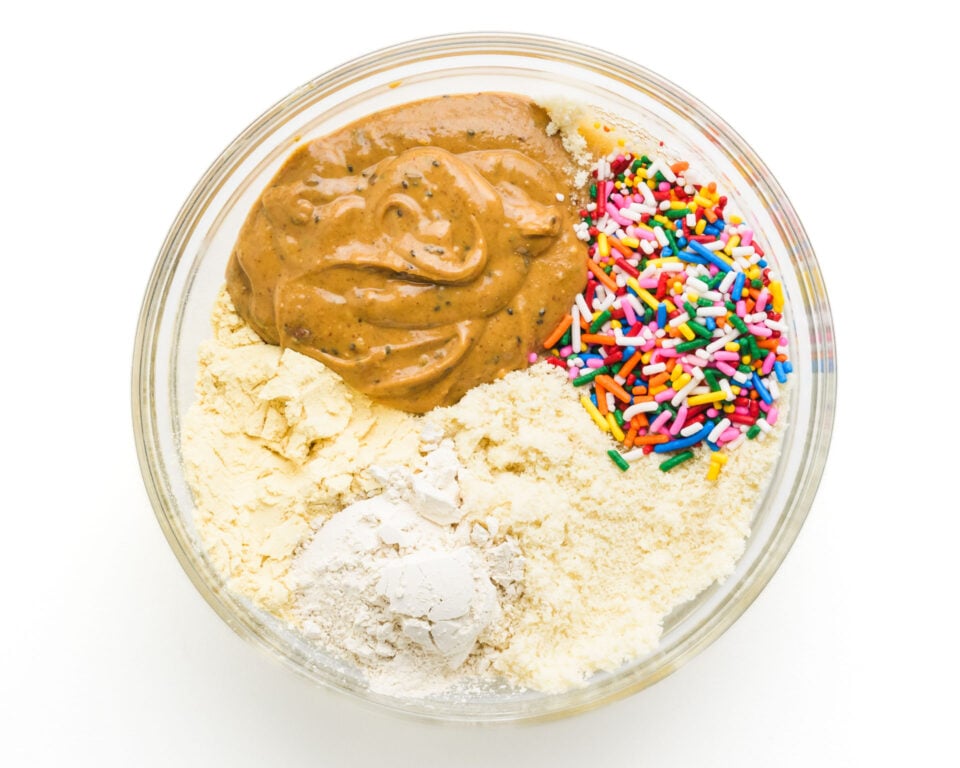
- Almond Flour — This provides the “cakey” base. Make sure to use superfine blanched almond flour rather than almond meal to keep the texture smooth. If you have a nut allergy, oat flour is a great swap.
- Vanilla Protein Powder — I recommend a plant-based blend (like pea or brown rice protein). Different brands absorb moisture differently, so if your dough feels too dry, just add a splash more milk!
- Cashew Butter — This is the secret to that “cake batter” flavor because it’s so mild and creamy. You can use almond butter, but it will have a slightly more toasted nut flavor.
- Maple Syrup — A little goes a long way for sweetness and helps bind the balls together. You could also use agave nectar.
- Vanilla & Almond Extract — Vanilla is a must, but a tiny drop of almond extract is what truly creates that nostalgic birthday cake taste.
- Sprinkles — Use “jimmies” (the long ones) for the best color pop inside the dough. If you’re looking for a natural option, look for dye-free sprinkles!
How to Make Birthday Cake Protein Balls
Making these protein bites is incredibly simple, but there is a specific order of business that ensures they stay moist and fudgy rather than crumbly.
1. Whisk the Base
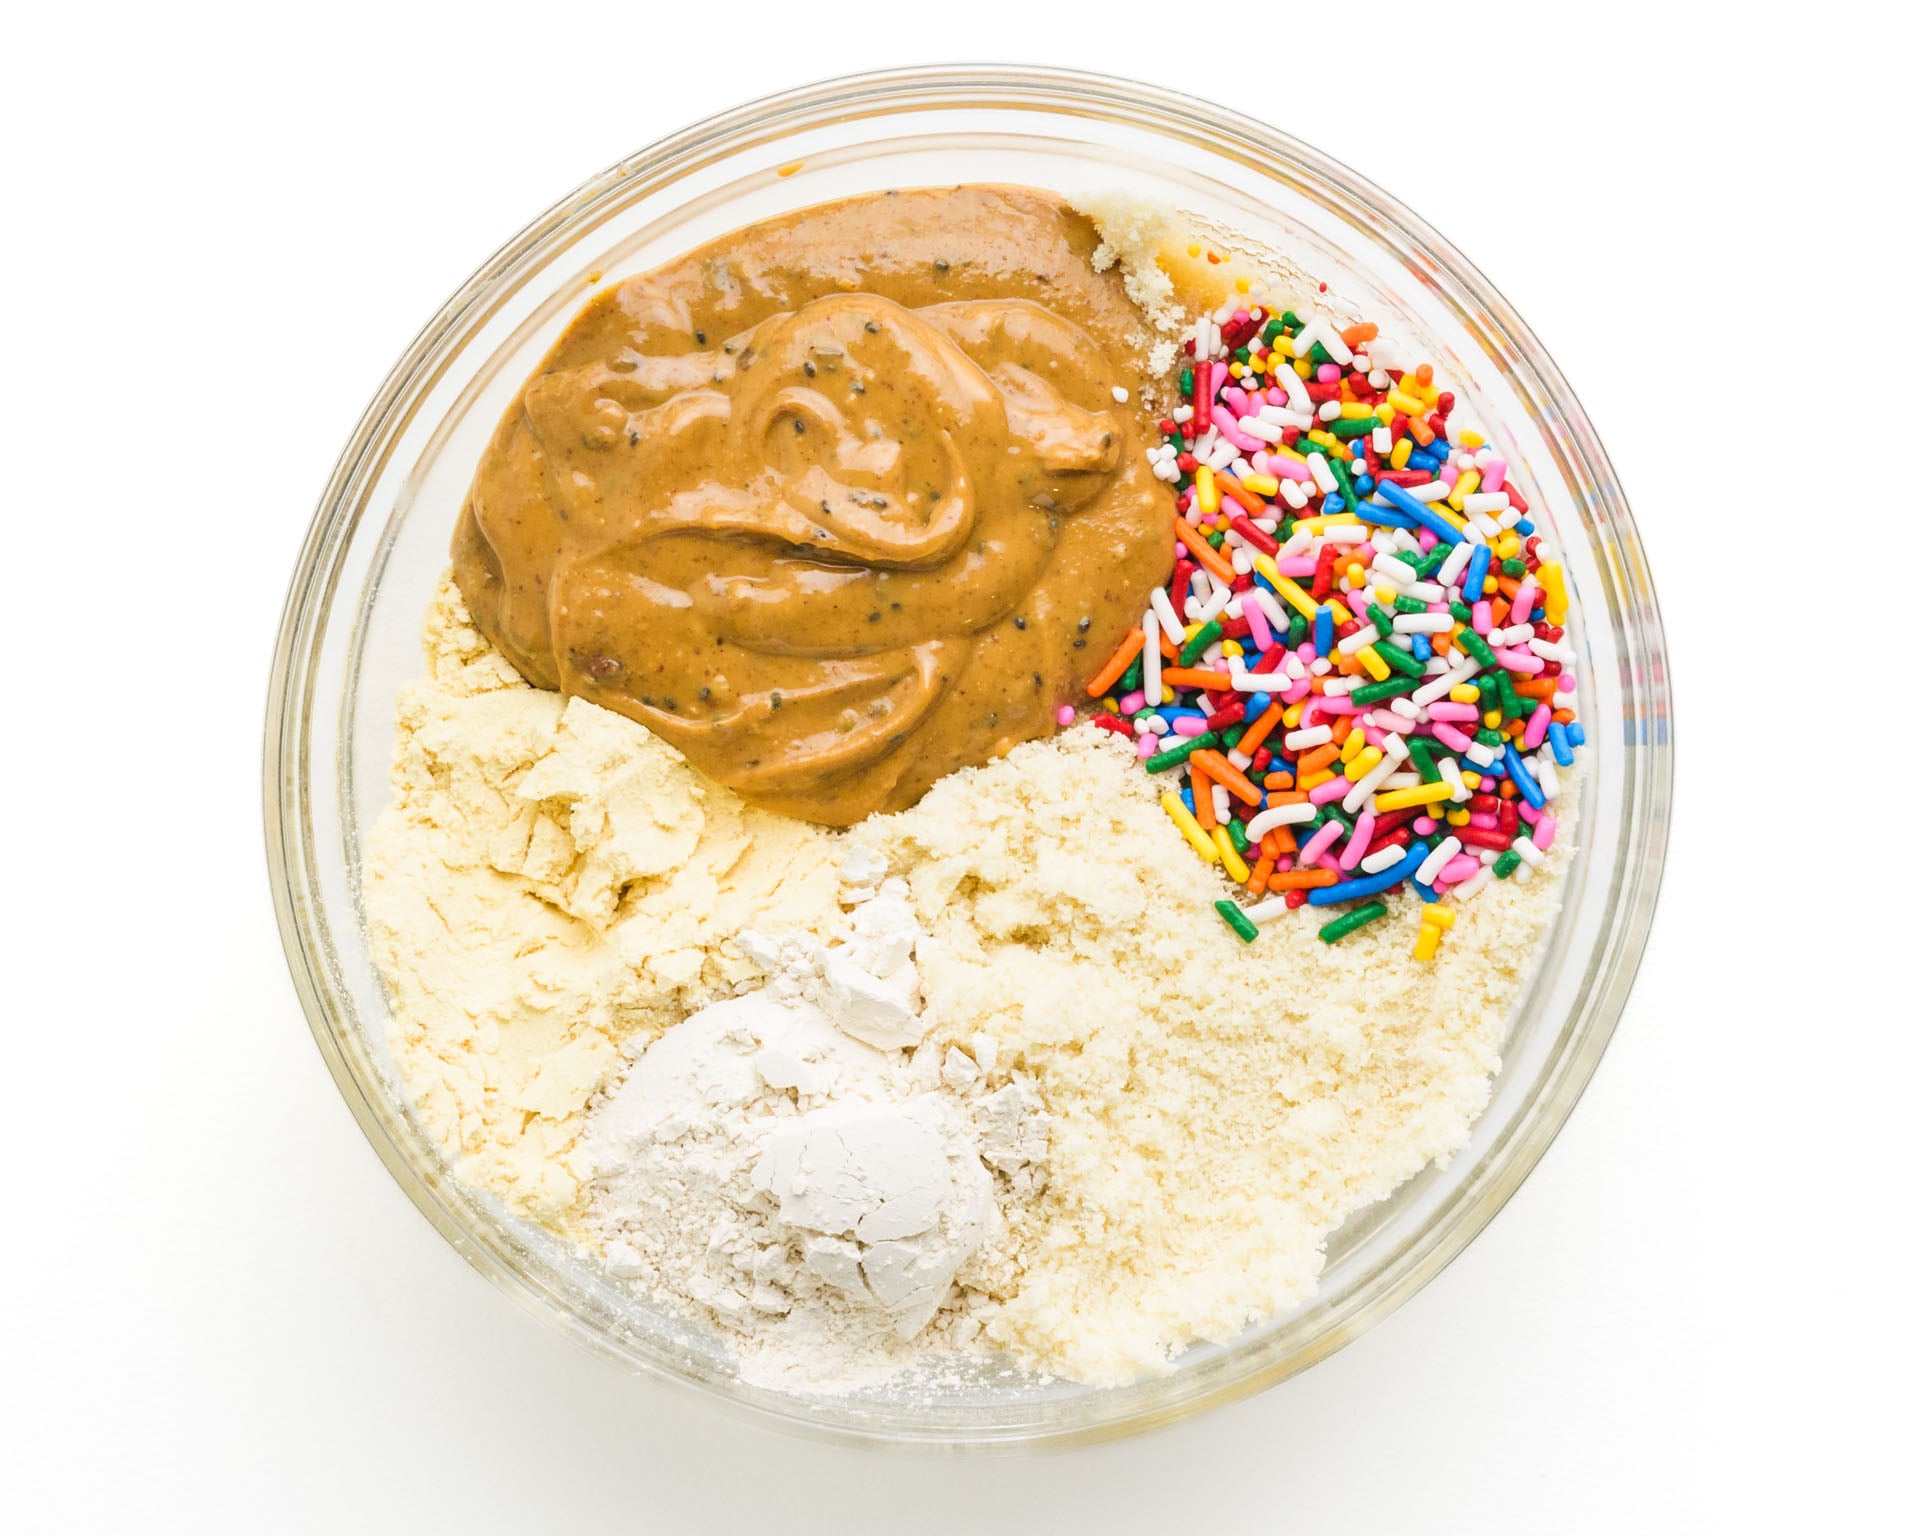
Start by whisking your almond flour and protein powder in a medium bowl. Don’t skip the whisking! Protein powder tends to clump, and you want a uniform “flour” before you add any moisture.
2. Add the Aromatics & Fats
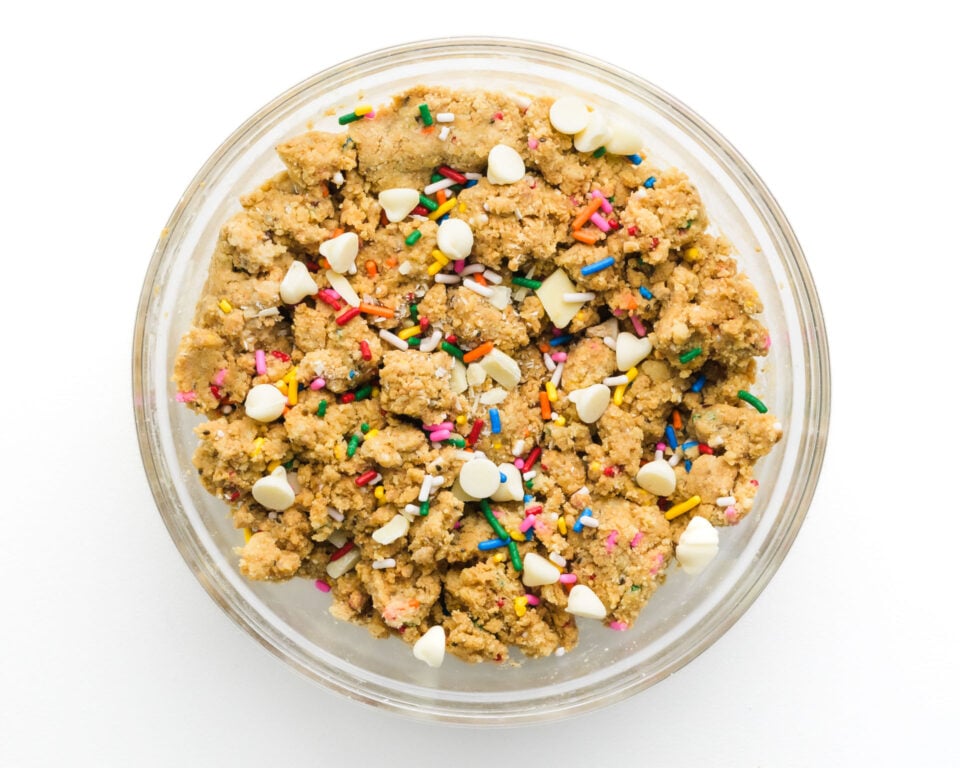
Stir in your cashew butter, maple syrup, and those essential vanilla and almond extracts. At this stage, the mixture will look very dry and crumbly—don’t panic! This is exactly where it should be.
3. The Silk-Fold Secret
This is the most important part of the recipe. Instead of dumping in all your milk at once, add it one tablespoon at a time. Mix thoroughly after each addition until a soft, scoopable dough forms that holds its shape when you press it between your fingers.
This “Silk-Fold” method prevents the dough from becoming a sticky mess or staying too dry to roll.
4. Fold and Roll
Gently fold in your sprinkles. I like to do this last so the colors don’t bleed into the dough too much.
To chip or not to chip?
I like adding a couple of tablespoons of white chocolate chips, but this is purely optional. In fact, I only add them when I have them on hand.
Now comes the fun part!
Use a cookie dough scoop to doll evenly-sized portions and roll them between your palms into smooth balls.
Marly’s Recipe Test Kitchen
I’ve made a lot of protein balls in my time (hello, coconut protein balls), and I’ve learned that a few small tweaks can make the difference between a “meh” snack and a “wow” treat. Here are my top findings from the test kitchen:
1. The “Moisture Match”
Not all protein powders are created equal! Some plant-based blends (especially those with a high pea protein content) act like a sponge. If your dough is still crumbly after the initial mix, don’t be afraid to add an extra teaspoon or two of milk.
Hint: You’re looking for a texture that feels exactly like chilled playdough.
2. Why Cashew Butter?
I tested this with peanut butter and almond butter as well. While they both work, cashew butter is the undisputed winner for that authentic “cake batter” flavor. It’s naturally sweeter and more neutral, allowing the vanilla and almond extracts to really shine.
3. The Chill Factor
You can eat these immediately (I usually do!), but if you want that true fudge-like consistency, let them hang out in the fridge for at least 20 minutes. This gives the almond flour time to hydrate, resulting in a much smoother bite.
4. Making it “Extra”
Want to take these over the top? Try rolling the finished balls in a shallow bowl of extra sprinkles or a little sparkling sugar for a true celebration look.
Storage & Freezing Tips
The best part about this recipe is that it’s perfect for meal prep! You can make a double batch on Sunday and have “cake” all week long. Here is how to keep them fresh:
- To Refrigerate: Store your protein balls in an airtight container in the fridge. They will stay fresh and fudgy for up to one week. I personally think they taste best when they’ve had a chance to chill!
- To Freeze: If you want to keep them longer, these freeze beautifully. Place them in a freezer-safe bag or container for up to two months.
- Pro Tip: If you’re eating them from the freezer, let them sit at room temperature for about 5–10 minutes before biting in. This brings back that softness we all love.
Subscribe and Get a Free Easy Vegan Recipes eBook
Plus our latest vegan recipes, delivered right to your inbox!
We won’t send you spam. Unsubscribe at any time.
Birthday Cake Batter Protein Balls
You’ll also get even more vegan recipes delivered to your inbox every week!
Ingredients
- 1 cup almond flour
- ½ cup vanilla protein powder
- ½ cup cashew butter
- 3 tablespoons maple syrup or favorite syrup sweetener
- 1 teaspoon vanilla extract
- ¼ teaspoon almond extract
- 2 tablespoons oat milk
- 3 tablespoons sprinkles
- Optional: 2 tablespoons white chocolate chips (Earth Balance makes dairy-free white chocolate chips)
Instructions
- In a medium mixing bowl, whisk together the almond flour and protein powder until evenly combined (this prevents protein powder clumps).1 cup almond flour, ½ cup vanilla protein powder
- Add the cashew butter, maple syrup, vanilla extract, and almond extract (if using). Stir with a spoon or spatula—it will be thick and crumbly at first.½ cup cashew butter, 3 tablespoons maple syrup, 1 teaspoon vanilla extract, ¼ teaspoon almond extract

- Use the Silk-Fold Secret: Drizzle in 1 Tbsp of non-dairy milk at a time, mixing thoroughly after each addition until a soft, scoopable "dough" forms that holds together when pressed. This ensures the perfect texture—never too dry or too sticky!2 tablespoons oat milk
- Fold in the sprinkles (and white chocolate chips if using) gently so they don’t break apart too much.3 tablespoons sprinkles

- Scoop out tablespoon-sized portions and roll into balls with your hands. If the dough sticks, lightly wet your hands or dust with a tiny bit of oat flour/protein powder.
- Optional: Roll the balls in extra sprinkles for a funfetti look.
- Place on a parchment-lined plate or tray. Refrigerate for 20–30 minutes to firm up (they’re edible right away but taste even better chilled).
- Store in an airtight container in the fridge for up to 1 week or freeze for up to 2 months.

Recommended Equipment
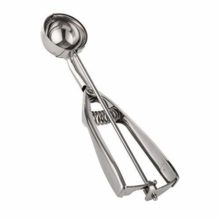
(The products above contain sponsored links to products we use and recommend)
Notes
- The Silk-Fold Secret (Texture): If the dough feels too dry or sandy, add more milk 1 teaspoon at a time. If it’s too sticky to roll, add 1 tablespoon of almond flour. You’re aiming for a “chilled playdough” consistency.
- Protein Powder Choice: For the best “cake” flavor, use a vanilla plant-based blend. If you have a Birthday Cake flavored powder, use it here to double down on that nostalgic taste!
- Make it No-Nut: To make these nut-free, swap the almond flour for heat-treated oat flour and the cashew butter for sunflower seed butter.
- Nutrition Note: Estimates are per ball and will vary based on the specific protein powder and nut butter brands you choose.
Nutrition
The nutrition information shown is an estimate provided by an online nutrition calculator and should not be considered a substitute for a professional nutritionist’s advice.
More Vegan Protein Recipes
If you love this recipe for cake batter protein balls, here are more plant-based protein favorites to try:

Frequently-Asked Questions
Why are my protein balls dry and crumbly?
This usually happens if your protein powder is highly absorbent or if the measurements were a bit off. Use the Silk-Fold Secret: add oat milk one teaspoon at a time and mix thoroughly until the dough reaches a “chilled playdough” consistency. If they are already rolled and seem dry, you can actually break them back down, add a tiny bit of nut butter or milk, and re-roll them!
Can I use Whey protein instead of plant-based protein?
You can, but keep in mind that whey protein is not dairy-free, and it is typically less absorbent than plant-based options like pea or brown rice protein. If you use whey, you will likely need much less milk (or perhaps none at all) to get the right consistency. Start with the dry ingredients and nut butter first, then only add milk if the dough won’t hold its shape.
How do I stop the sprinkles from bleeding into the dough?
The trick is to fold the sprinkles in very gently at the very last second. If you over-mix, the moisture from the maple syrup can cause the dye in the sprinkles to streak. For the best “pop” of color, use rainbow “jimmies” (the rod-shaped ones) rather than nonpareils (the tiny round beads), as jimmies tend to hold their color better.
About the Author
Hi! I’m Marly McMillen. I’m the founding editor, author, recipe developer, vegan home chef, and food stylist behind Namely Marly. I’m so grateful to you and every member of my audience for your support and dedication. More about Namely Marly ›