Vegan Crème Brûlée


This easy vegan crème brûlée recipe is everything you want in a creamy, decadent dessert. Make this crème brûlée without eggs for a simple but elegant dessert! This plant-based dessert is easier than the traditional recipe and uses only 7 ingredients.
Drizzle some blueberry sauce over the top for an even more dramatic presentation and flavor.

Vegan Crème Brûlée
Growing up in a super small town, I would not have pictured myself oohing and ahhing over a vegan crème brûlée recipe. And yet… here I am. This deliciously creamy custard recipe comes with a crispy burnt sugar topping that makes this dessert sing!
The contrast between that crispy topping and the creamy custard in this vegan coconut creme brulee is nothing short of spectacular. It surges this simple vegan dessert into another hemisphere!
Making a crème brûlée vegan may seem like an affront to die-hard French dessert connoisseurs, but I’m here to tell you, it’s the only way to go! The thing is dairy-free crème brûlée is still just as creamy but it’s ready without even baking.
What Makes This Recipe Shine?
- Using full-fat coconut milk makes this dessert rich and creamy
- Adding raw cashews impacts the flavor and texture of this dish
- Using a tiny pinch of turmeric adds a hint of golden color.

Key Ingredients
You can find the full printable recipe, including ingredient quantities, below. But first, here are some explanations of ingredients and steps to help you make this recipe perfect every time.
Here are the ingredients you’ll need for this recipe, including substitution ideas:
- Coconut milk — We’ll use full-fat canned coconut milk (it should have 12+ grams of fat)
- Arrowroot powder — This is a thickener, and you can substitute others, like cornstarch.
- Nutritional yeast flakes — There’s a bit of nutritional yeast flakes for color and flavor.
- Ground turmeric — There’s a pinch of ground turmeric for color.
How to Make Vegan Creme Brûlée
It may seem complicated to make this healthy crème brûlée recipe, but of course, you might think that about any creamy dessert with a fancy, French name. Trust me, this recipe is easy!
In fact, I think making vegan crème brûlée is easier than the standard recipe. Because you don’t have to crack eggs, or worry about bacteria in your kitchen from said eggs, or temper the egg yolks, or ensure the eggs are cooked adequately.
See? This vegan crème brûlée is easier.
So, let’s get started.
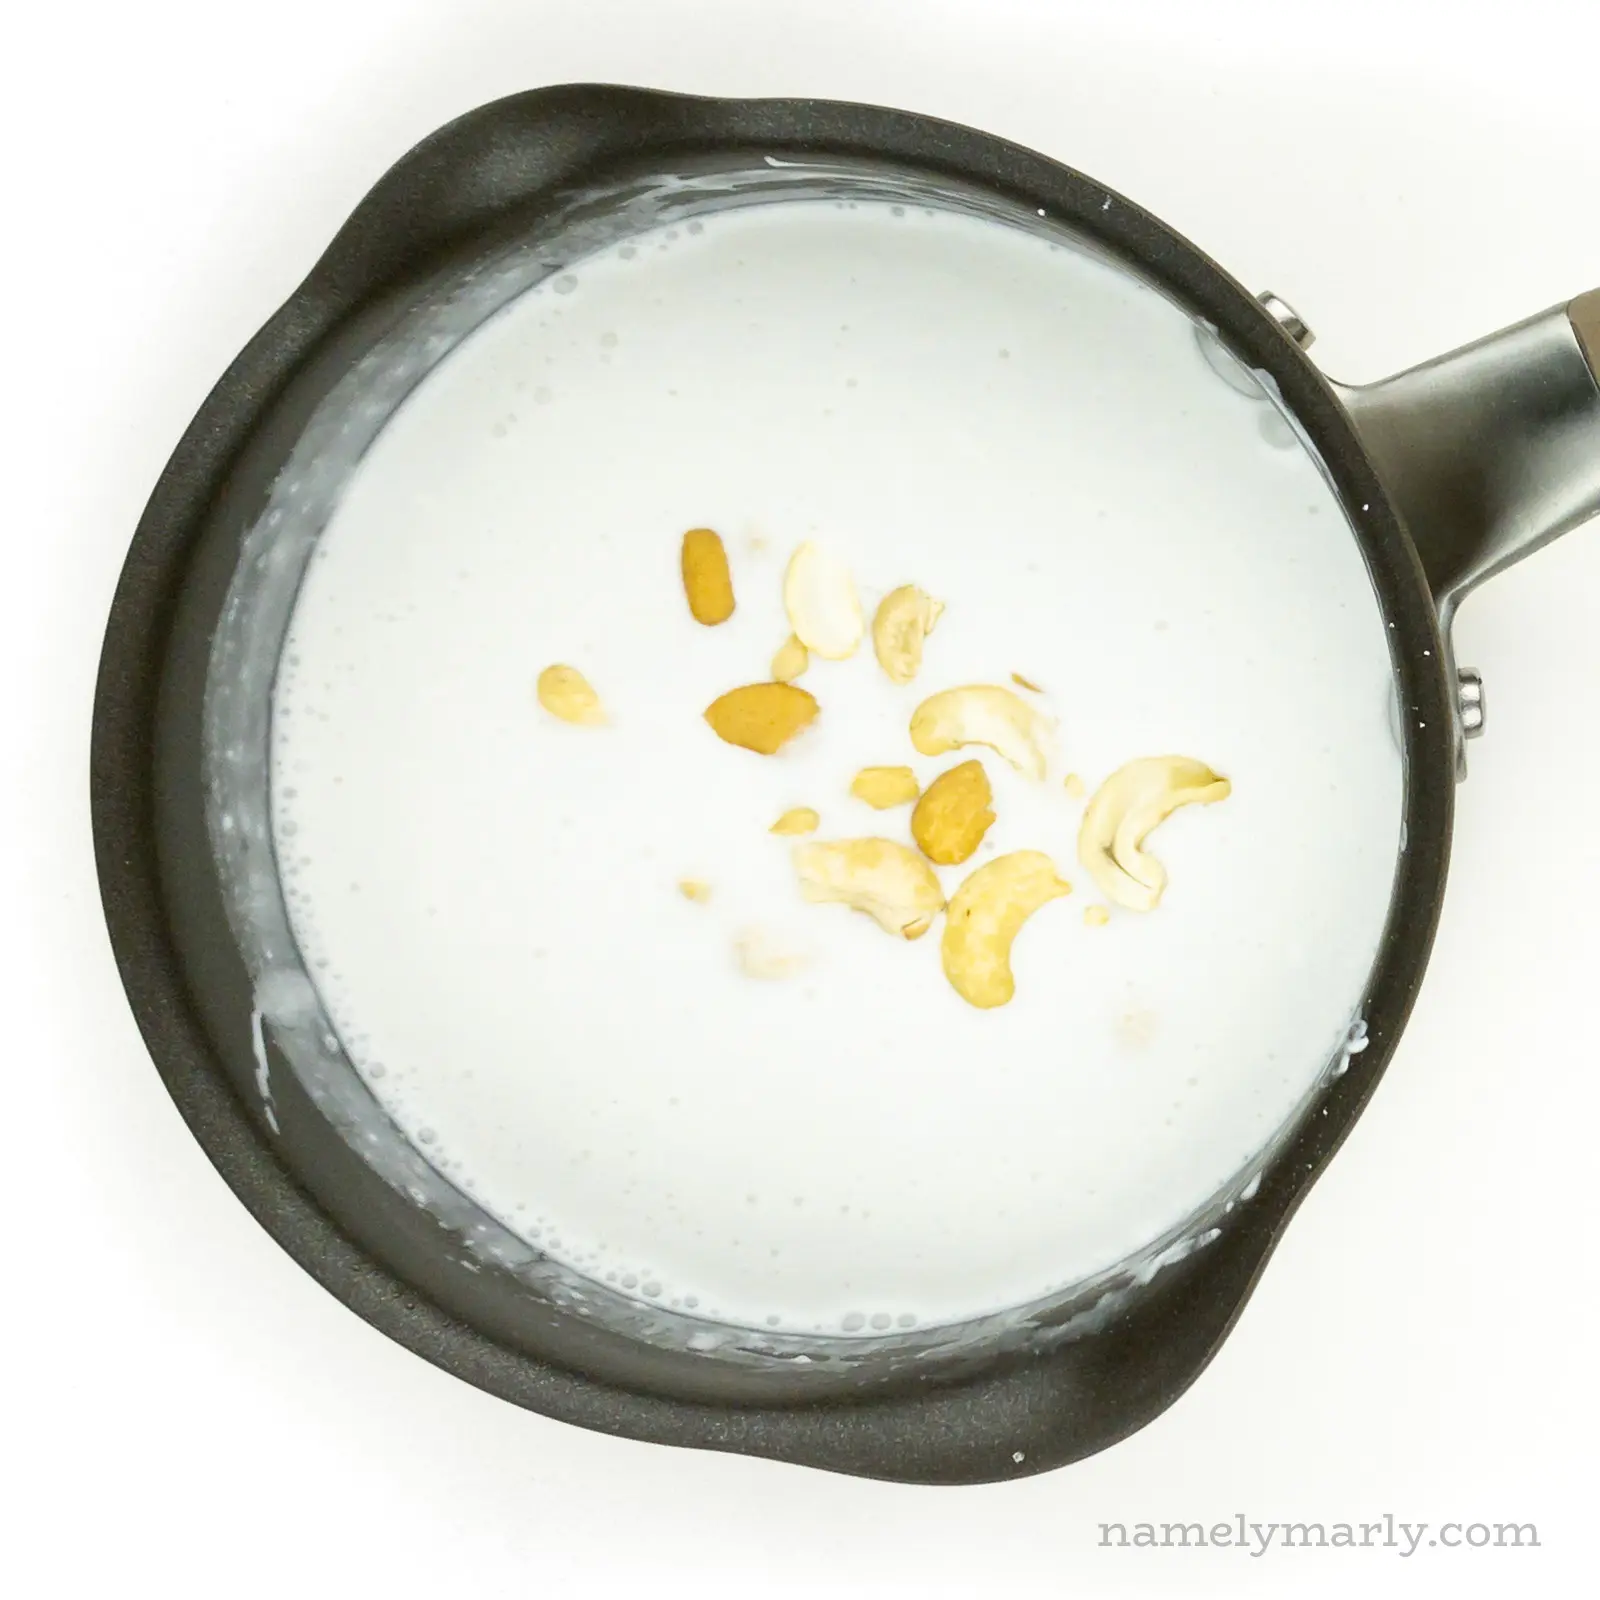
- Make the cream base by simmering the coconut milk, arrowroot powder, sugar, and cashews in a saucepan while stirring for about 5 minutes.
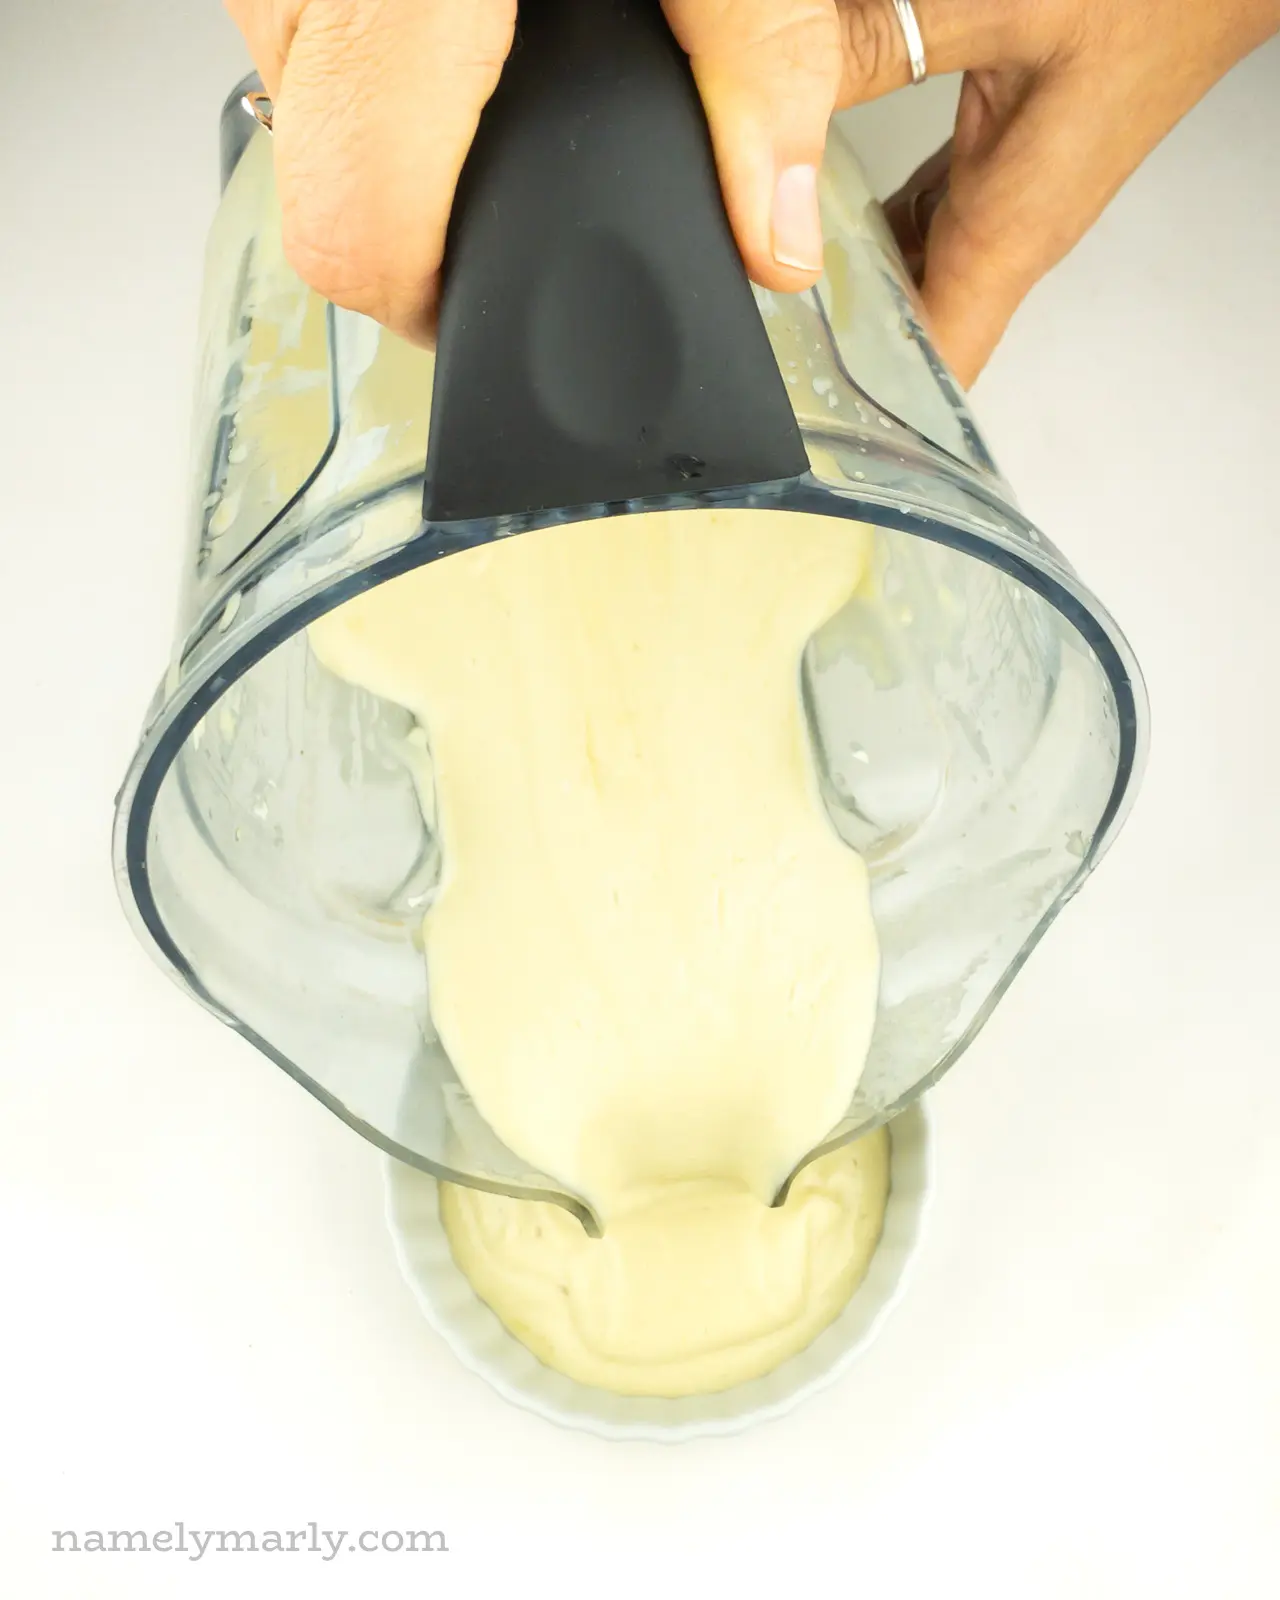
- Blend the cream base with nutritional yeast flakes, vanilla, and turmeric until creamy.
- Pour the cream into brûlée dishes or ramekins.
- Chill the brûlée in the fridge for 2 hours.
- Sprinkle the top of each dish with granulated sugar.
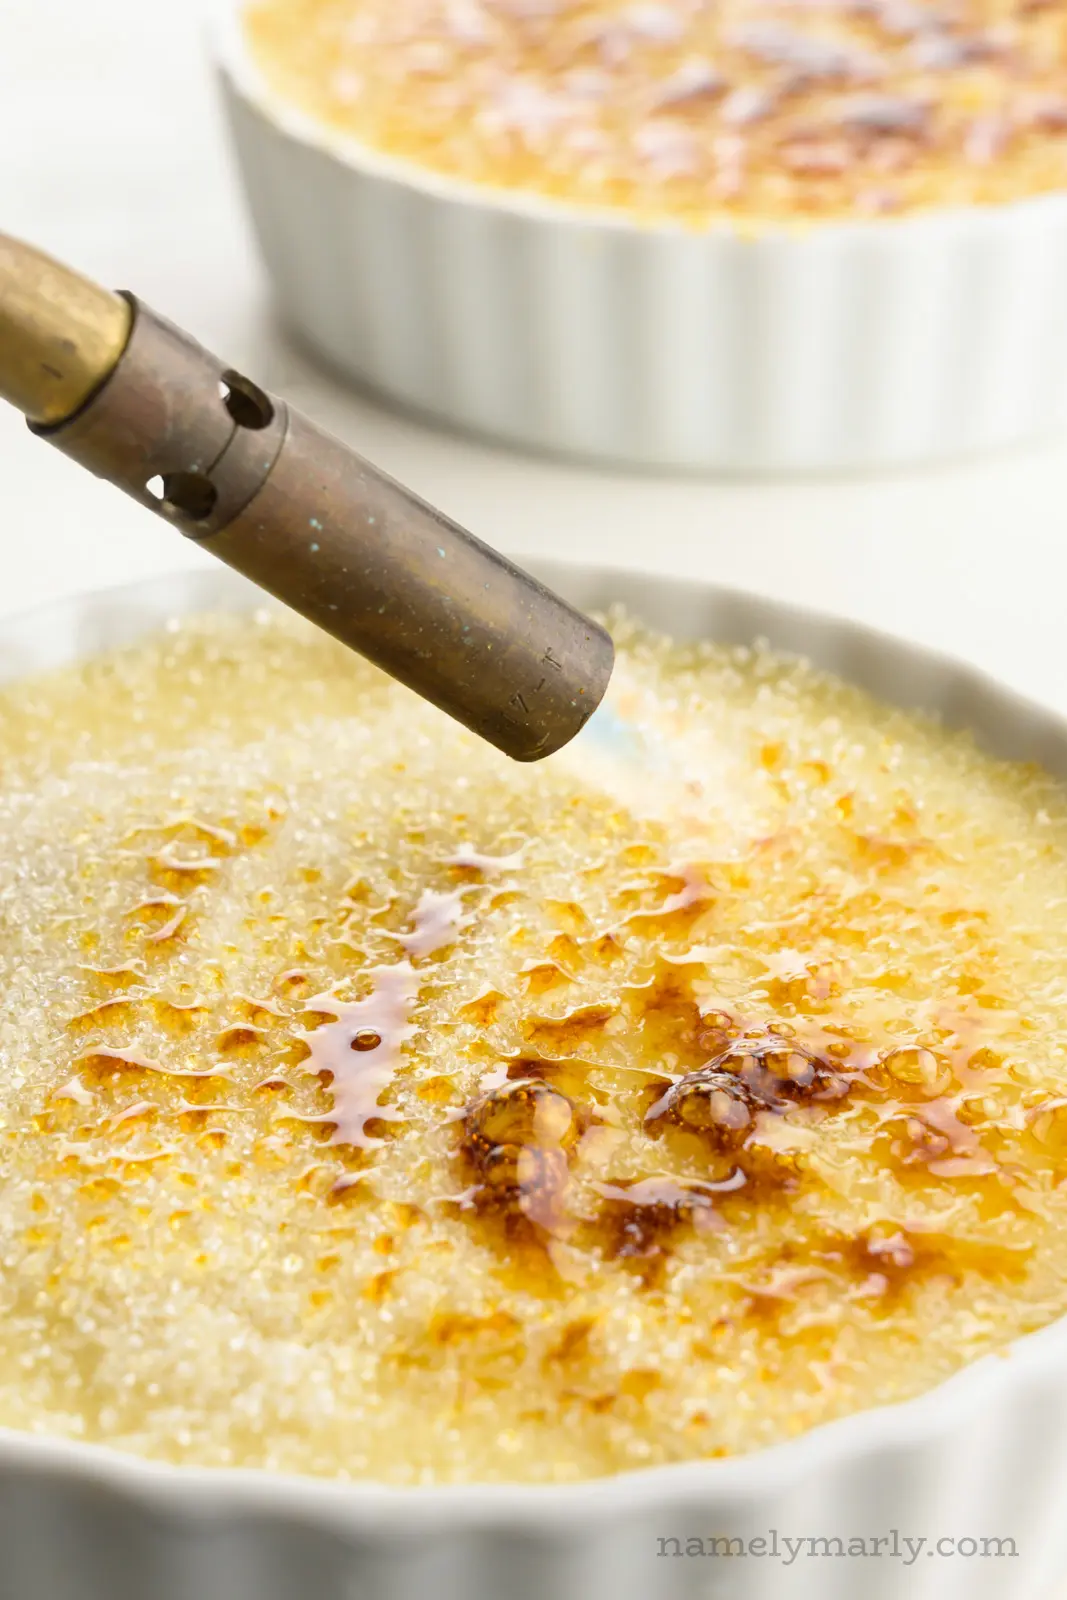
- Make the burnt sugar topping by suing a kitchen torch to carmelize the sugar and create a crispy top coating.
- Serve immediately or refrigerate for up to an hour before serving.
Here are more detailed, step-by-step instructions for this vegan creme brûlée:
Step One: Bring Coconut Milk and Cashews to a Simmer
Add the coconut milk, arrowroot powder, and cashews in a small saucepan. Use a spatula and stir to combine. Bring it to a simmer over medium heat, stirring occasionally. Cook it for 1 minute, then remove it from heat. Don’t worry about lumps if they occur. We’ll take care of that in the next step.
Step Two: Blend & Chill
Add the cream mixture to a high-speed blender. You can use a food processor here, but to get the creamiest texture, a blender works best.
Add the yeast flakes, vanilla, and turmeric. Blend for a few seconds, then use a spatula to push ingredients down from the side of the blender jar. Blend again until smooth.
Blending Hot Liquid
- Allow the liquid to cool slightly.
- Never fill a blender more than half-way with hot liquid.
- Remove the center cap from the blender lid.
- Place a towel over the top of the blender lid.
- Blend until smooth.
Pour the vegan brûlée into 4 brûlée dishes or ramekins. Place them in the fridge to set for at least 2 hours up to overnight (it gets creamier as it chills).
Step Three: Burnt Sugar Topping for Serving
Brûlée actually means burnt. This requires a kitchen power tool — bring on the kitchen torch!
So, before serving, cover the entire surface of the brûlée with a thin layer of sugar. Use a kitchen torch to carmelize the sugar and create a crispy top coating. Let the sugar sit for a few minutes (so the sugar isn’t too hot), then serve it immediately or refrigerate it for up to an hour before eating it.
Don’t have a kitchen torch? Use your oven broiler to burn the sugar. Move the oven rack to the highest position. Heat up the broiler so it’s very hot. You won’t achieve the same golden color as with a torch, but this works. I’ve also read that a grill lighter (the ones with a long wand) can burn the sugar topping, too.
Marly’s Tips
Use these expert tips to make this vegan crème brûlée perfect every time:
- The texture of crème brûlée is more like Greek yogurt than a true custard, so serving this dish after it chills will let it thicken properly.
- Add up to 1/4 cup cocoa powder to the milk mixture to make vegan chocolate crème brûlée (and leave out the ground turmeric).
- Traditional crème brûlée is served in ramekins to ensure they cook evenly. Of course, that’s not an issue here because we’re not baking it. You can serve this in any dish you want, but I love the “traditional” look of ramekins.
- I used plain granulated sugar for the topping and it works just fine!
That burnt-sugar, crackly topping on a cashew creamy custard creates such a simple, elegant dessert.
Reader Reviews
★★★★★
KM
WOW! Creme brûlée is a favourite dessert in my house and, since going plant-based, we’ve missed it dearly. Not any more! This is truly delicious, decadent, creamy, and wonderful. It’s also just so darned much easier to make than the “real” thing.
Frequently-Asked Questions
Is Creme Brûlée Vegetarian?
Although crème brûlée is technically a vegetarian dish, because it’s made with both milk and eggs, it is not considered vegan. However, it’s a very easy recipe to adapt to a vegan diet and tastes just as creamy and delicious!
What's the best coconut milk to use?
There are so many types and brands of coconut milk. Which ones are best? I recommend using full-fat coconut milk, regardless of the brand. To make sure you’re using full fat, simply check the label. It should indicate somewhere between 12 and 15g of fat. The amount of fat in each can vary, and this will have an impact on how creamy the custard is. It will take longer to set if there’s less fat in the can.
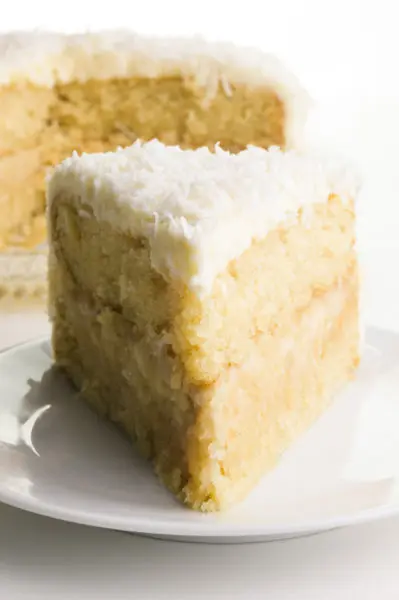
Fancy Vegan Desserts
If you love this vegan creme brûlée, you obviously like the finer desserts in life. Be sure to try these indulgent vegan desserts.

Subscribe and get a free Easy Vegan Recipes eBook
Plus our latest vegan recipes, delivered right to your inbox!

No-Bake Crème Brûlée
Ingredients
- 13.5 oz can coconut milk (see note)
- 1 tablespoon arrowroot powder
- ¼ cup granulated sugar
- ¼ cup raw cashews (not soaked cashews)
- 1 teaspoon nutritional yeast flakes
- 1 teaspoon vanilla extract
- 1 tiny pinch turmeric (for color)
- 4 tablespoons granulated sugar (for topping)
Instructions
- Scoop one cup of the fat from a can of chilled coconut milk, arrowroot powder, sugar, and cashews in a saucepan. Stir to combine. Bring to a simmer (low boil) over medium heat while stirring (this can take up to 5 minutes). Simmer for 1 minute. Remove from heat. Don't worry about lumps in the sauce if they occur.
- Add the cream mixture to a high-speed blender. Add the nutritional yeast flakes, vanilla, and pinch of turmeric (for color). Blend until creamy.
- Pour the cream into 4 brûlée dishes or ramekins (or 8 smaller containers). Place in the fridge to set for at least 2 hours to overnight (the longer it sits the thicker the cream will become).
- Before serving, sprinkle the top of each with approximately 1 tablespoon granulated sugar and make sure the entire surface of cream has sugar over it. Use a kitchen torch to carmelize the sugar and create a crispy top coating. Serve immediately or refrigerate for up to an hour before serving.
Recommended Equipment

(The products above contain sponsored links to products we use and recommend)
Video
Notes
For Chocolate Creme Brûlée
Add up to 1/4 cup cocoa powder to the milk mixture (and leave out the ground turmeric).Regarding Coconut Milk
Use full-fat coconut milk. The label should read between 13 and 15g of fat. The amount of fat in each can varies which will have an impact on how creamy the custard is. Keep your coconut milk in the fridge so the fat hardens. Then you can scoop the fat from the can. If your can has 1 cup of fat that’s good. If your can has less than 1 cup, use 1.5 tablespoons arrowroot powder.Make-Ahead Tips
To make ahead, prepare the custard and pour it into serving dishes. Cover tightly and refrigerate for up to 3 days before serving.Burning Sugar Options
Don’t have a kitchen torch? You can use your oven broiler to burn the sugar. Simply, move the oven rack to the highest rack in the oven. Heat up the broiler so it’s very hot. It helps if the custard itself is well chilled. Just be sure to set it out at room temperature for a few minutes so the ramekin doesn’t crack. You won’t achieve the same golden color as with a torch, but this works. I’ve also read that a grill lighter (the ones with a long wand) can burn the sugar topping as well. However, it seems like that would take a while so it may not be practical. Once the sugar coating is done, let it sit for a few minutes before eating it, so you don’t burn your mouth.The nutrition information shown is an estimate provided by an online nutrition calculator and should not be considered a substitute for a professional nutritionist’s advice.
This post was originally published in 2019 and was updated to include new photos, new text, and an updated recipe in 2021.
Holy wow this was amazing! in my opinion this trumps a traditional creme brulee any day! all my family loves it and dont notice a difference. Just wow! Love making this the day before so the custard is nice and chilly
Hi Brooke! I’m so glad you (and your family) loved this recipe. I’m with you — why in the world would a person want to go through the hassle of cooking this with eggs. The vegan version is SO easy! 🙂
I tried this recipe and it was very tasty, although I found it a bit too runny, and tasted a bit too much of coconut. I had taken the thickest part of the coconut milk ( let it sit in the fridge overnight first). What can I do to make it thicker? Add more arrowroot powder? How can I camouflage the coconut flavour more?
Hi Nicole. Thanks for your comment. If you prefer a thicker consistency, you can absolutely add a bit more arrowroot powder. As far as the flavor, you can add a bit more vanilla extract, or maybe even try vanilla paste or a scraped bean pod as the flavor can be a bit more potent.
Are you only adding the coconut fat that separates in the can? Or the coconut water too? Thanks!
Hi Abigail, The thickest part, the fat, is what gives the best consistency. I always reserve the water to use in a smoothie or other recipes.
This is my 2nd time making your recipe and OMG, it’s perfect. Thank you!!!
Full disclosure: this is my second time rating this recipe.
We make the vanilla version all the time but today tried the suggested chocolate version. We omitted the turmeric, and added a little less than 1/4 cup of Dutch-processed cocoa powder. It is AMAZING.
Thanks again for the great recipe!
I’m so glad you liked it and thanks for sharing your chocolate adaptations. I’ll add a note to leave out the turmeric when making it chocolate!
Amazing! It helped to freeze for 20 minutes, torch, then freeze again do they the texture was thicker. Tasted amazing! Also if you mess up and use coconut milk with low fat content, it won’t thicken… BUT you can freeze the mixture and have a delicious creme brûlée vegan ice cream
Hi Haydee. Great point about freezing it! IF the texture doesn’t thicken for whatever reason, freezing is an option!
Just wondering if this would be a freezable recipe? I love the idea of a plant based creme brûlée, but I WILL eat it all at once by myself!
Hi Heather! I totally know what you mean! If I have something in the freezer it takes me a little longer to work my way through it…rather than eating it all in one sitting! I have not tried freezing this one myself, but I absolutely would. I see no reason, based on ingredients, that it wouldn come out of the freezer with a different texture. So I recommend freezing it. Now I want to make it again to test this theory. Or maybe it’s just an excuse to make it again! 🙂
Just made this and shocked everyone on how good this really is. Gonna keep this one in my arsenal 🙂
Amazing taste like the real thing
Thanks, Tiffani!
WOW! Creme brûlée is a favourite dessert in my house and, since going plant-based, we’ve missed it dearly. Not any more!
This is truly delicious, decadent, creamy, and wonderful. It’s also just so darned much easier to make than the “real” thing.
I can’t say enough thank yous for this recipe.
Cheers!