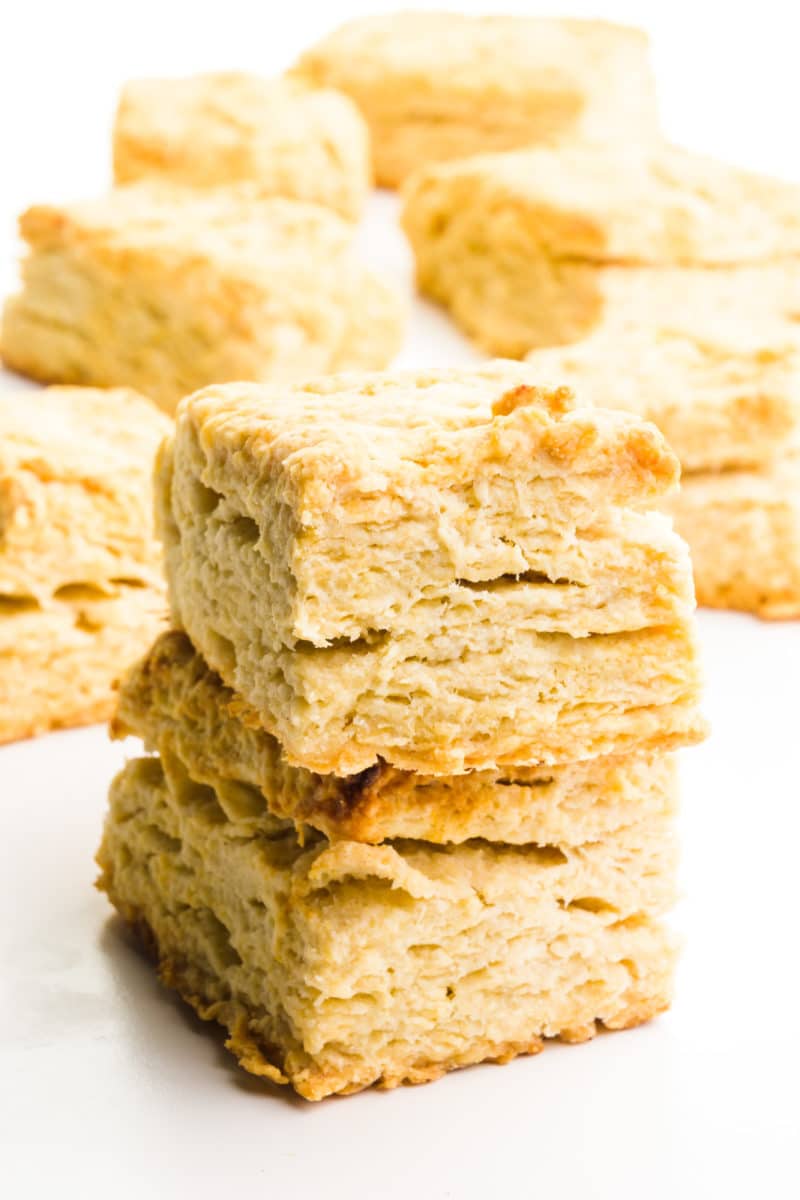
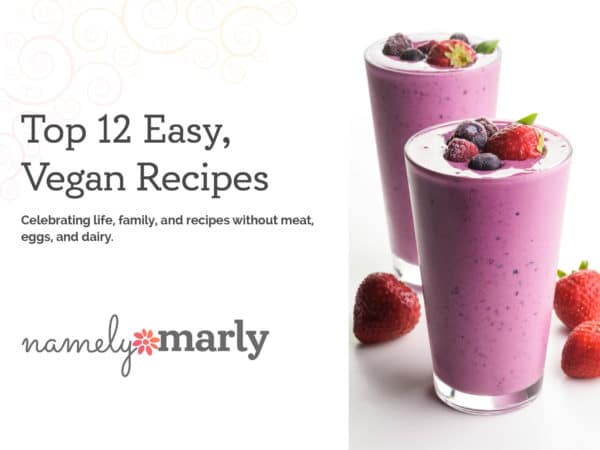
Vegan Biscuits
These flaky vegan biscuits are folded, creating tender, buttery biscuits time and time again. Serve them alongside your plant-based meals!
This post may contain affiliate links. Disclosure Policy
You'll also get even more vegan recipes delivered to your inbox every week!
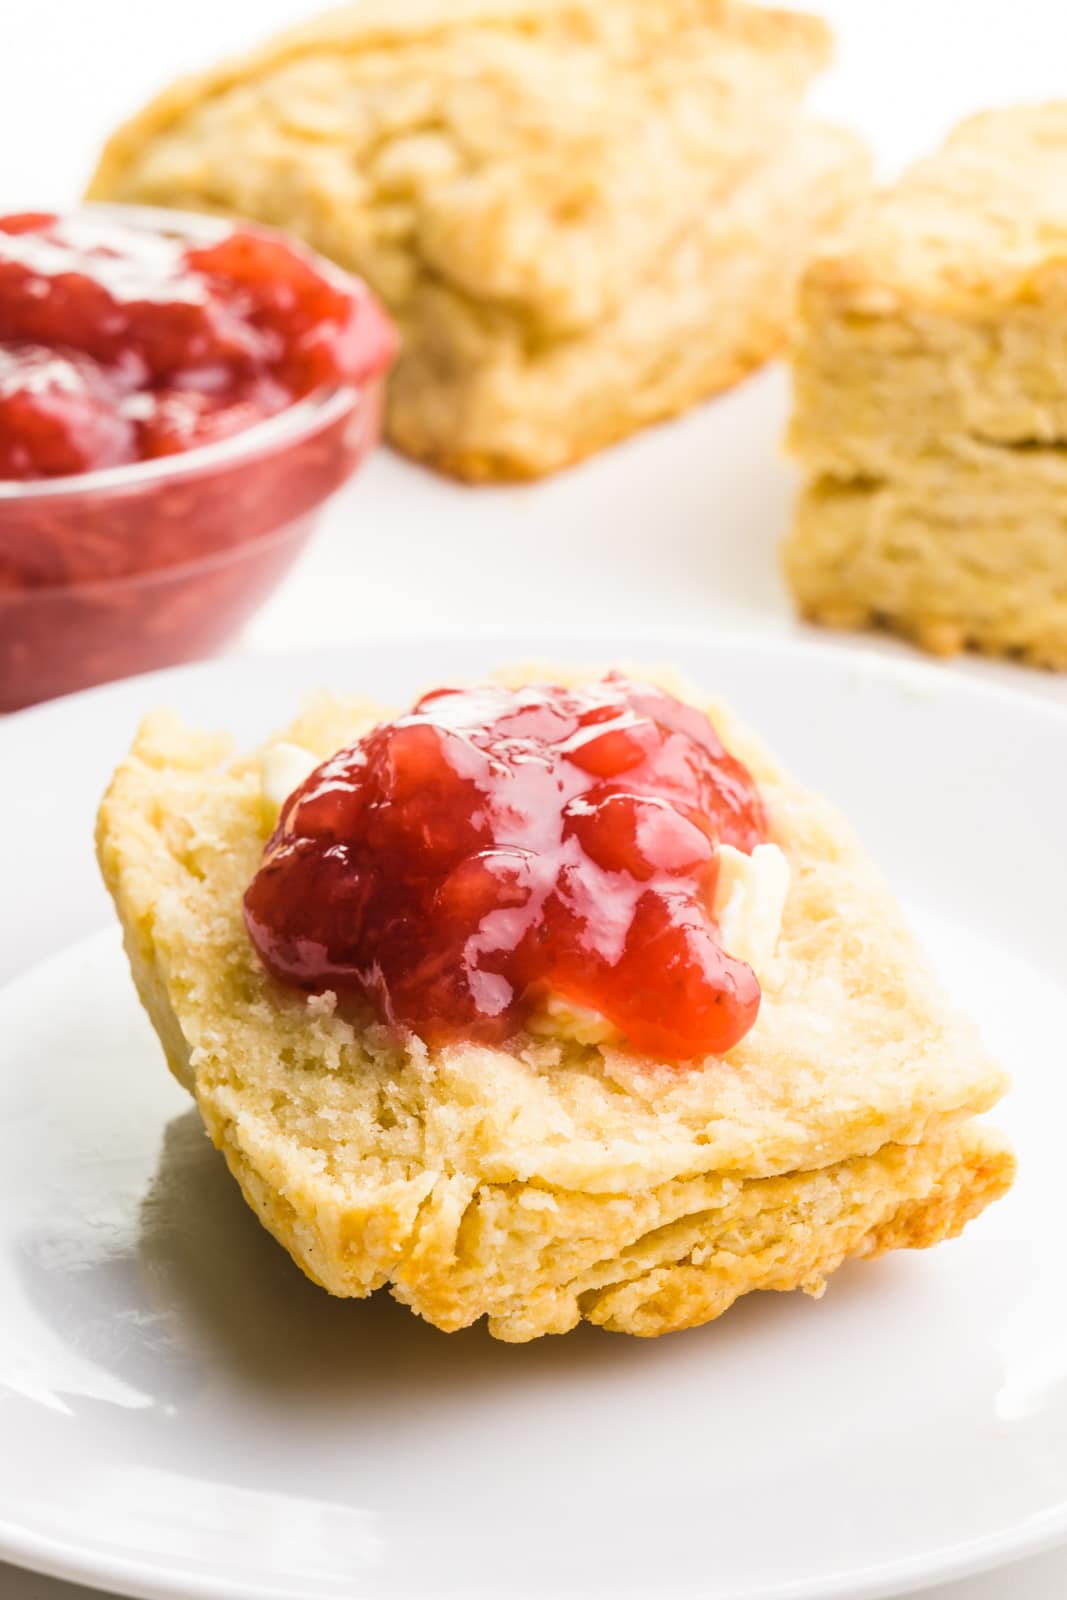
Serve these delicious biscuits with gravy, jam, or even sliced in half and filled with your favorite sandwich ingredients.
Speaking of jam, adding a dollop or two of this berry chia jam to biscuits is the way to go!
I like making a meal special with upgrades. For example, if you serve some homemade biscuits alongside a simple meal, it’s immediately upgraded to something special. Do you see where I’m going with this? You can keep some homemade biscuits on-hand to make just about any meal extra special, from breakfast to lunch or dinner! These flaky vegan biscuits happen to be my favorites, so let’s get into how you can make them too.
Reader Reviews
★★★★★
Roshan
This recipe made my day!! I tried at my husband’s birthday party and all my family members are loving it.
In this Post
Ingredients & Substitutions
You can find the full printable recipe, including ingredient quantities, below. But first, here are some explanations of ingredients and steps to help you make this recipe perfect every time.
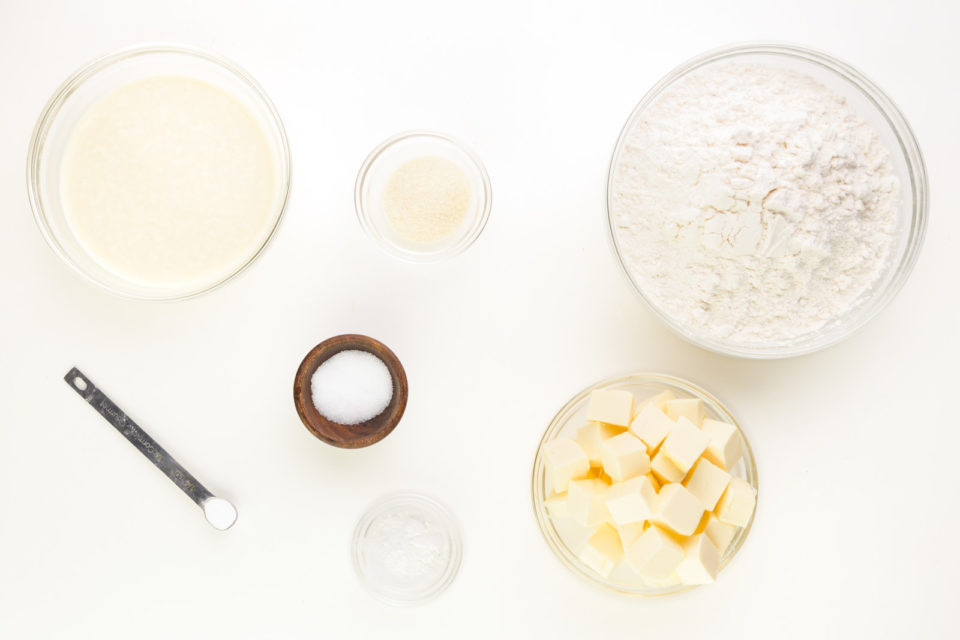
- Vegan Buttermilk — We’ll make vegan buttermilk by combining soy milk with apple cider vinegar. The vinegar interacts with the baking soda and also adds depth of flavor.
- Flour — I recommend using all-purpose flour.
- Sugar — Adding a bit of sugar improves the texture of the biscuits and adds depth of flavor too.
- Baking powder + Baking soda — These two together are powerful leaveners, responsible for tall, fluffy biscuits.
- Salt — Without salt, biscuits would taste pretty bland. We’ll add just the right amount to make these biscuits delicious.
- Vegan butter — Not just any butter will do. I recommend using either Earth Balance buttery sticks or make your own vegan butter.
What Makes This Recipe Shine?
- Using vegan buttermilk adds depth of flavor making these vegan biscuits both light and fluffy and delicious too.
- Stacking the biscuit batter is an easy way to create layers of flaky biscuits you’ll want to make again and again.
- Cutting rectangular or square biscuits means no more biscuit cutters and no more wasted batter either. We’ll use every bit and enjoy every bite!
How to Make Vegan Biscuits
- Make the vegan buttermilk.
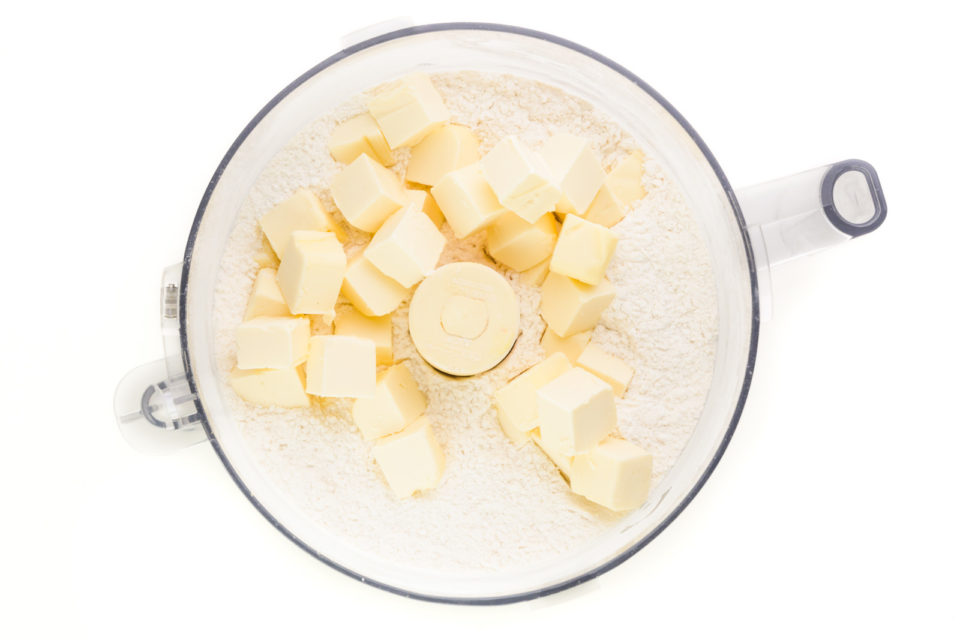
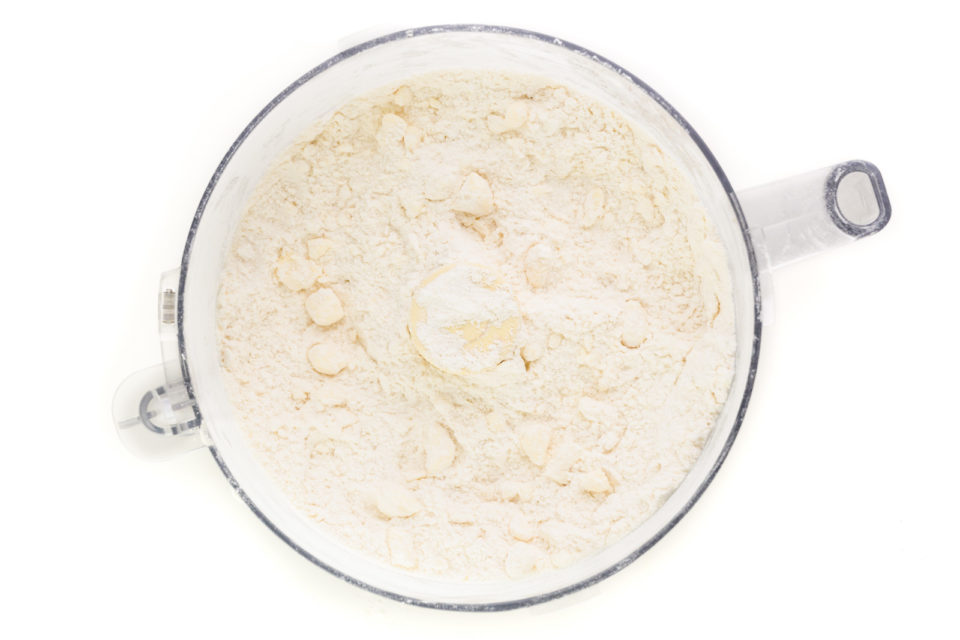
- Mix dry ingredients in a food processor and pulse in quick bursts to combine and sift.
- Add vegan butter cubes to the flour in the food processor, leaving pea-sized bits of the vegan butter.
- Pour the flour mixture into the bowl and pour in the vegan buttermilk. Use your hands to work the moisture through the dough.
- Gently work the dough into a square about 1 inch high.
- Cut the dough in half lengthwise and crosswise, creating 4 smaller squares. Stack the 4 squares and gently press down on the stack, creating another dough base.
- Pat the dough base into a rectangle, roughly 6×10 inches, and cut 8 rectangular biscuits. Transfer the biscuits to the prepared pan. Then place the pan in the freezer for 8 to 10 minutes.
- Coat each biscuit with the vegan egg wash and then bake for 20 to 25 minutes, until the tops of the biscuits are golden brown.
- Remove the pan from the oven and place the biscuits on a wire rack to cool.
You would think making your own vegan biscuits would be difficult, but it’s really not. Follow these step-by-step guide to make them yourself:
Step One: Make the Buttermilk
In a large bowl, combine the plant-based milk and vinegar.
Step Two: Mix Dry Ingredients
Pour flour, sugar, baking powder, baking soda, and salt into a food processor. Pulse in quick bursts to combine and sift.
Step Three: Add Butter
Slice the stick of vegan butter in half lengthwise. Turn it to the side and slice it lengthwise again. Then make several slices along the length of the stick to create cubes of butter. Add these cubes to the flour in the food processor, disbursing them around the bowl.
Then give it 7 to 10 quick pulses, to distribute the vegan butter throughout the flour. You want pea-size bits of the vegan butter, because that’s what adds flakiness to these biscuits.
Step Four: Make Biscuit Batter
Pour the flour mixture into the bowl. Run your fingers through it to break up any larger bits of butter that remain.
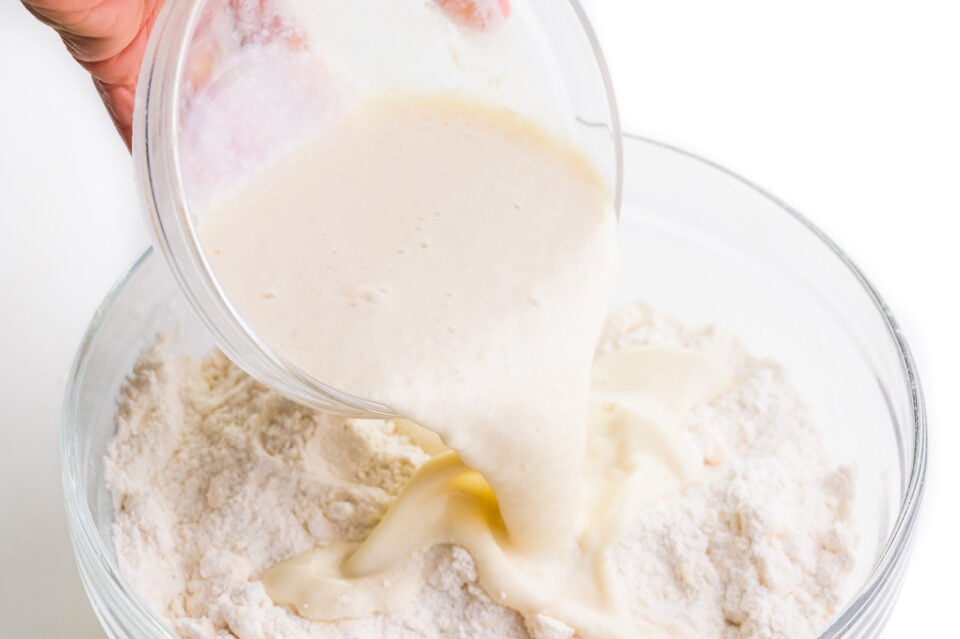
Then pour in the vegan buttermilk. Use a spatula initially to gently stir it until just combined. Then use your hands to work the moisture through the dough. This is a shaggy dough and it will seem too dry to hold together, but the next step will take care of that.
Step Five: First Roll
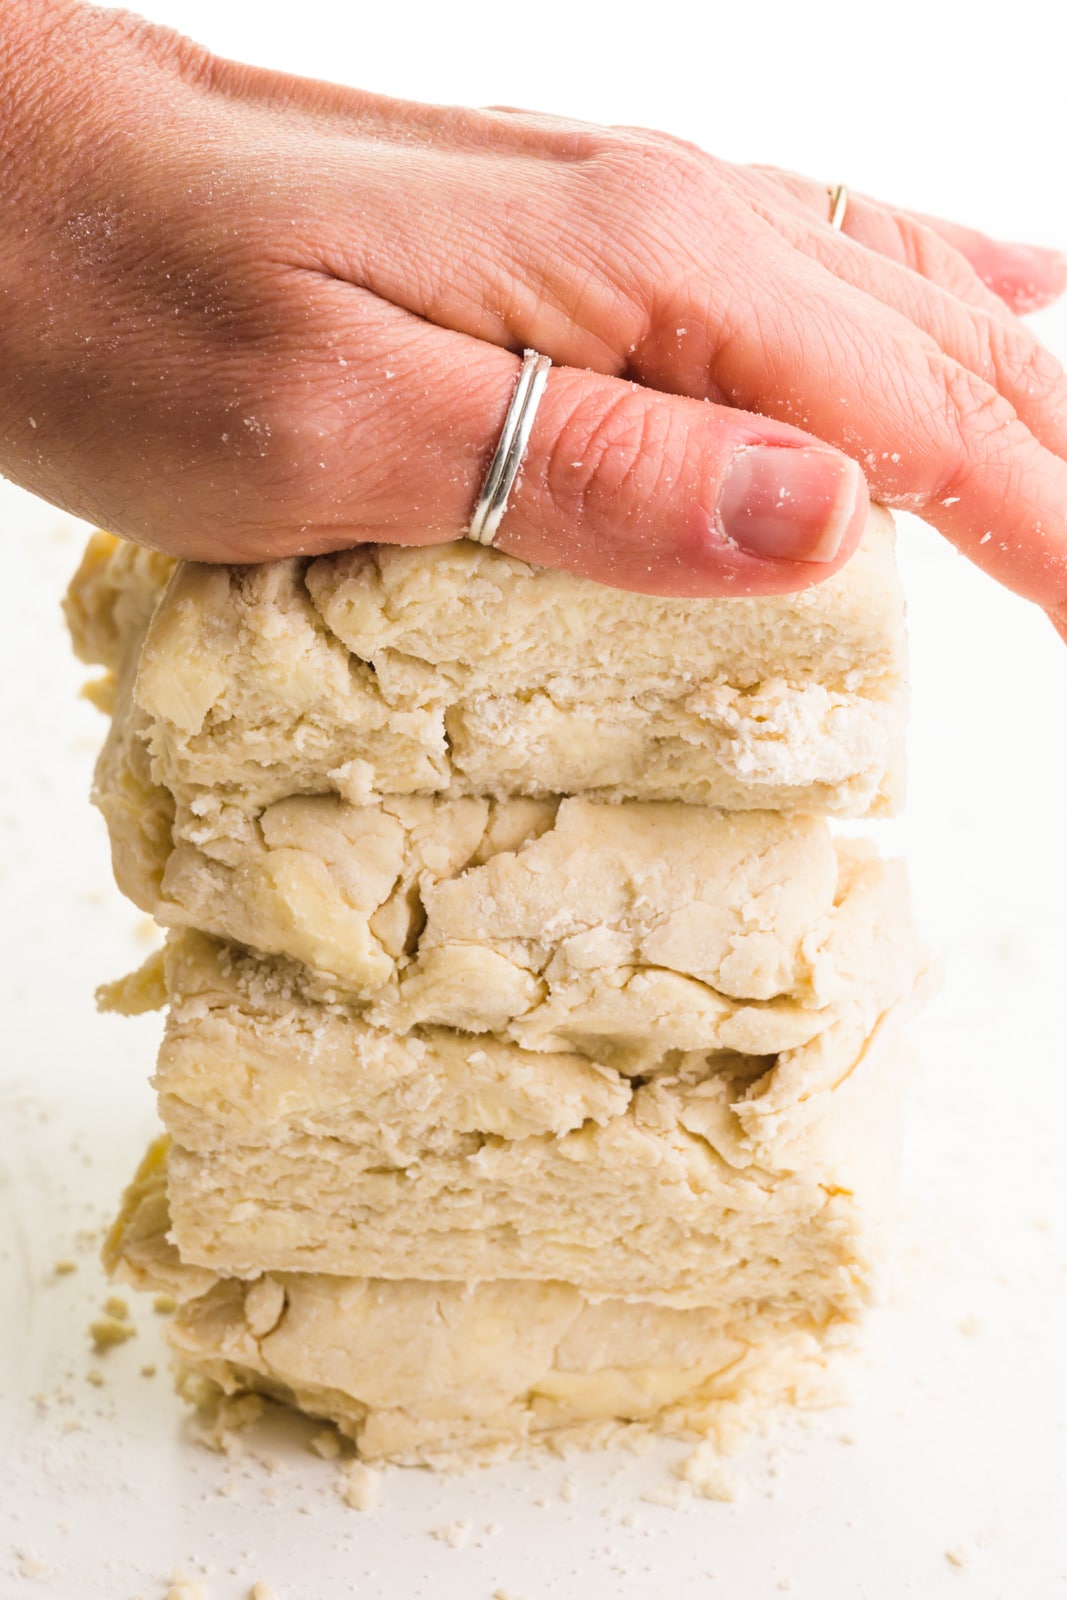
Sprinkle some flour on a countertop and dump the dough there. Gently work the dough into a square about 1 inch high. Use a serrated knife to cut the dough in half both lengthwise and crosswise, creating 4 smaller squares.
Stack the 4 squares, adding any dough remnants in between the squares. Gently press down on the stack, creating another dough base.
Marly’s Tips
Stacking the dough is an easy trick to create layers, meaning the resulting biscuits will be flaky and delicious!
Step Six: Second Roll, Cut, and Chill
Pat the dough base into a rectangle, roughly 8 x 10 inches. Pat the edges of the dough to create firm edges.
Use a knife to cut down the center lengthways. Turn the dough and make 4 cuts in the other direction, creating 8 rectangular biscuits. Transfer the biscuits to the prepared pan. Then place the pan in the freezer for 8 to 10 minutes. If you prefer smaller biscuits, you can cut two vertical cuts to create 12 smaller biscuits. Be sure to reduce the cooking time slightly.
Round vs. Square Biscuits
Traditional biscuits are round, but there is another, better way. Cut the biscuits into rectangles to make use of every bit of the biscuit batter. And there’s no need to buy biscuit cutters either!
Step Seven: Wash and Bake
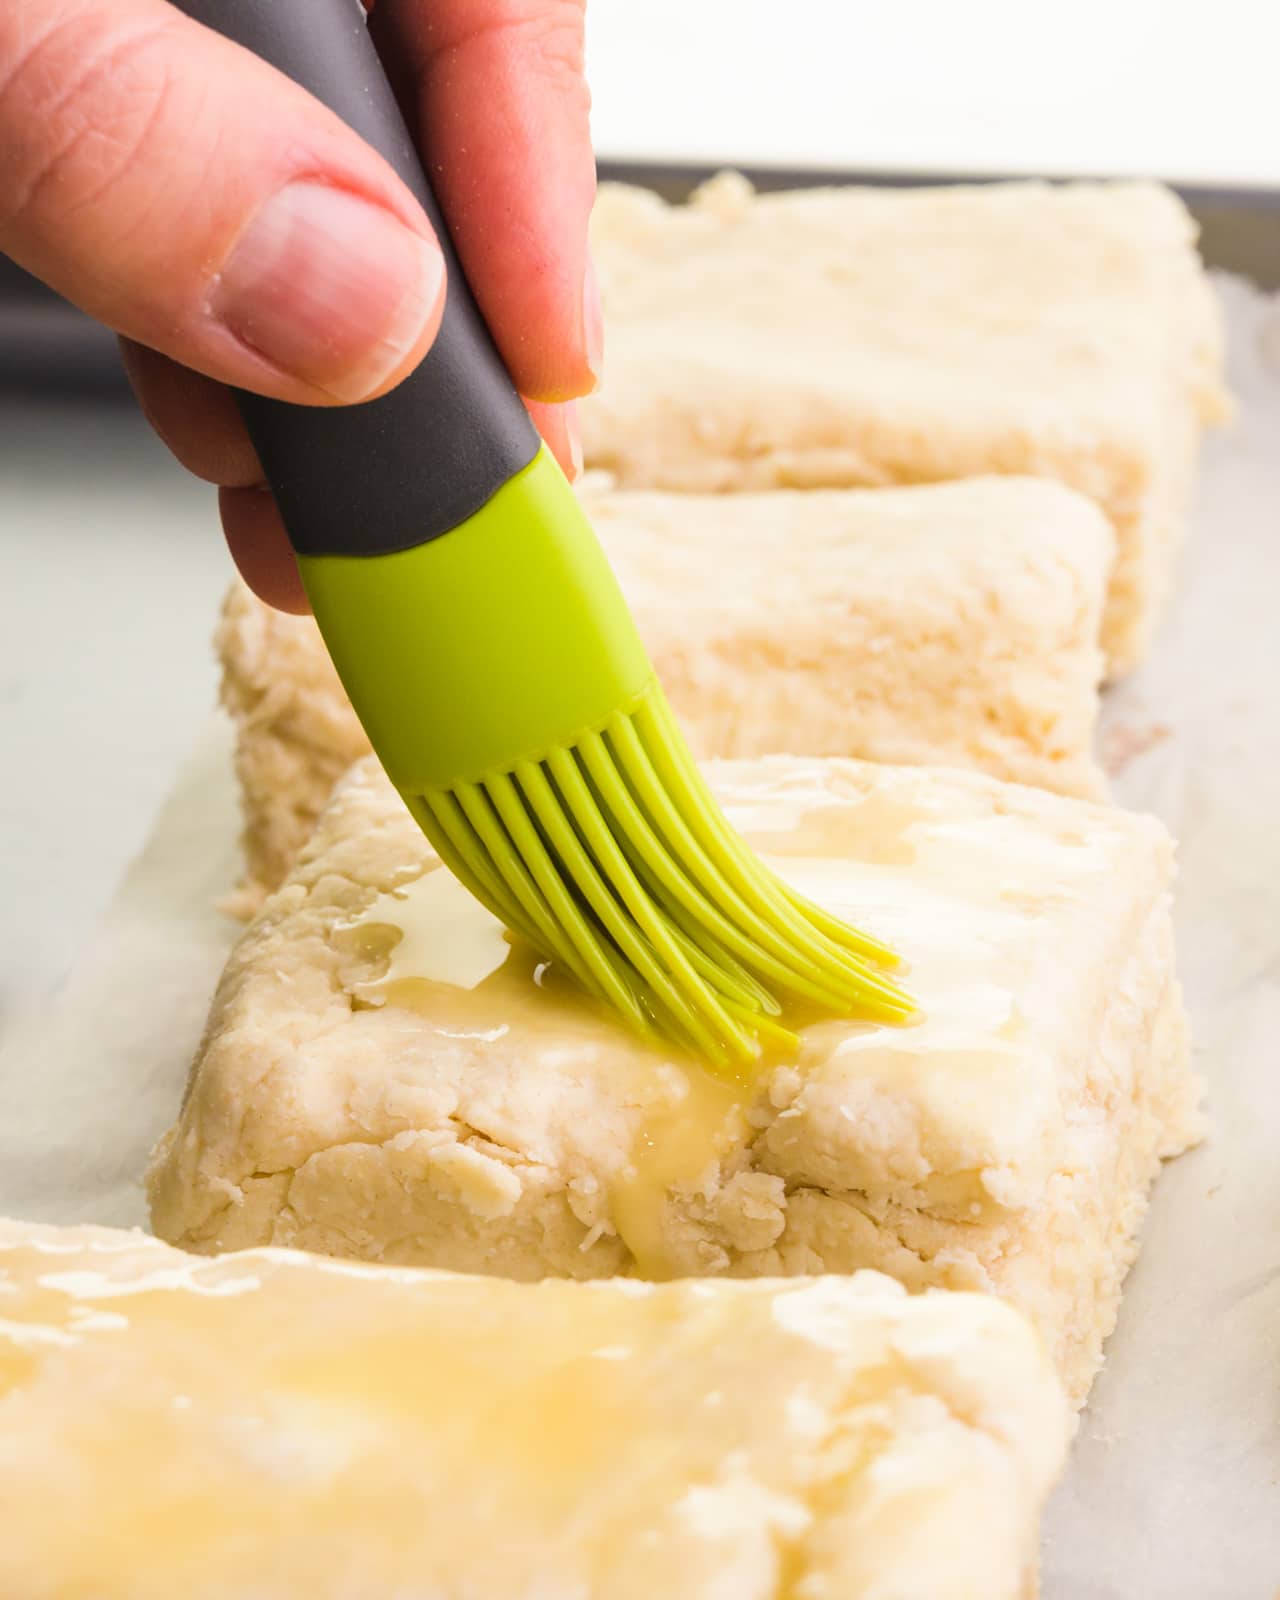
While the biscuit dough chills, whip up a quick egg wash substitute for biscuits by stirring together the ingredients and and letting them cool.
Coat each biscuit with the vegan egg wash. Then place the pan in the oven and bake for 20 to 25 minutes, until the tops of the biscuits are golden brown. Remove the pan from the oven and place the biscuits on a wire rack to cool.
Using a vegan egg wash is optional, but it helps to create a golden crust to your biscuits, making them not only delicious but gorgeous too!
Storage Tips
Store biscuits in an airtight container in the fridge for up to 5 days. They can be frozen for up to 2 months.

That’s it for these vegan biscuits.
Subscribe and Get a Free Easy Vegan Recipes eBook
Plus our latest vegan recipes, delivered right to your inbox!
We won’t send you spam. Unsubscribe at any time.
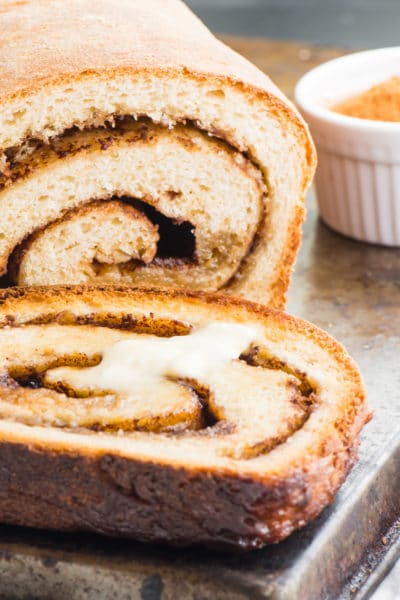
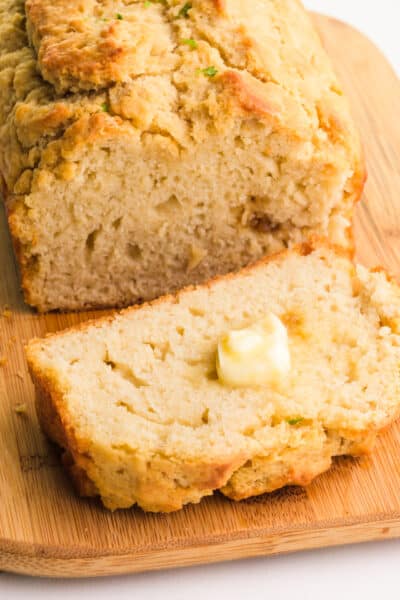
More Vegan Bread Recipes


Vegan Biscuits
You’ll also get even more vegan recipes delivered to your inbox every week!
Ingredients
- 1 cup soy milk , plain (not vanilla)
- 1 tablespoon apple cider vinegar
- 2 ½ cups all-purpose flour
- 2 tablespoons granulated sugar
- 2 ½ teaspoons baking powder
- ¼ teaspoon baking soda
- 1 teaspoon salt
- 1 cup vegan butter , cold
Vegan Egg Wash
- 1 tablespoon vegan butter
- 1 teaspoon soy milk
- 1 teaspoon agave nectar (or maple syrup)
Instructions
- Preheat oven to 400°F/200°C and line a baking sheet with parchment paper.
- In a large bowl, combine the plant-based milk and vinegar. Stir and then set aside.
- Pour flour, sugar, baking powder, baking soda, and salt into a food processor. Pulse in quick bursts to combine and sift.
- Slice the stick of vegan butter in half lengthwise. Turn it to the side and slice it lengthwise again. Then make several slices along the length of the stick to create cubes of butter. Add these cubes to the flour in the food processor, disbursing them around the bowl. Then give it 7 to 10 quick pulses, to distribute the vegan butter throughout the flour. You want pea-size bits of the vegan butter; that's what adds flakiness.
- Pour the flour mixture into the bowl. Run your fingers through it to break up any larger bits of butter that remain. Then pour in the vegan buttermilk. Use a spatula initially to stir this gently, until just combined. Then use your hands to work the moisture through the dough. This is a shaggy dough and it will seem too dry to hold together.
- Sprinkle some flour on a countertop and transfer the dough there. Gently work the dough into a square about 1 inch high. Use a serrated knife to cut the dough in half both lengthwise and crosswise, creating 4 smaller squares. Stack the 4 squares, adding any dough remnants in between the squares. Gently press down on the stack, creating another dough base.
- Pat the dough base into a rectangle, roughly 6×10 inches. Use a knife to cut down the center lengthways. Turn the dough and make 4 cuts in the other direction, creating 8 rectangular biscuits. Transfer the biscuits to the prepared pan. Then place the pan in the freezer for 8 to 10 minutes.
- Prepare the egg wash by stirring together the ingredients. Set it aside to cool.
- Coat each biscuit with the vegan egg wash. Learn more about vegan egg wash options. Place the pan in the oven and bake for 20 to 25 minutes, until the tops of the biscuits are golden brown. Remove the pan from the oven and place the biscuits on a wire rack to cool.
- Store biscuits in an airtight container in the fridge for up to 5 days. They can be frozen for up to 2 months.
Recommended Equipment
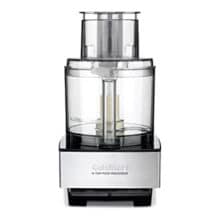
(The products above contain sponsored links to products we use and recommend)
Notes
Nutrition
The nutrition information shown is an estimate provided by an online nutrition calculator and should not be considered a substitute for a professional nutritionist’s advice.
This post was originally published in 2020 and was updated to include new photos, new text, and an updated recipe in 2021.
About the Author
Hi! I’m Marly McMillen. I’m the founding editor, author, recipe developer, vegan home chef, and food stylist behind Namely Marly. I’m so grateful to you and every member of my audience for your support and dedication. More about Namely Marly ›
Wow! what an incredible dish. This is so appealing that I am gonna start the dish right now.
Thanks! I’m so glad to see you like this recipe!
This recipe made my day!! I tried at my husband’s birthday party and all my family members are loving it. Please share more recipes with me.
Nice post, thank you for share such information.
Really it’s Amazing tips. It’s worthful to us. Thank you so much for sharing this post. Please share another post like this one.